
HOW TO MAKE A MINIATURE HINGE
This article by @handxmade is free for personal use ONLY, any reproduction is prohibited.
If you’d like to show your appreciation for these articles through monetary means, you can send me a ko-fi! ☕️
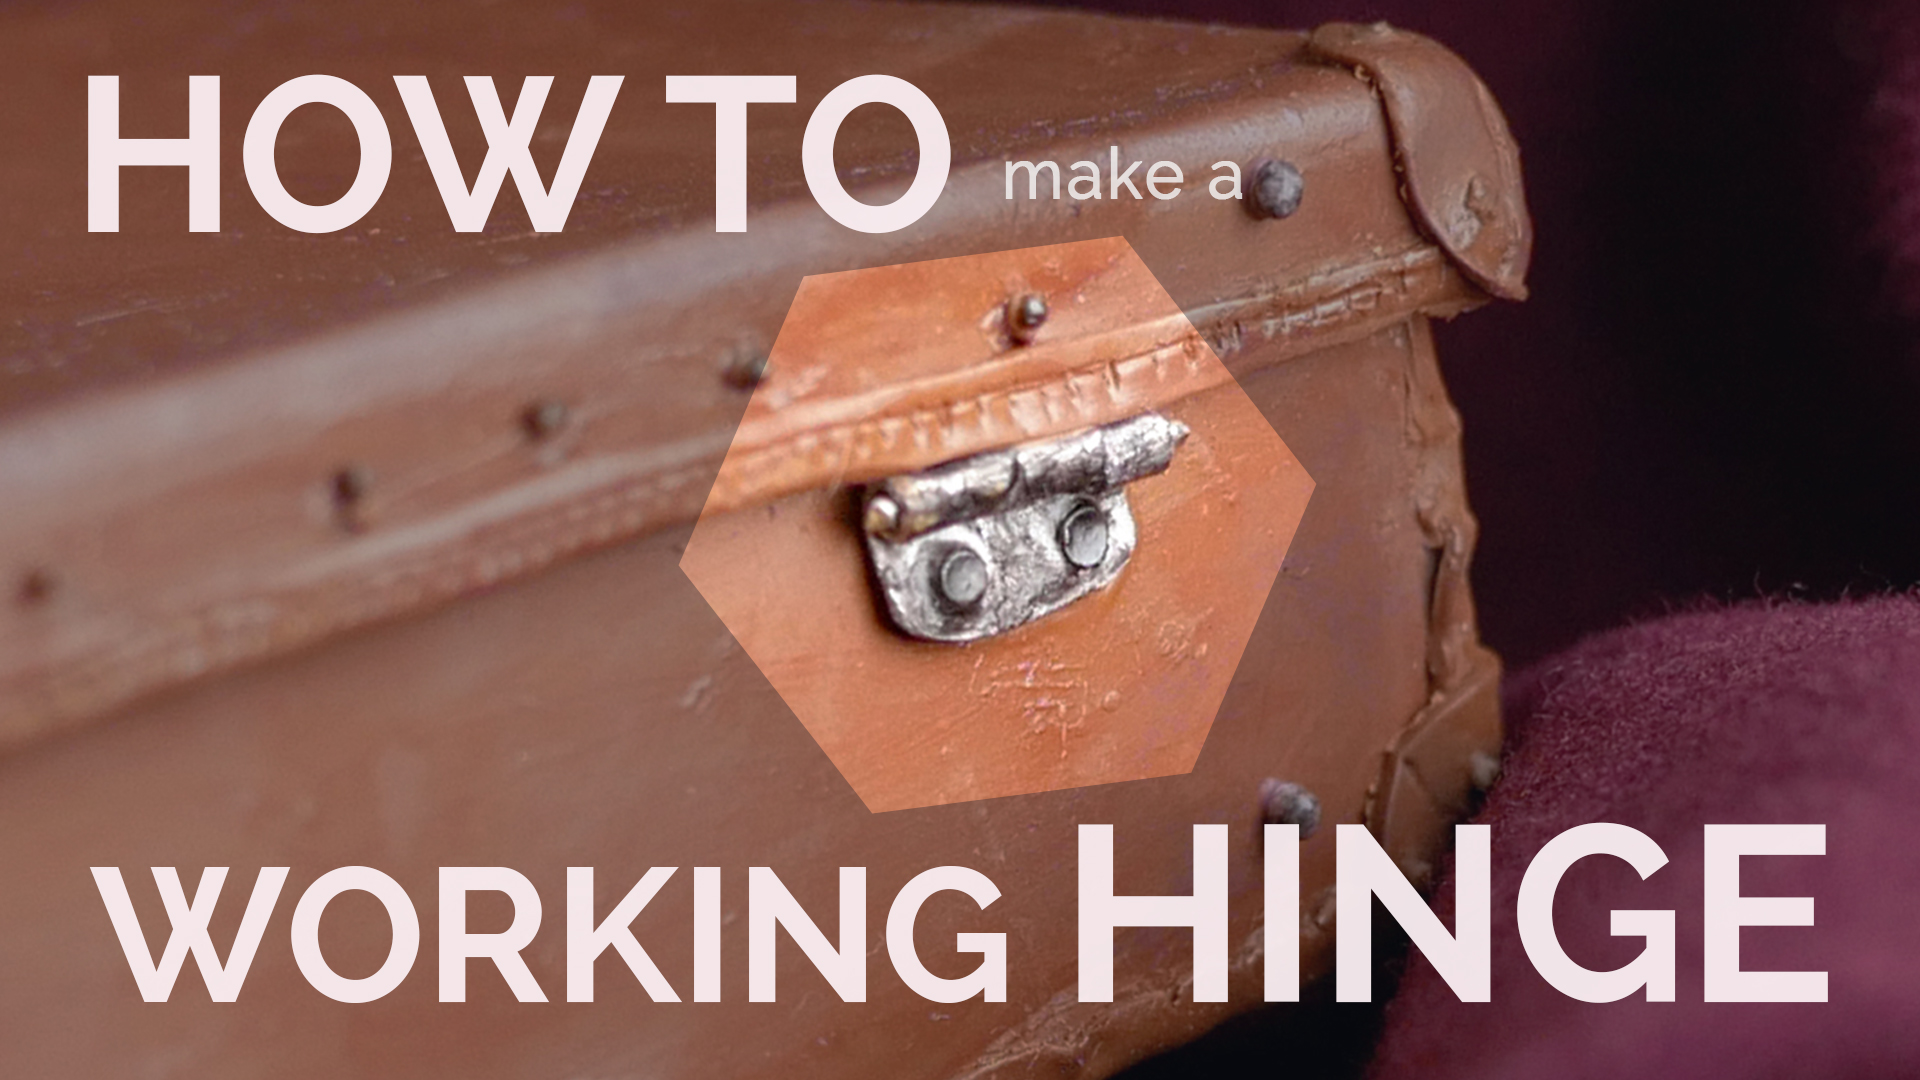
If you've seen my Newt's Suitcase from Fantastic Beasts And Where To Find Them video, you'll see me adding a hinge on the suitcase!
I wanted to make a suitcase that can be opened and closed, and for that to happen, I'd need to put some sort of hinge.
Now, I'm pretty sure that somewhere online, you can buy properly made hinge for miniatures. I've actually seen them before and wanted to get them but didn't...so when I was making the suitcase I decided to make one myself.
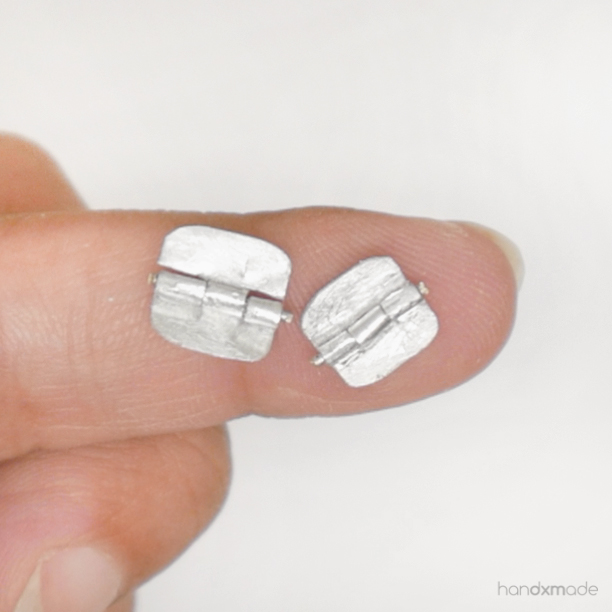
This is how they look like when they're by itself!
Of course, machine made ones will definitely be neater and perfect (and actually the same size....), but if you need a hinge right here right now and you can't wait a few weeks for your online purchase to be delivered to you, just know that you can make one yourself!
Please read before proceeding:
This article is by @handxmade, and is free for personal use ONLY. Do NOT distribute. Any reproduction is prohibited.
If you’d like to show your thanks for this free template, maybe consider being my patron or sending me a ko-fi - it will definitely make my day and help me with my expenses for my future craft endeavour! ♥️
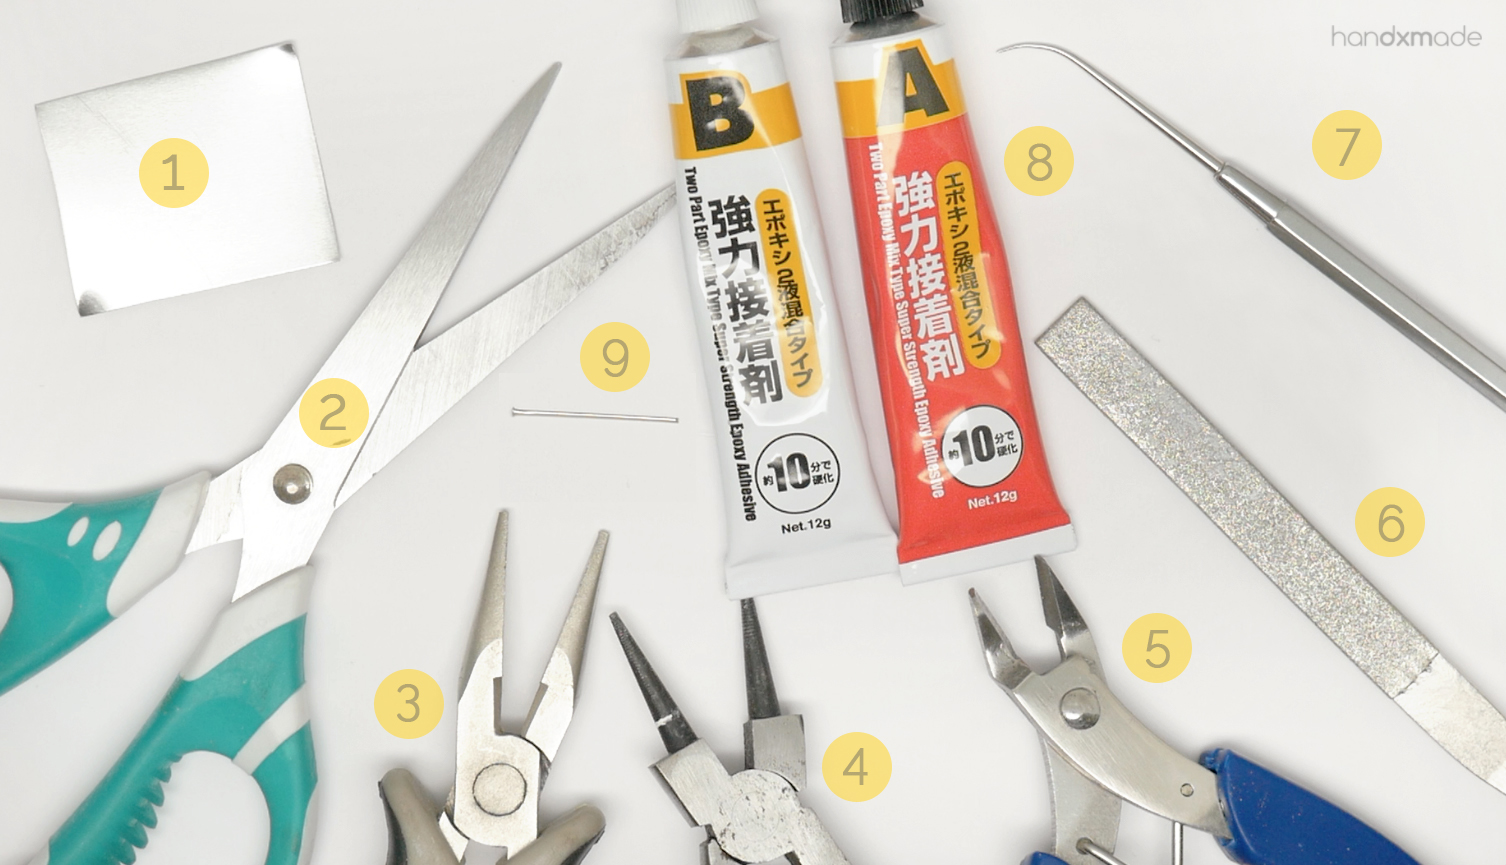
Materials you'll need:
1. Metal Paper
I got mine from a local art store (Art Friend) and they sell pieces of metal paper that are thin like paper and you can cut it with scissors.
You want it to be stiff to a certain extent - aluminium foil would be too soft! But canned drinks' would be perfect (although you would have to paint it afterwards)!
2. Scissors
I used a normal pair of scissors, nothing special 🙃
3. Nose Pliers (Optional)
Optional but good to have around for its flat surface.
4. Round Nose Pliers
VERY IMPORTANT. The main action can't be done without this!
5. Cutting Pliers
To trim your headpin (see 9.)
6. Sanding File
Use to shape your hinge! You can use scissors too, but it's easier to control with a file 😊 Also, if you need just a little extra bigger gap, it's nice to have to expand accordingly.
7. Curved Needle Tool
To "sketch" out what you need to cut on the metal paper. You can use any kind of needle tools or anything that can make a mark on the metal paper 😀
8. Resin Two Part Epoxy Glue
I got mine as a gift from @msparkpark, but if I'm not mistaken, you can get them in Daiso!
You can use super glue too, as long as it can stick metal to metal.
9. Headpin
I use a headpin because it's straight and stiff but yet easy to cut with a cutting plier 😊
STEP 1: Sketch out Part A and Part B on metal paper.
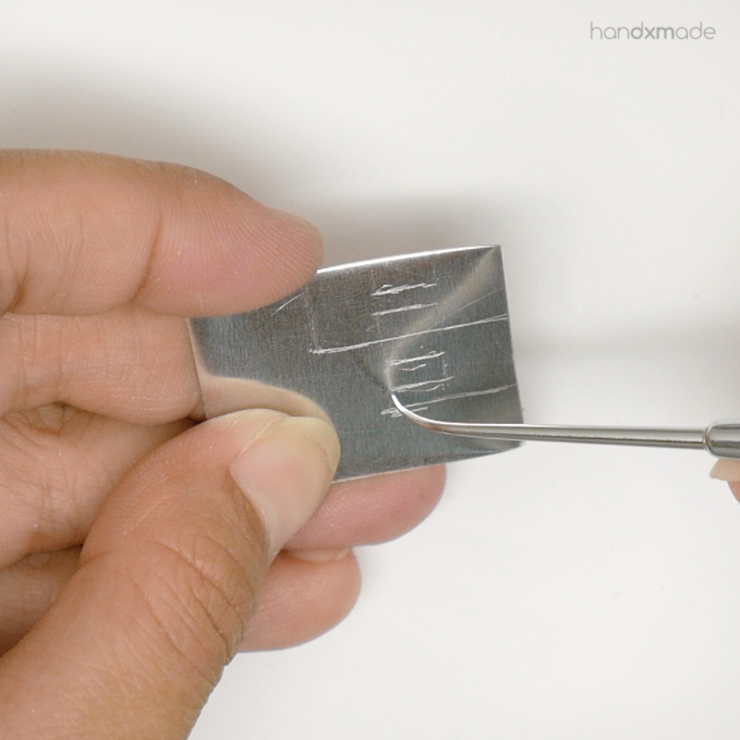
This is how it should look like when you use your needle tool to "sketch" on your metal paper 😊 It would be very obvious so you can cut without the fear of screwing up like I was 🙃
You can also measure and draw on the metal piece with a marker instead if you prefer - I did a rough sketch instead and have no measurements unfortunately.
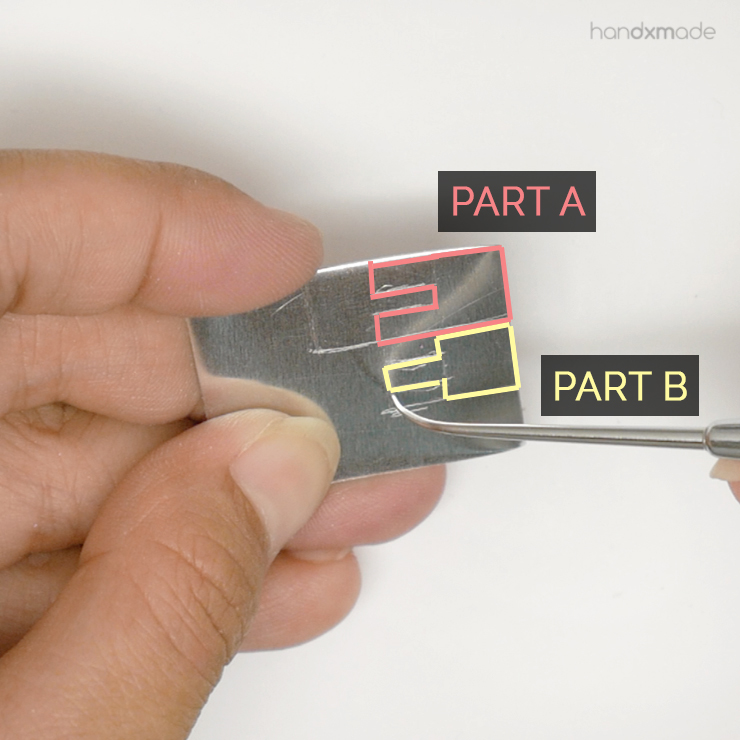
Regardless, you'd want these two parts for each hinge! They shall be call Part A and Part B 😀
STEP 2: Make Part A
Cut the lines as sketched, bend the middle strip with nose pliers, and then cut it out with your scissors!
I used the file to file down the part where I can't cut (it's impossible to!!)
Then with the nose pliers, I roll the strips towards the "body", make sure it's right in front of the "body" and not ON the "body"! You need the space for the hinge to move.
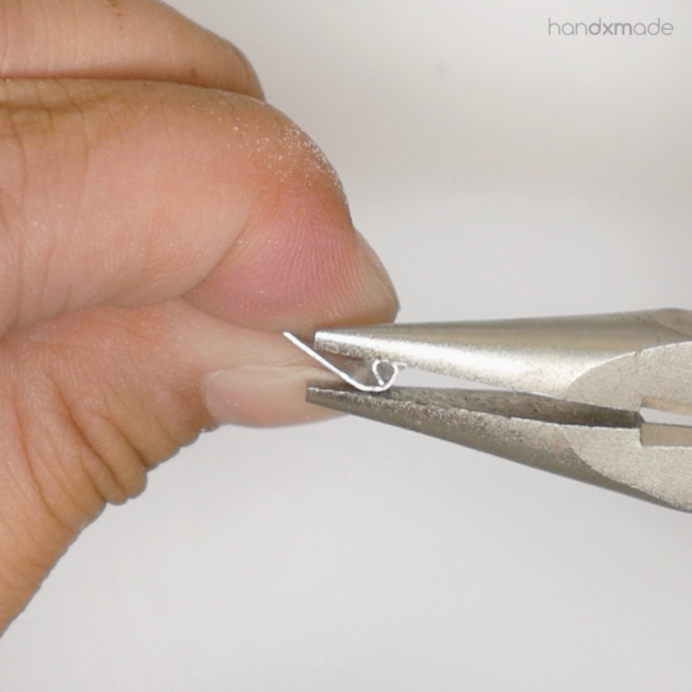
I use the normal nose pliers to do some adjustments needed, like making the rolled strips rounder.
STEP 3: Make Part B
Do the same for Part B, but make sure you trim out the correct strips!
If it gets stuck, just use the nose pliers to twist it out like this 😊 I rather cut through less than more, because if you accidentally cut through the strip that you need, it might become fragile and loose.
Here I'm using the normal nose pliers to roll the stripe instead. It works, but you'll need to adjust the rolled strip a lot more as it's not rounded.
STEP 4: Attach Part A and Part B with a headpin
And this is why you want the rolled strips to be round, because you want to fit the headpin through!
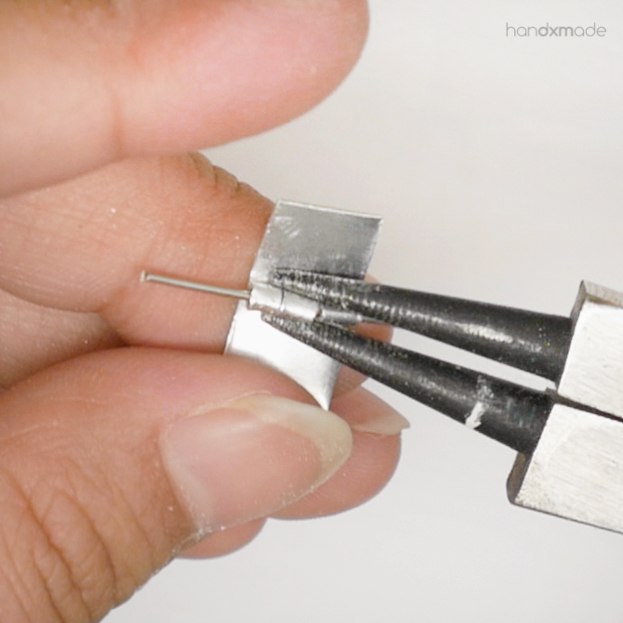
You can tighten the rolled strips with round nose pliers too (as shown above), so the headpin doesn't drop out as easily 😀
I trimmed the ends of the headpin as flushed against the sides of part A as much as I can with the cutting pliers after this.
STEP 4: Make the headpin stay with glue
Here I'm mixing the epoxy glue together well before I use it. I like epoxy glue as they will dry up really well and it basically stays permanent, which is really crucial for things like this.
I essentially glue the ends of the headpin to Part A. You want to make sure ONLY that area gets the glue. Part B should be able to move freely and that's how the hinge will work! 😍
I then use the file to shape the hinge by sanding the edges so it's rounded! Again, they should be able to open and close like this 😊
I know their size is slightly off, and that's because I did NOT measure anything and no ruler was involved...I sure wish I had put a bit more effort to do that though. Next time I'll make sure to make it as neat and straight as possible!
A gif from the video to show how I put the hinge on the suitcase 😊
I used the same epoxy glue, and made sure one side is completely dried before I glued the other side! It worked really well and to be honest I was quite relieved that it did hahahahaha. The hinge could have been too loose or too tight etc and doesn't open as smoothly and all 😱 I guess checking it thoroughly before gluing it down helped!
So here's how I made the hinge! Hope this helps you and shows you that it really isn't as difficult as it seems. If you have all the materials and can't afford to spend the money or wait, feel free to give this a try! 😊