
ACRYLIC PAINTS
This article by @handxmade is free for personal use ONLY, any reproduction is prohibited.
If you’d like to show your appreciation for these articles through monetary means, you can send me a ko-fi! ☕️
This post will be all about acrylic paints, and I'll be writing about what I've learnt about acrylic paints! Even though I don't really use them as much, they are nice to have around when I do need them, and I've learnt a thing or two that helped me get over the annoyance I've had with acrylic paints hahaha.
The first thing I would like to talk about would be....
BRUSHES
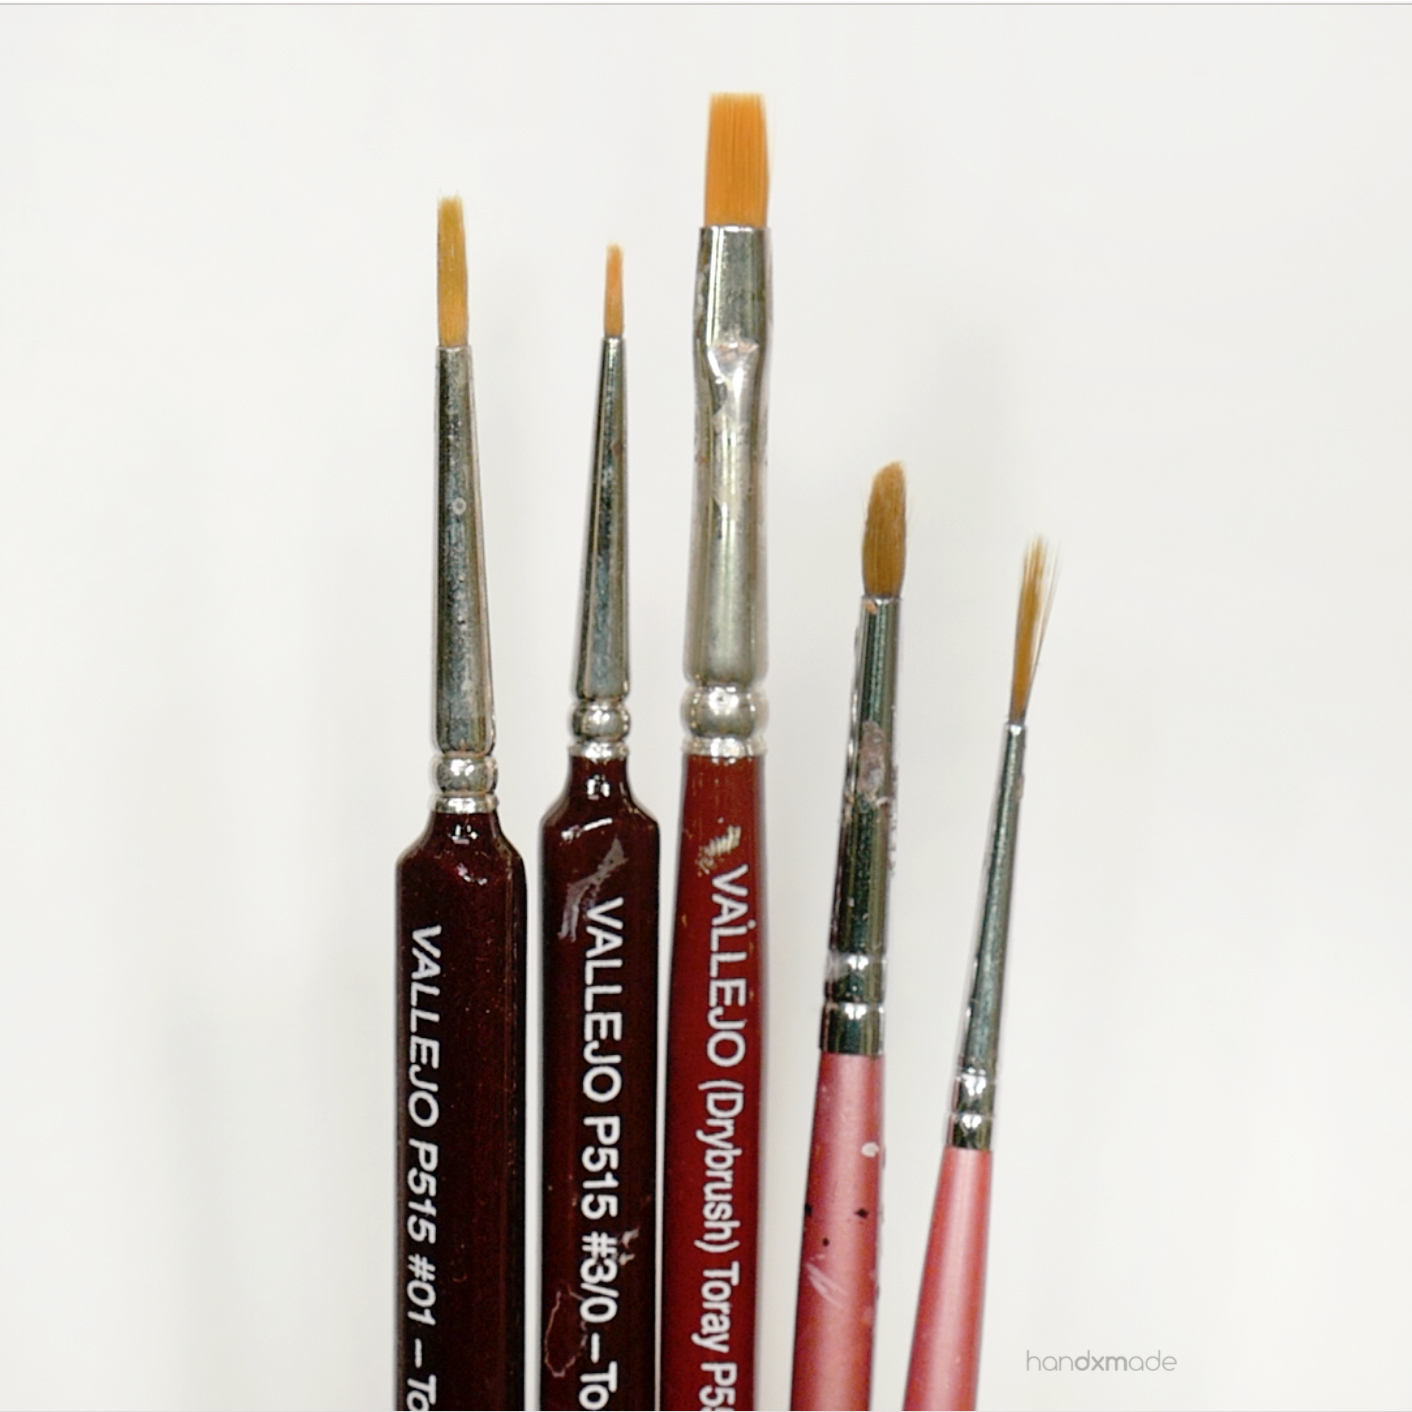
Because of the things I make which is miniatures, the brushes I own tends to be miniature and smaller in size. Above are the brushes I use all the time and find myself reaching out for 😊
I recommend having at least one flat brush and one round brush to start with. Flat brush tends to give you a lot more even strokes and cover a wider surface, whereas round brushes would give you precision.
Be careful though - LONG round brushes like the one on the far right are usually best for LONG LINES. To me at least! They are much thinner and you would think that would be easier to use, but nope, it's actually really difficult to paint little circles etc because they're so long!
Also, I probably should have taken a photo of it but the brushes' bristles looks like they're all over the place, but good brushes like these ones would bunch up together pretty well when wet, and you'll get a nice tip!
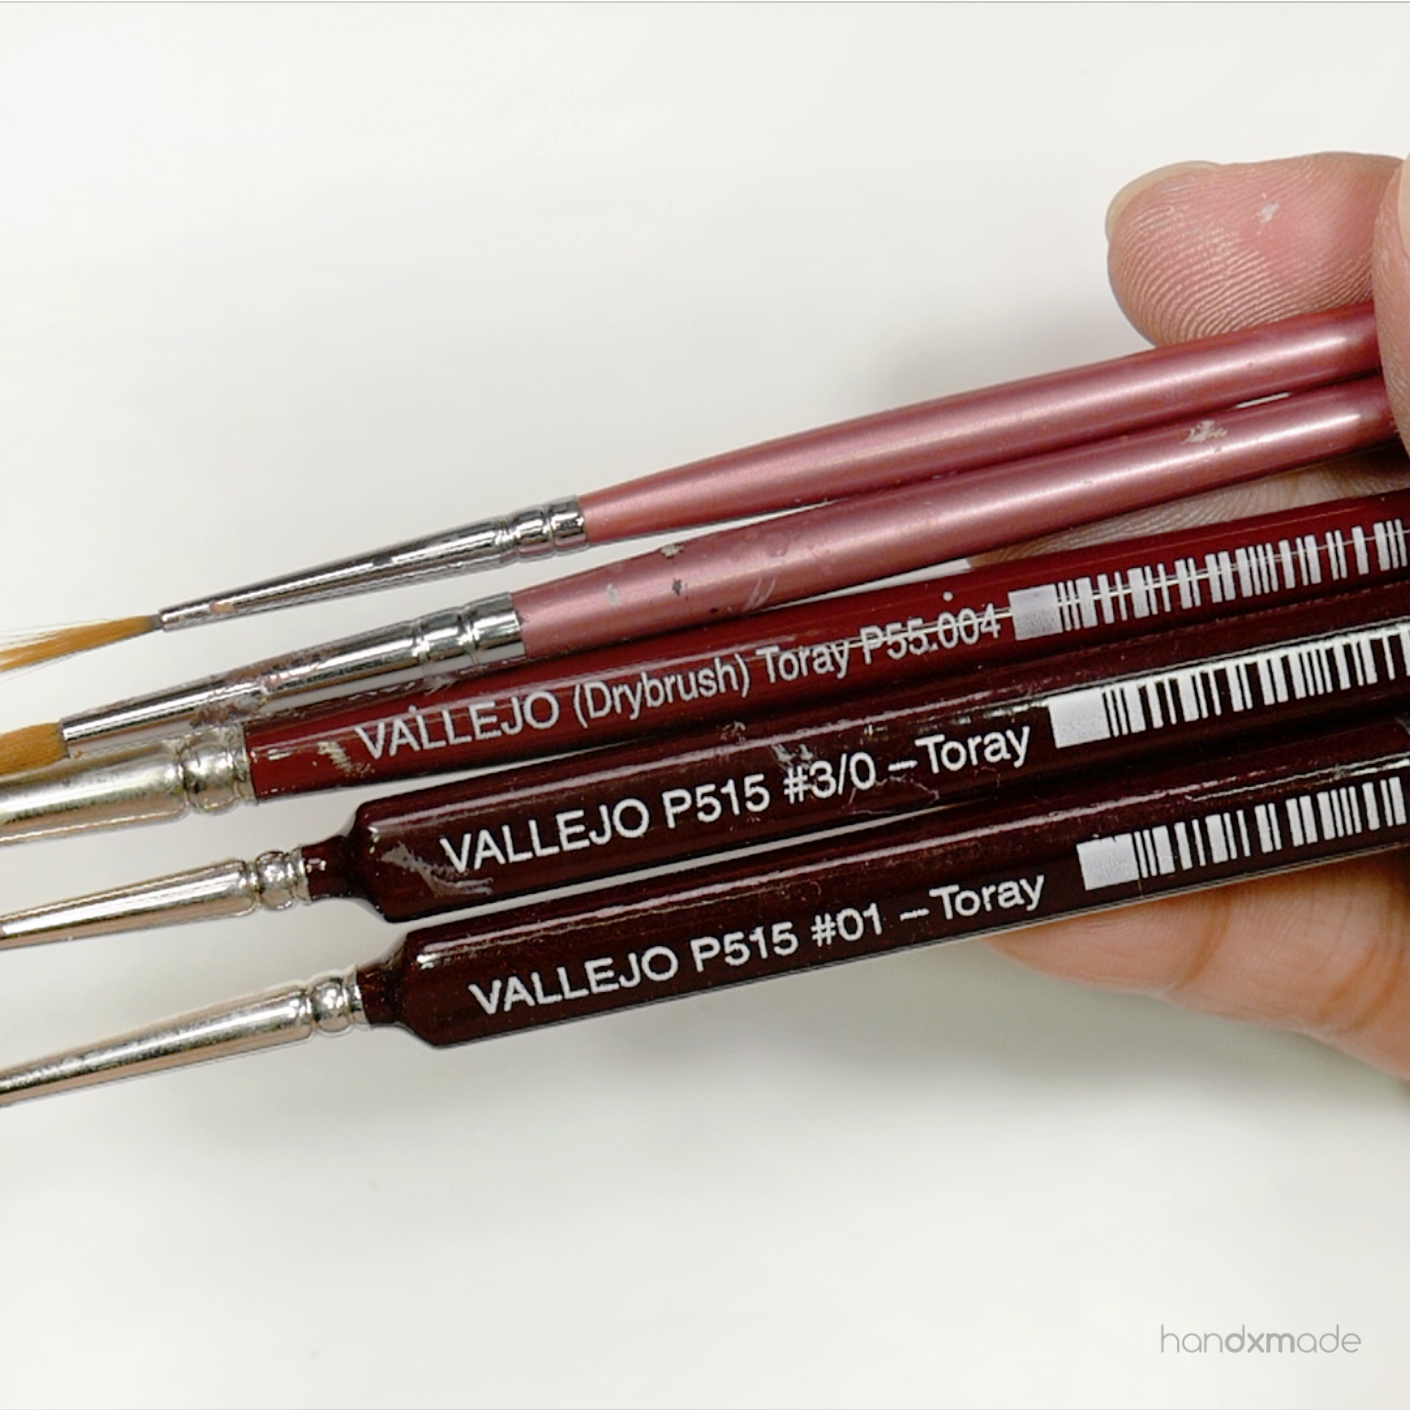
Here's where I bought the ones with the pink handles. I really enjoy using the Lip Liner brush!
These VALLEJO brushes are my FAVOURITES and they work really well with acrylic paints! I bought them at a local hobby shop and it's one of my best investment. Since they are MADE to use with acrylic paints for miniature painting you see hehe.
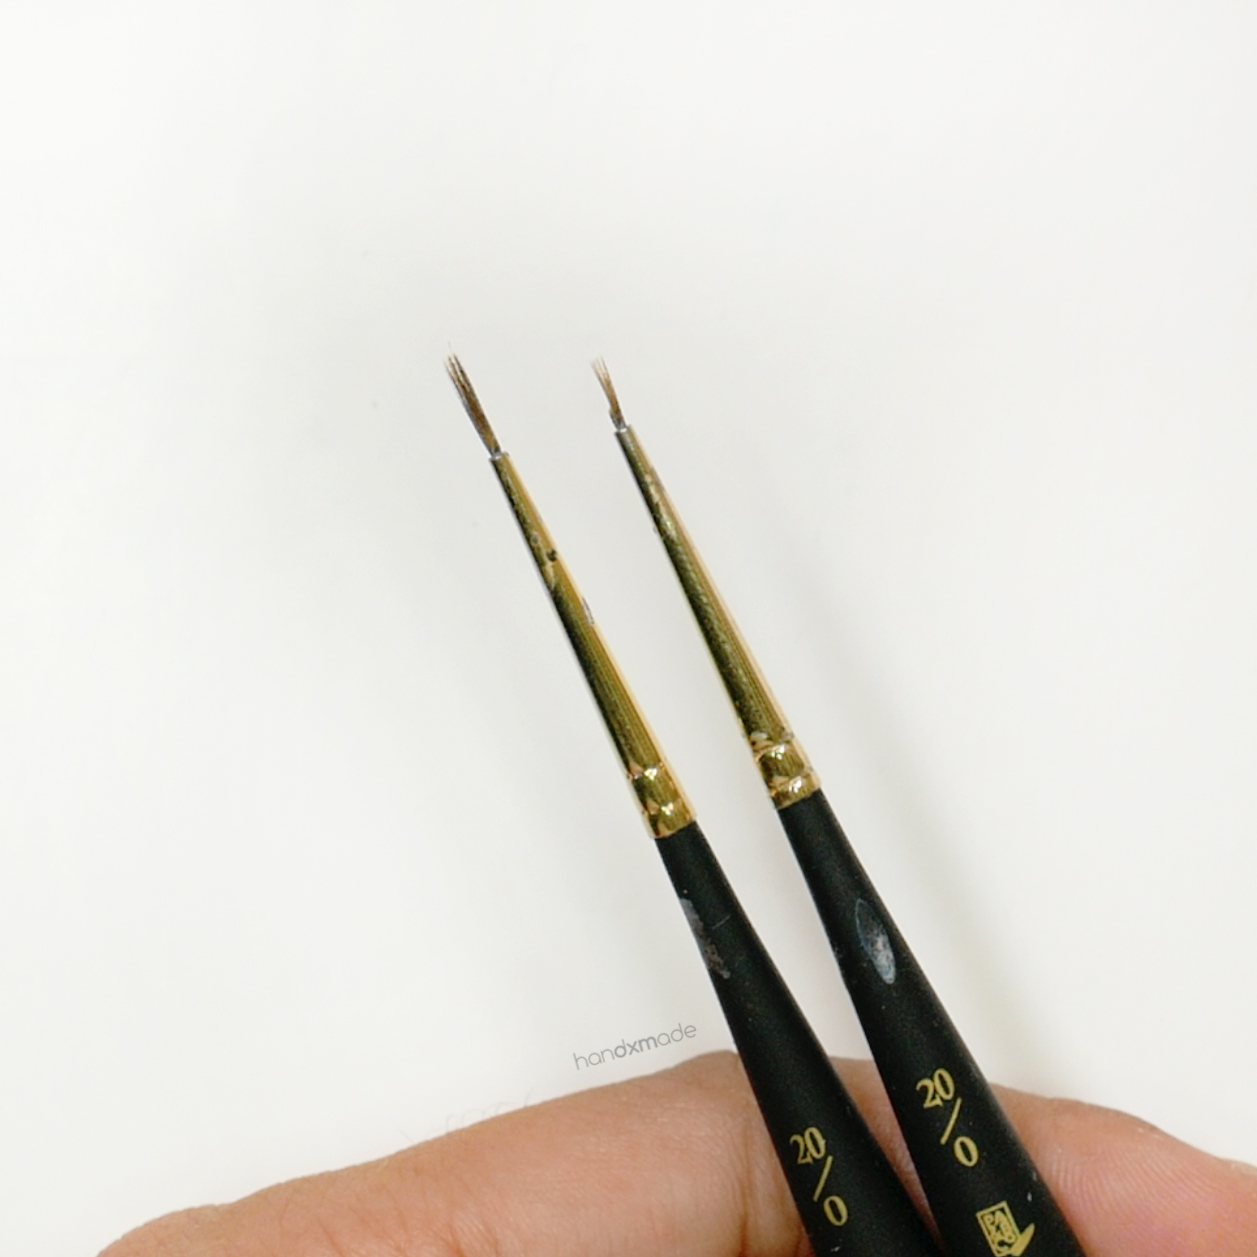
These two brushes are the round brushes I tend to reach for when I need really tiny and precise painting.
I even trimmed the one on the right to make it EVEN SMALLER hahahaha - it worked really well! I think I got a bad brush and decided to try to save it (it wouldn't all come to a spot when it's wet), but it turned out okay. These are really high quality brushes though so I think I was just unlucky haha.

One of the reason why i don't like using acrylic paint was that it dries up so darn fast!
Of course I went to google for a solution, and of course there would be one! Hahahahaa. Trust me guys this wet palette helps so much that I was really surprised!
What you do is to get a container (in this case I got a sauce plate from Daiso hahaha) and put some sort of absorbent pad, or a thin sponge (even a kitchen towel will do!). Fill it up with water - just make sure it's damp! I didn't show in the GIF but I did dry up the access water.
Get wax paper (in my case I actually didn't have one on me and didn't know where to get them (IKR) but I find that tracing paper works to a certain extent hahah), and put it ON the damp cloth!
I find this solves a lot of problem for me:
1. Don't have to wash the palette afterwards - just throw the paper away! CONVENIENT.
2. The paint does stay wet for SUUUUUPER long! The dampness from the damp cloth keeps the paint wet and it's really super amazing!
3. If you need to do more painting afterwards, you can even put it in a closed container and keep it in the fridge for it to last even longer (maybe even a few days?? YES IT'S THAT AMAZING)
This saved me a lot of paint and time and now I don't know what to do without it haha. There are brands that sells wet palettes, but they're usually really expensive, AND BIG. So I just decided to make my own. It really isn't that difficult!
I think wax paper would do much better because if you rub a little too hard, the ink sometimes does go through the tracing paper. Also, I recommend getting a nice flat sponge or an absorbent cloth like this one so you can keep reusing and reusing!
If you're interested to read more about wet palettes, here's a pretty good article about it! One of the quote from this article: "Put simply, the wet palette keeps your paint wet. It's a suspiciously basic concept, but I've never seen it executed so well. The paint absorbs water from the parchment paper which in turn absorbs water from the paper towel or sponge beneath it. The moisture you're constantly losing to evaporation is immediately and automatically replaced. It's not infinite of course; the palette will dry up eventually. But under normal conditions, a wet palette allows me at least an hour of working time with any single dab of paint, which is significantly more time than I had, even with Slow-Dri."
SCI-ENCE.
MARTHA STEWART MILTI-SURFACE ACRYLIC PAINT

These paints were my very first acrylic paint, and I must admit - I was drawn to it because of their nice packaging HAHAHA. I also hate gloss looking stuff, so the word "SATIN" was very much welcome!
I remember investing in these because the first air-dry clay I used was from Martha Stewart too, and because airdry clay can be mixed with acrylic paint to change colour, my brain was like "same brand should work even better" HAHAHA. Who knew I would dislike working with airdry clay so much aye 🤷🏻♀️
Nonetheless, these paints were actually quite nice to use tbh! The colours are gorgeous too am I right hehe.
I actually heard that they've discontinued this series though, what a shame.
One nice tip I found out for paints that has same colour cover on the top is to place them like this so you can see all the colours! Quite a nice tip actually haha.
Now here's how it looks like! Well nothing special actually, everyone knows how acrylic paint looks like, and these are the same - thick. (I accidentally squeezed out too much lol what a waste)
Here's the application! It's actually quite smooth, but as usual, laying it on too thick causes streaks, but too much water also doesn't make the application even (which is what we want).
One of my issue with acrylic paint is the streaks actually. A good and smooth brush would help reduce streaks but sometimes it can't be helped.
Here's how they look like after it's dried! The satin texture is sure welcome though! The paint does level itself during the drying process (good paints do that) so yeah - it really isn't that bad!
I'm sure if you put another layer you'd be able to cover the "holes" properly but I'm just so lazy. It also builds up and sometimes it doesn't look good and it can be quite obvious.
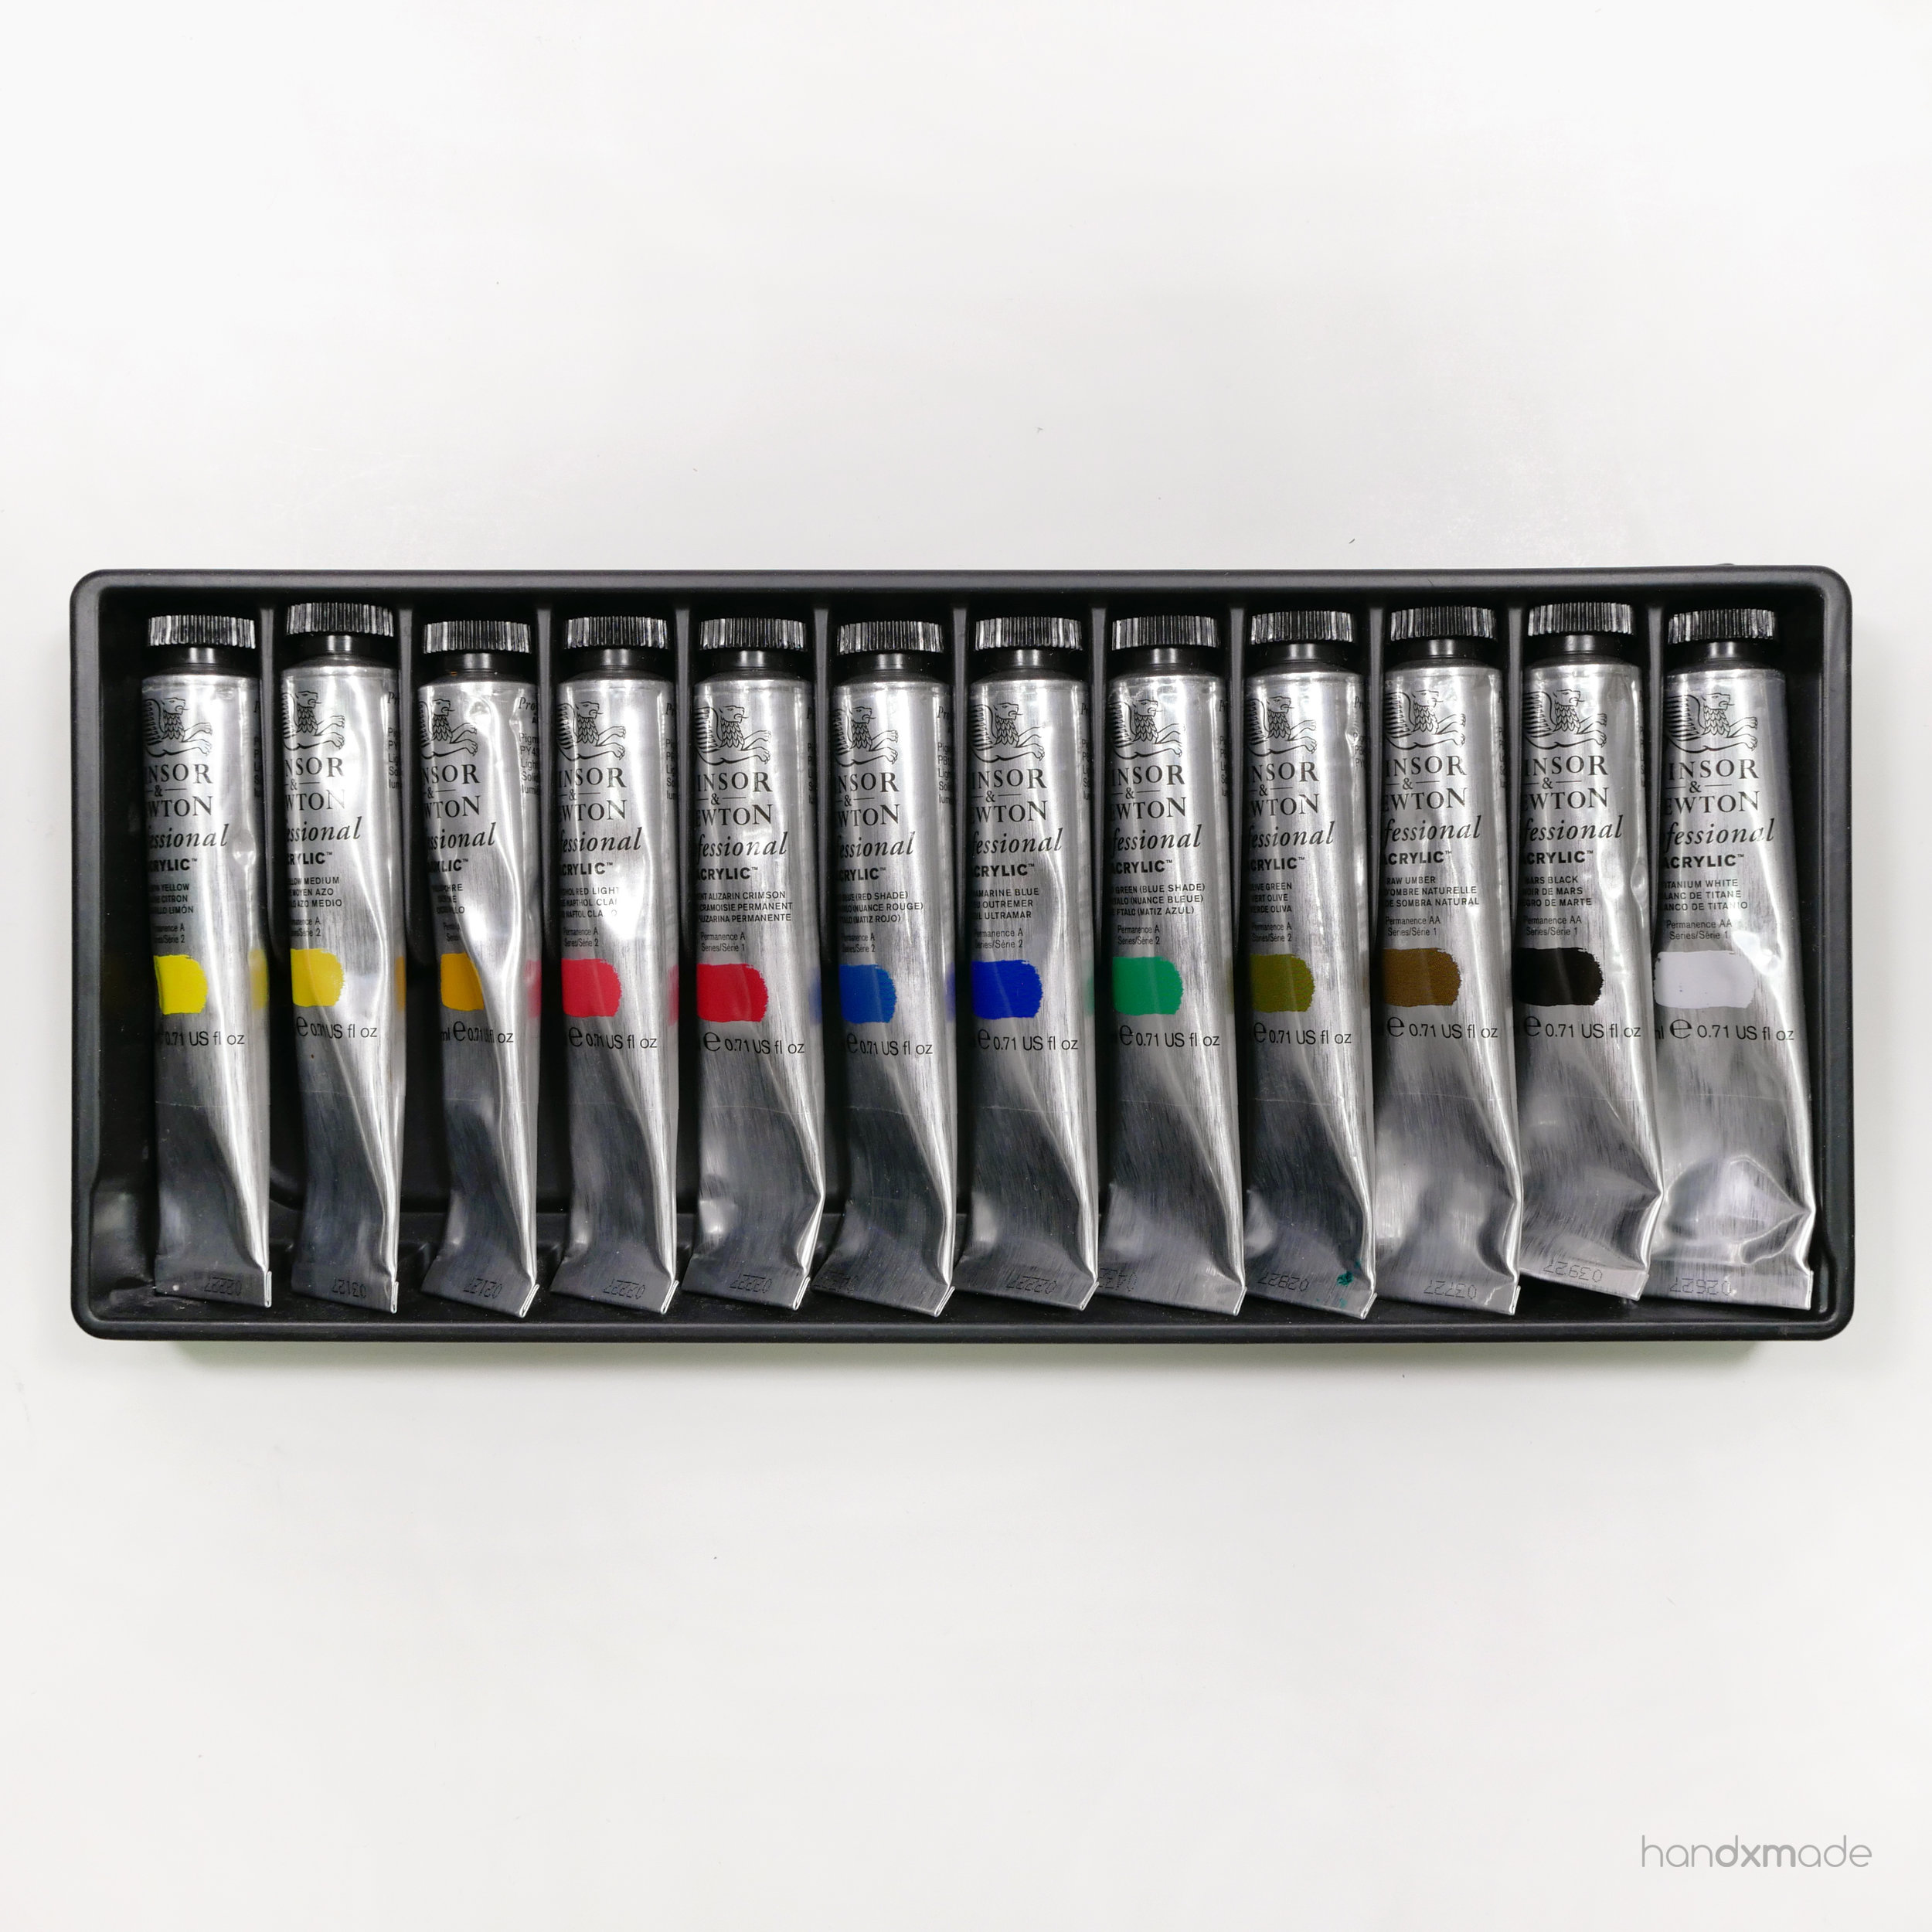
WINSOR & NEWTON ARTISTS' ACRYLIC

This set of Winsor & Newton acrylic paint was really expensiveeeeeee but I do like to use them sometimes! It's definitely hard to master, but if you do......the "watercolour" texture is really amazing!
As you know, polymer clay doesn't have a porous surface so watercolour doesn't work well AT ALL. You can use soft pastels to try to get that soft transparent look, but these paints does it a lot better for some textures you can get with watercolour!
I'll be honest though, I really haven't had the chance to practice with these and I still don't really know how to use them....but @thelittlemew use these on her creations and they look so completely gorgeous!!
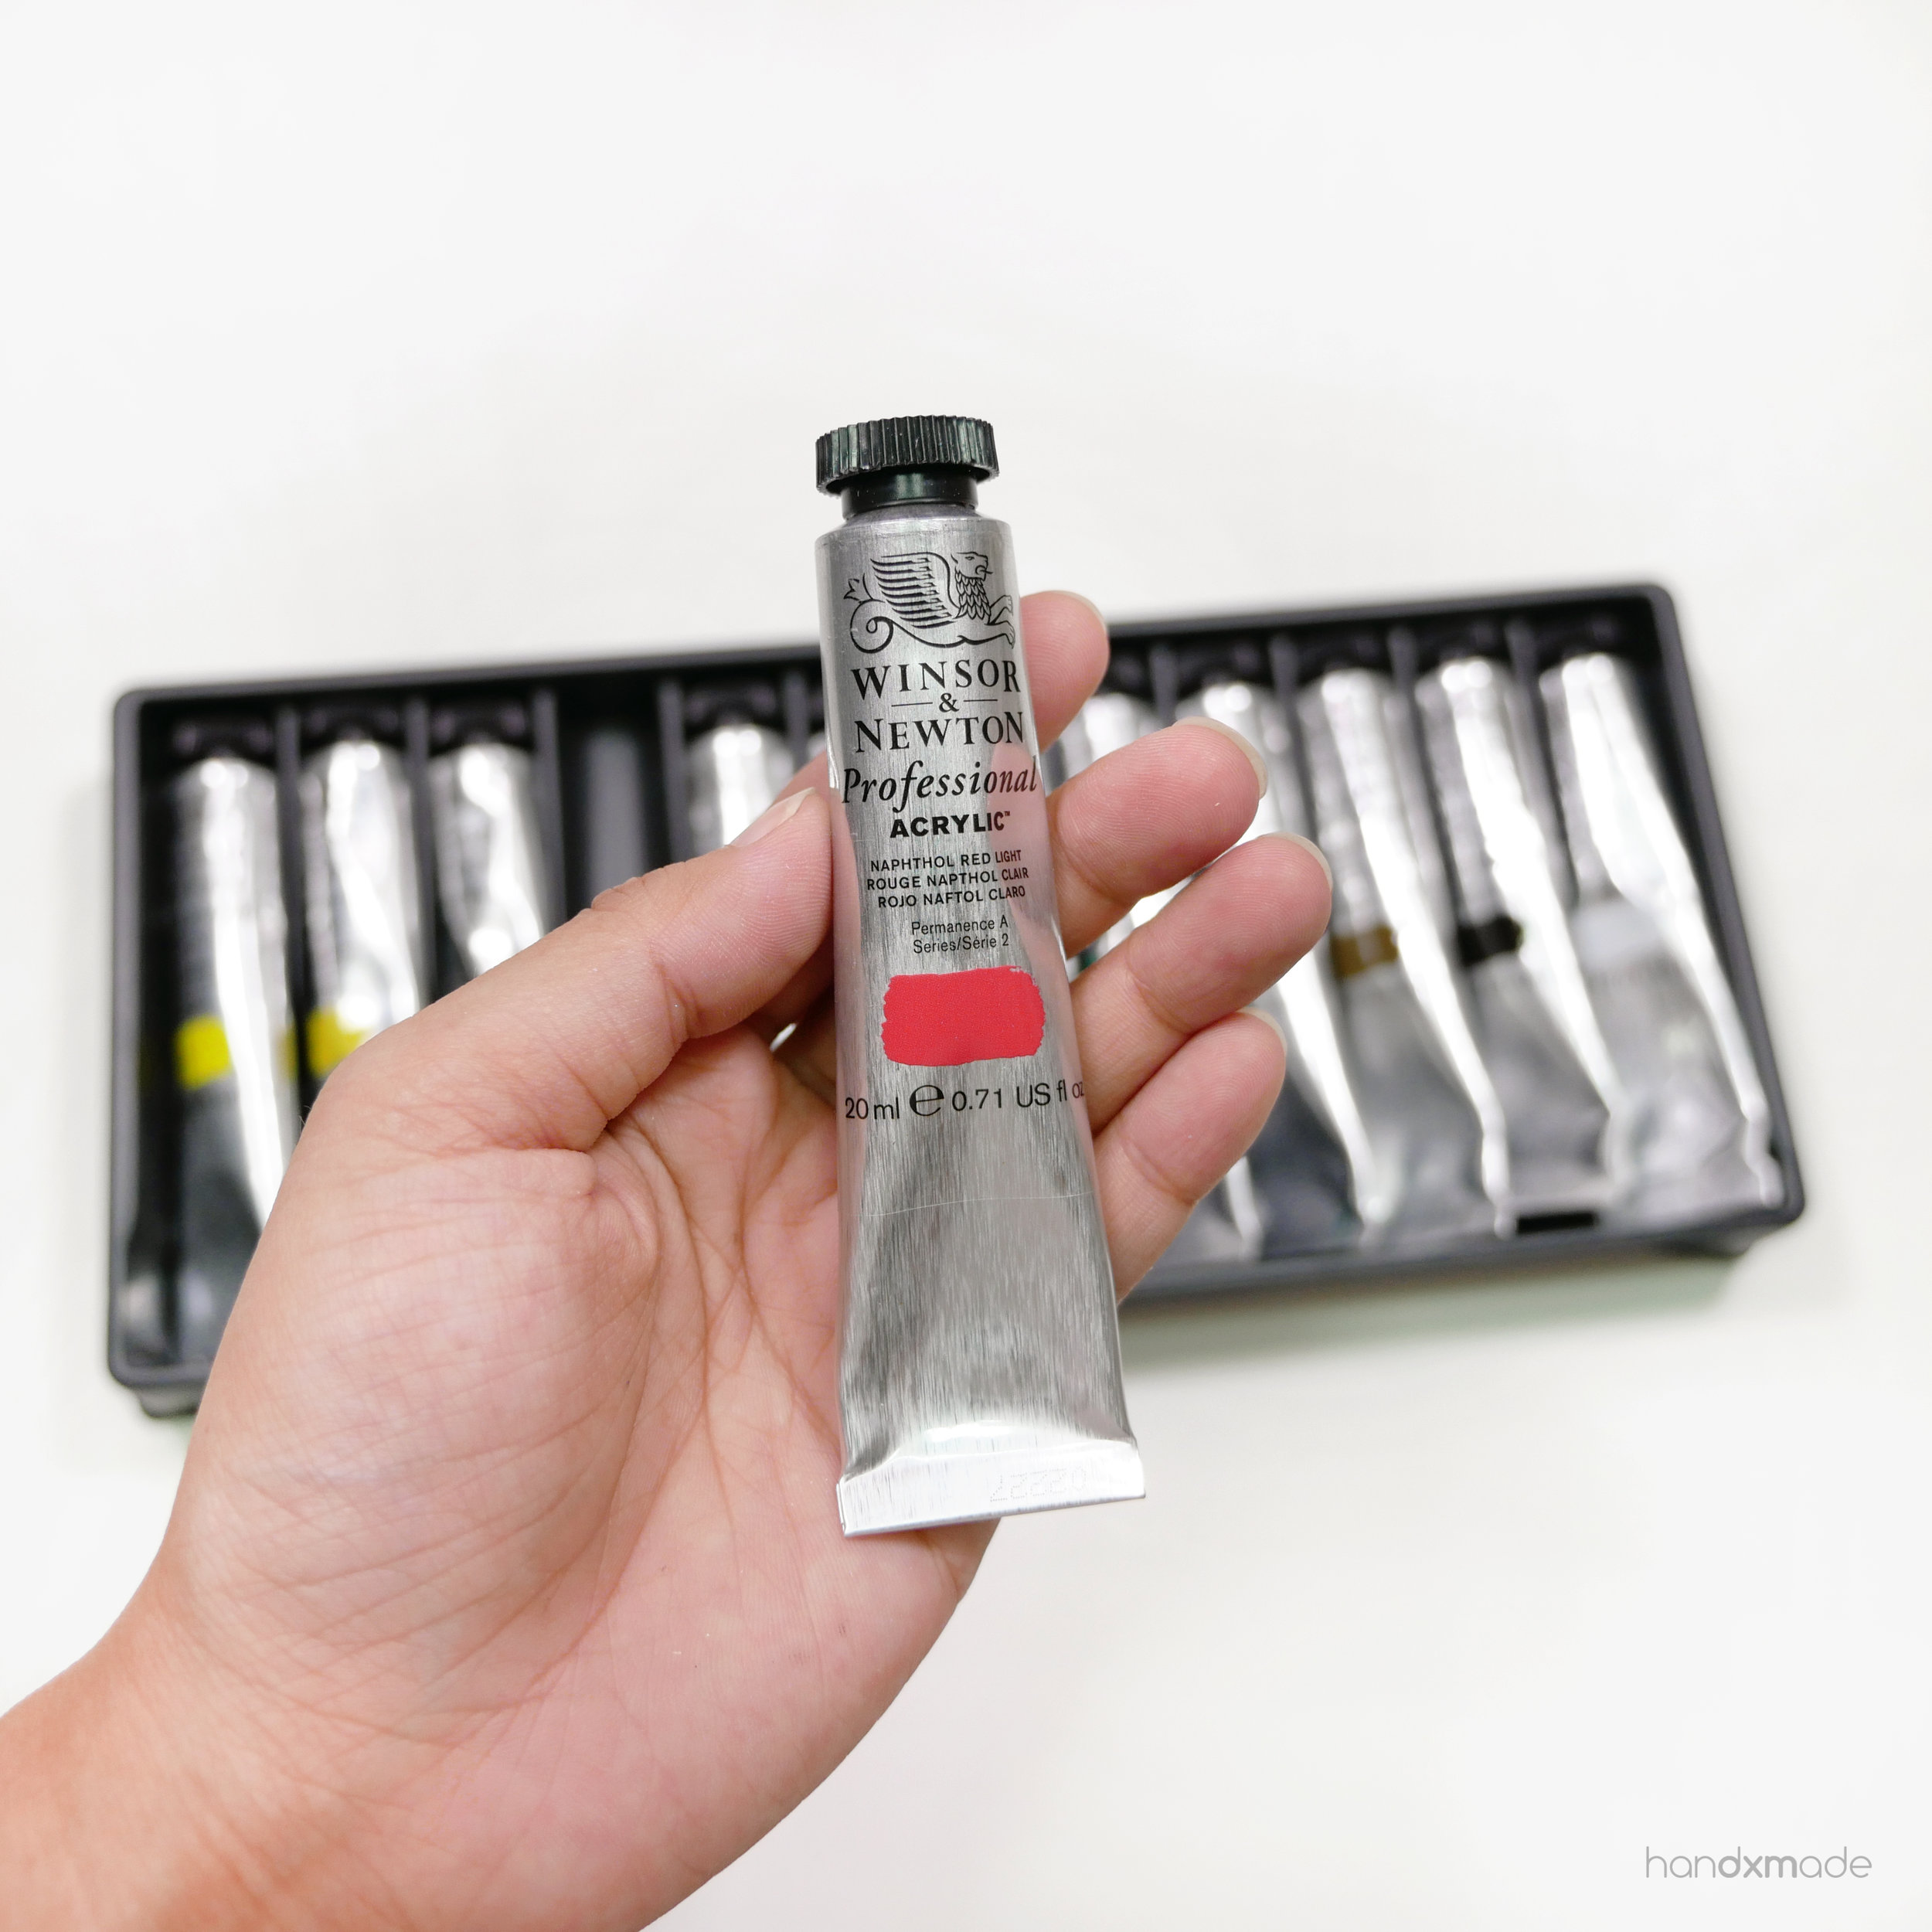
Here's a comparison of the size of the tube with my hand! They are quite a lot especially if you'll be using very little in a go for miniatures hahaha.
Winsor & Newton is famous for their watercolour because of the pigmentation in their paints, so I figured I can try their acrylic paint too. Apparently it dilutes very well, so it was soooo looking forward to that! (Normal acrylic paint really doesn't dilute like watercolour does - the transparency is always so beautiful)
It's also really thick, and I would say the consistency really look and feels similar to watercolour. A LITTLE GOES A LONGGGGG WAY ok!!! This teeny bit was still too much 😅GAH WHAT A WASTE HAHAHA.
I started with a diluted wash hahahaha but honestly I REALLY CAN'T GET THE TEXTURE I WANTE YET 😭
This is a thicker wash but still pretty diluted, and the last one was the pure acrylic form which is the thickest BUT IT CAUSES SO MUCH STREAKS it's really bad hahaahha.
Anddddddd this is why I don't really use it 😩But you can totally see the textures that usually acrylic paint doesn't have for the super diluted part right!! I really need to learn how to use it properly 😅
You probably can add some stuff to make the pigments stay together a little better or something like that - will update here if I do figure out how to use it to my liking! 😊
VALLEJO MODEL AIR ACRYLIC PAINTS

When I was making the miniature car for one of my orders, I had to ask for my bf's friend's help as I needed an even colour throughout the car WITHOUT streaks (streaks really is my nemesis when it comes to acrylic paint haha). Air brushing would have done the job really well, and since @shaunkhiu paints miniature models, he has the tools and helped me with it!
That was when I learnt of this paint, and realised that OH MY GOD THESE ARE WHAT I NEED. THIS IS THE SECRET GUYS HAHAHAHA.
Because miniature models needs that even finish, they have the PERFECT consistency, and NO STREAK PROBLEMS?!!?! I honestly wish I know about these paints a lot sooner, or just even know about the model painting hobby because seriously they have so much tips and tricks when it comes with painting with acrylic paint on 3D items! (You can search youtube about it and there will be tons of tutorials teaching you how to make depths etc! It's honestly quite amazing)
Shaun told me about how these paints can be used for air brushing, and just normal brushing is cool too. But BECAUSE it needs to be thin enough to go through the air brush YET the intensity of the paint still has to maintain consistent and intense, it's just amazing omg I've NEVER seen acrylic paint like this before, ever!
I wouldn't have known about these paints because they DON'T sell them in art stores, but in HOBBY SHOPS. So check your local hobby shop! Usually they also sell a lot of gems that you wouldn't find otherwise. It really opened my eyes to all the other possibilities, since they're also all about realistic miniatures 😍
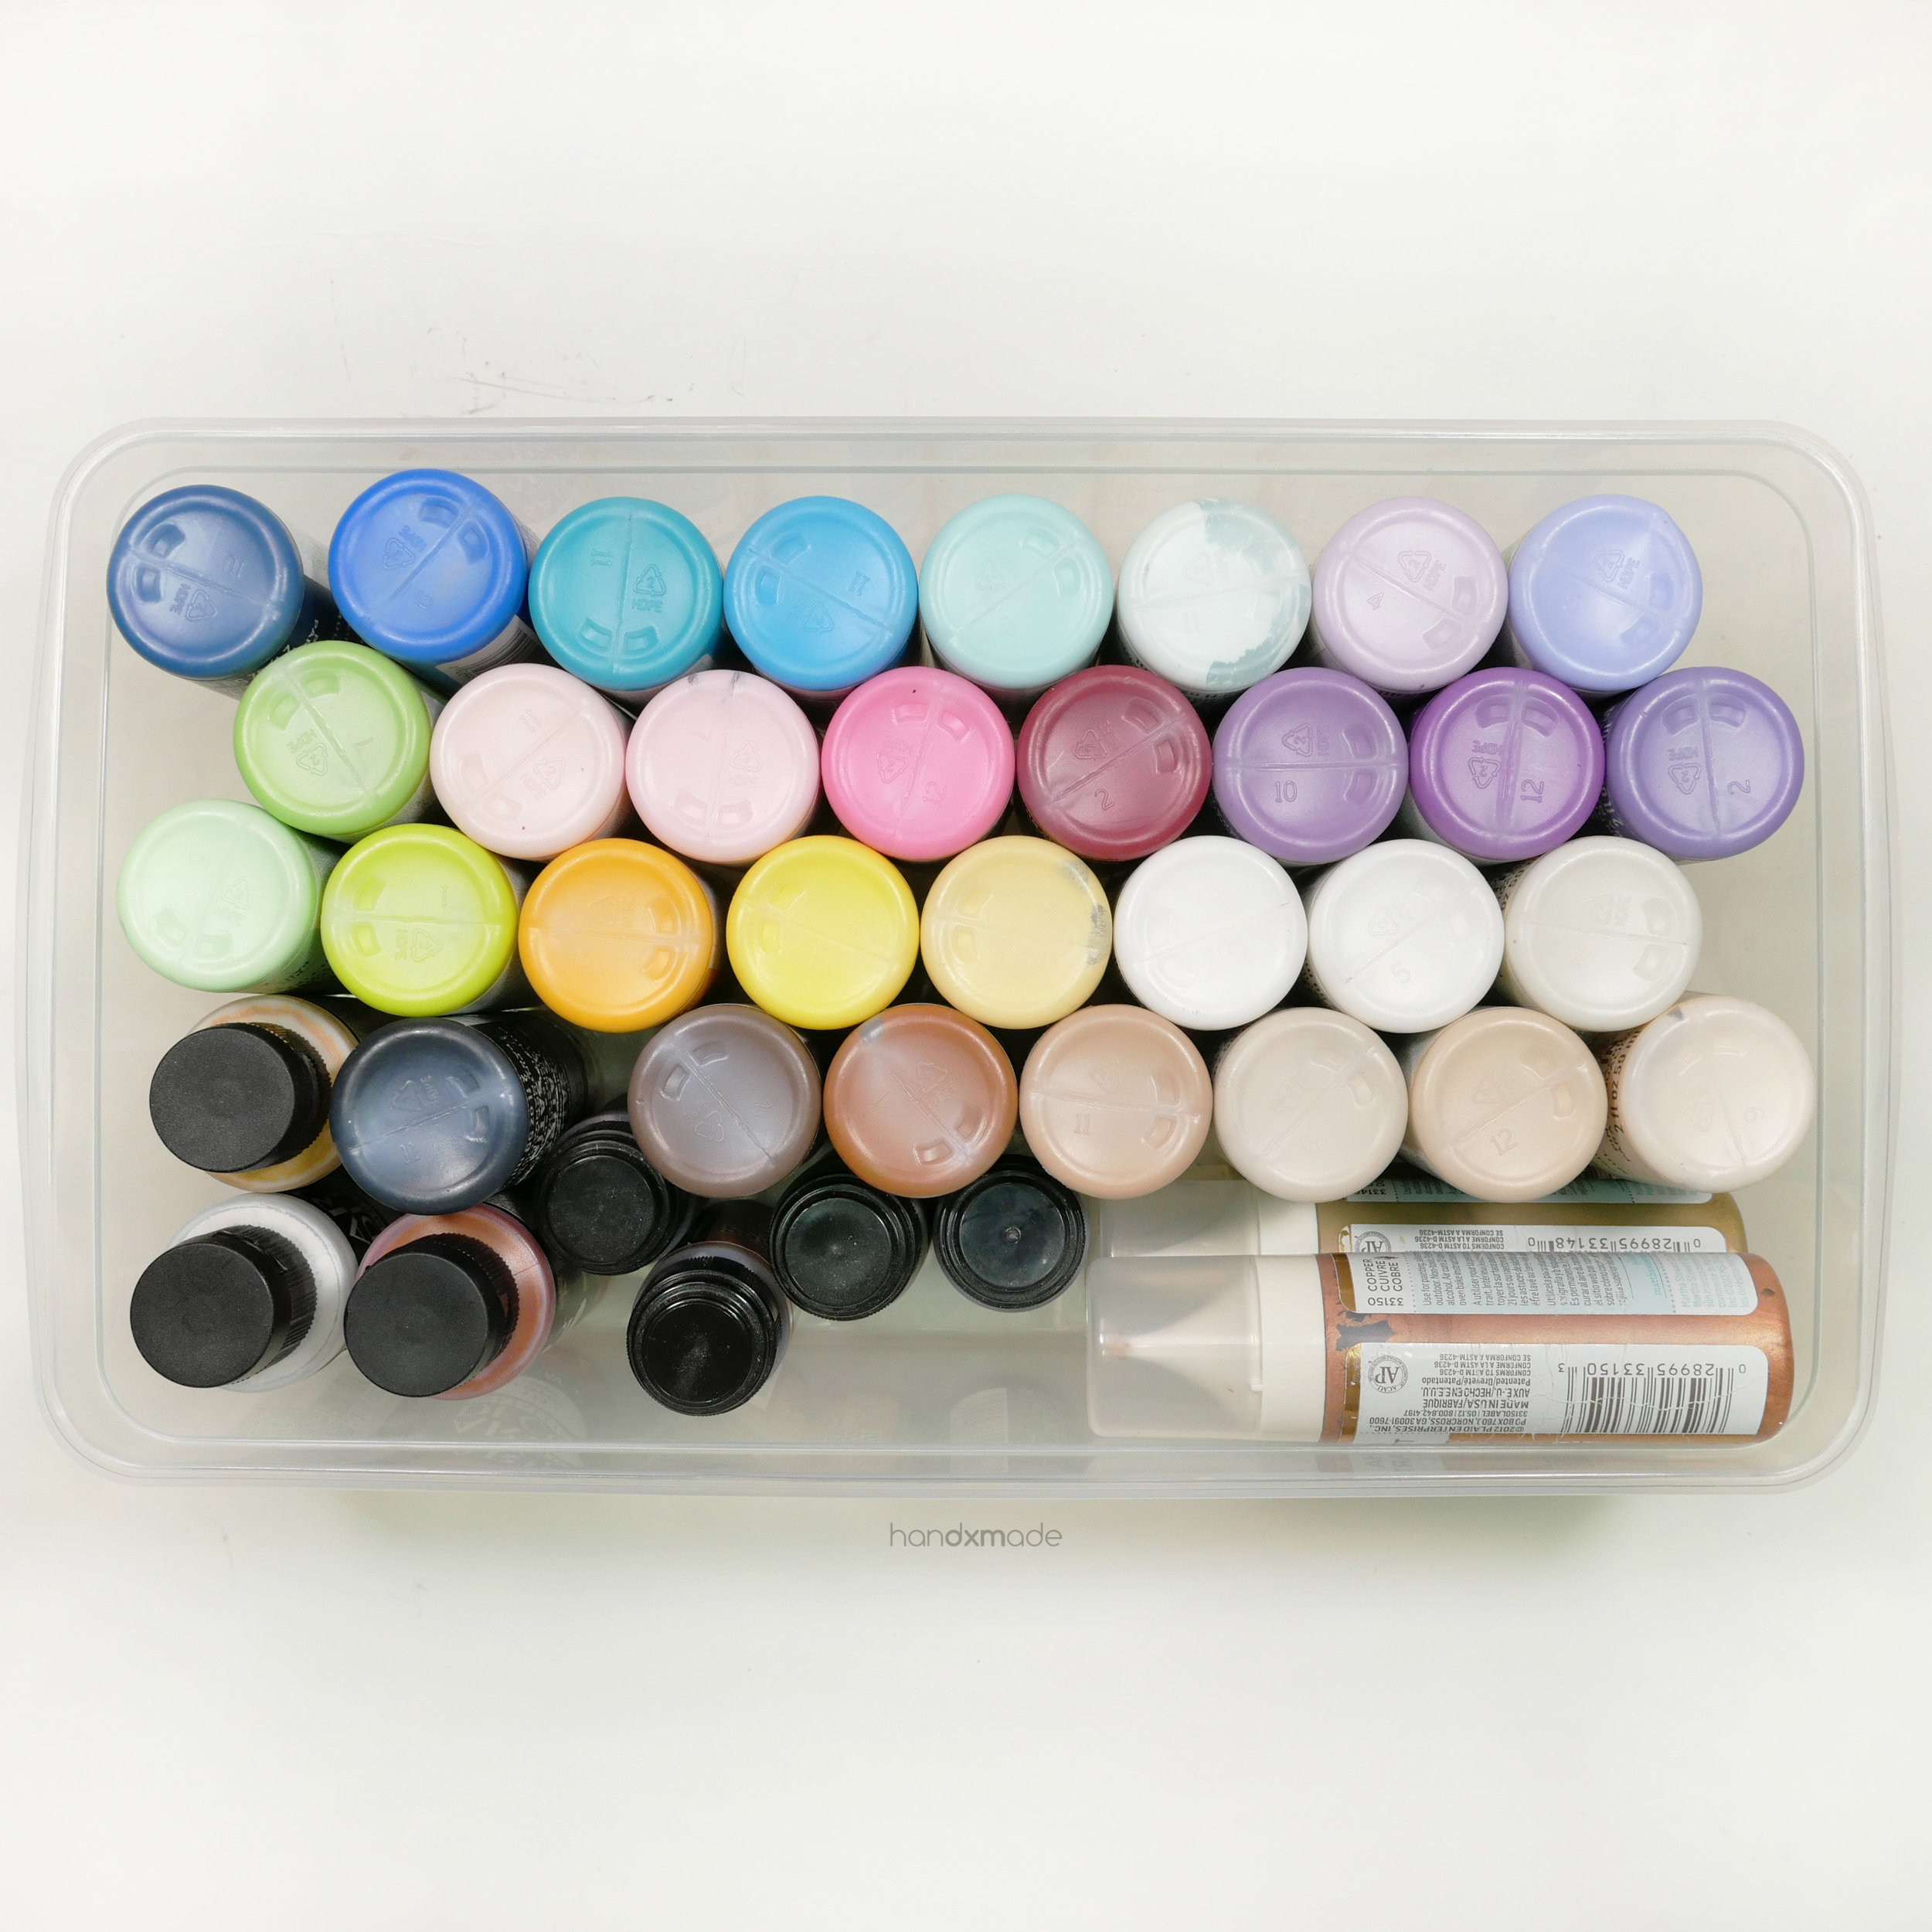
They sell these paints in SETS, but honestly imo, it's better to get the colours you need and mix them yourself. Ever since I've dabbled with watercolour, mixing colours is a fundamental skill that is super important that I learnt, and you get to save money because you can mix most of the colours that are sold!
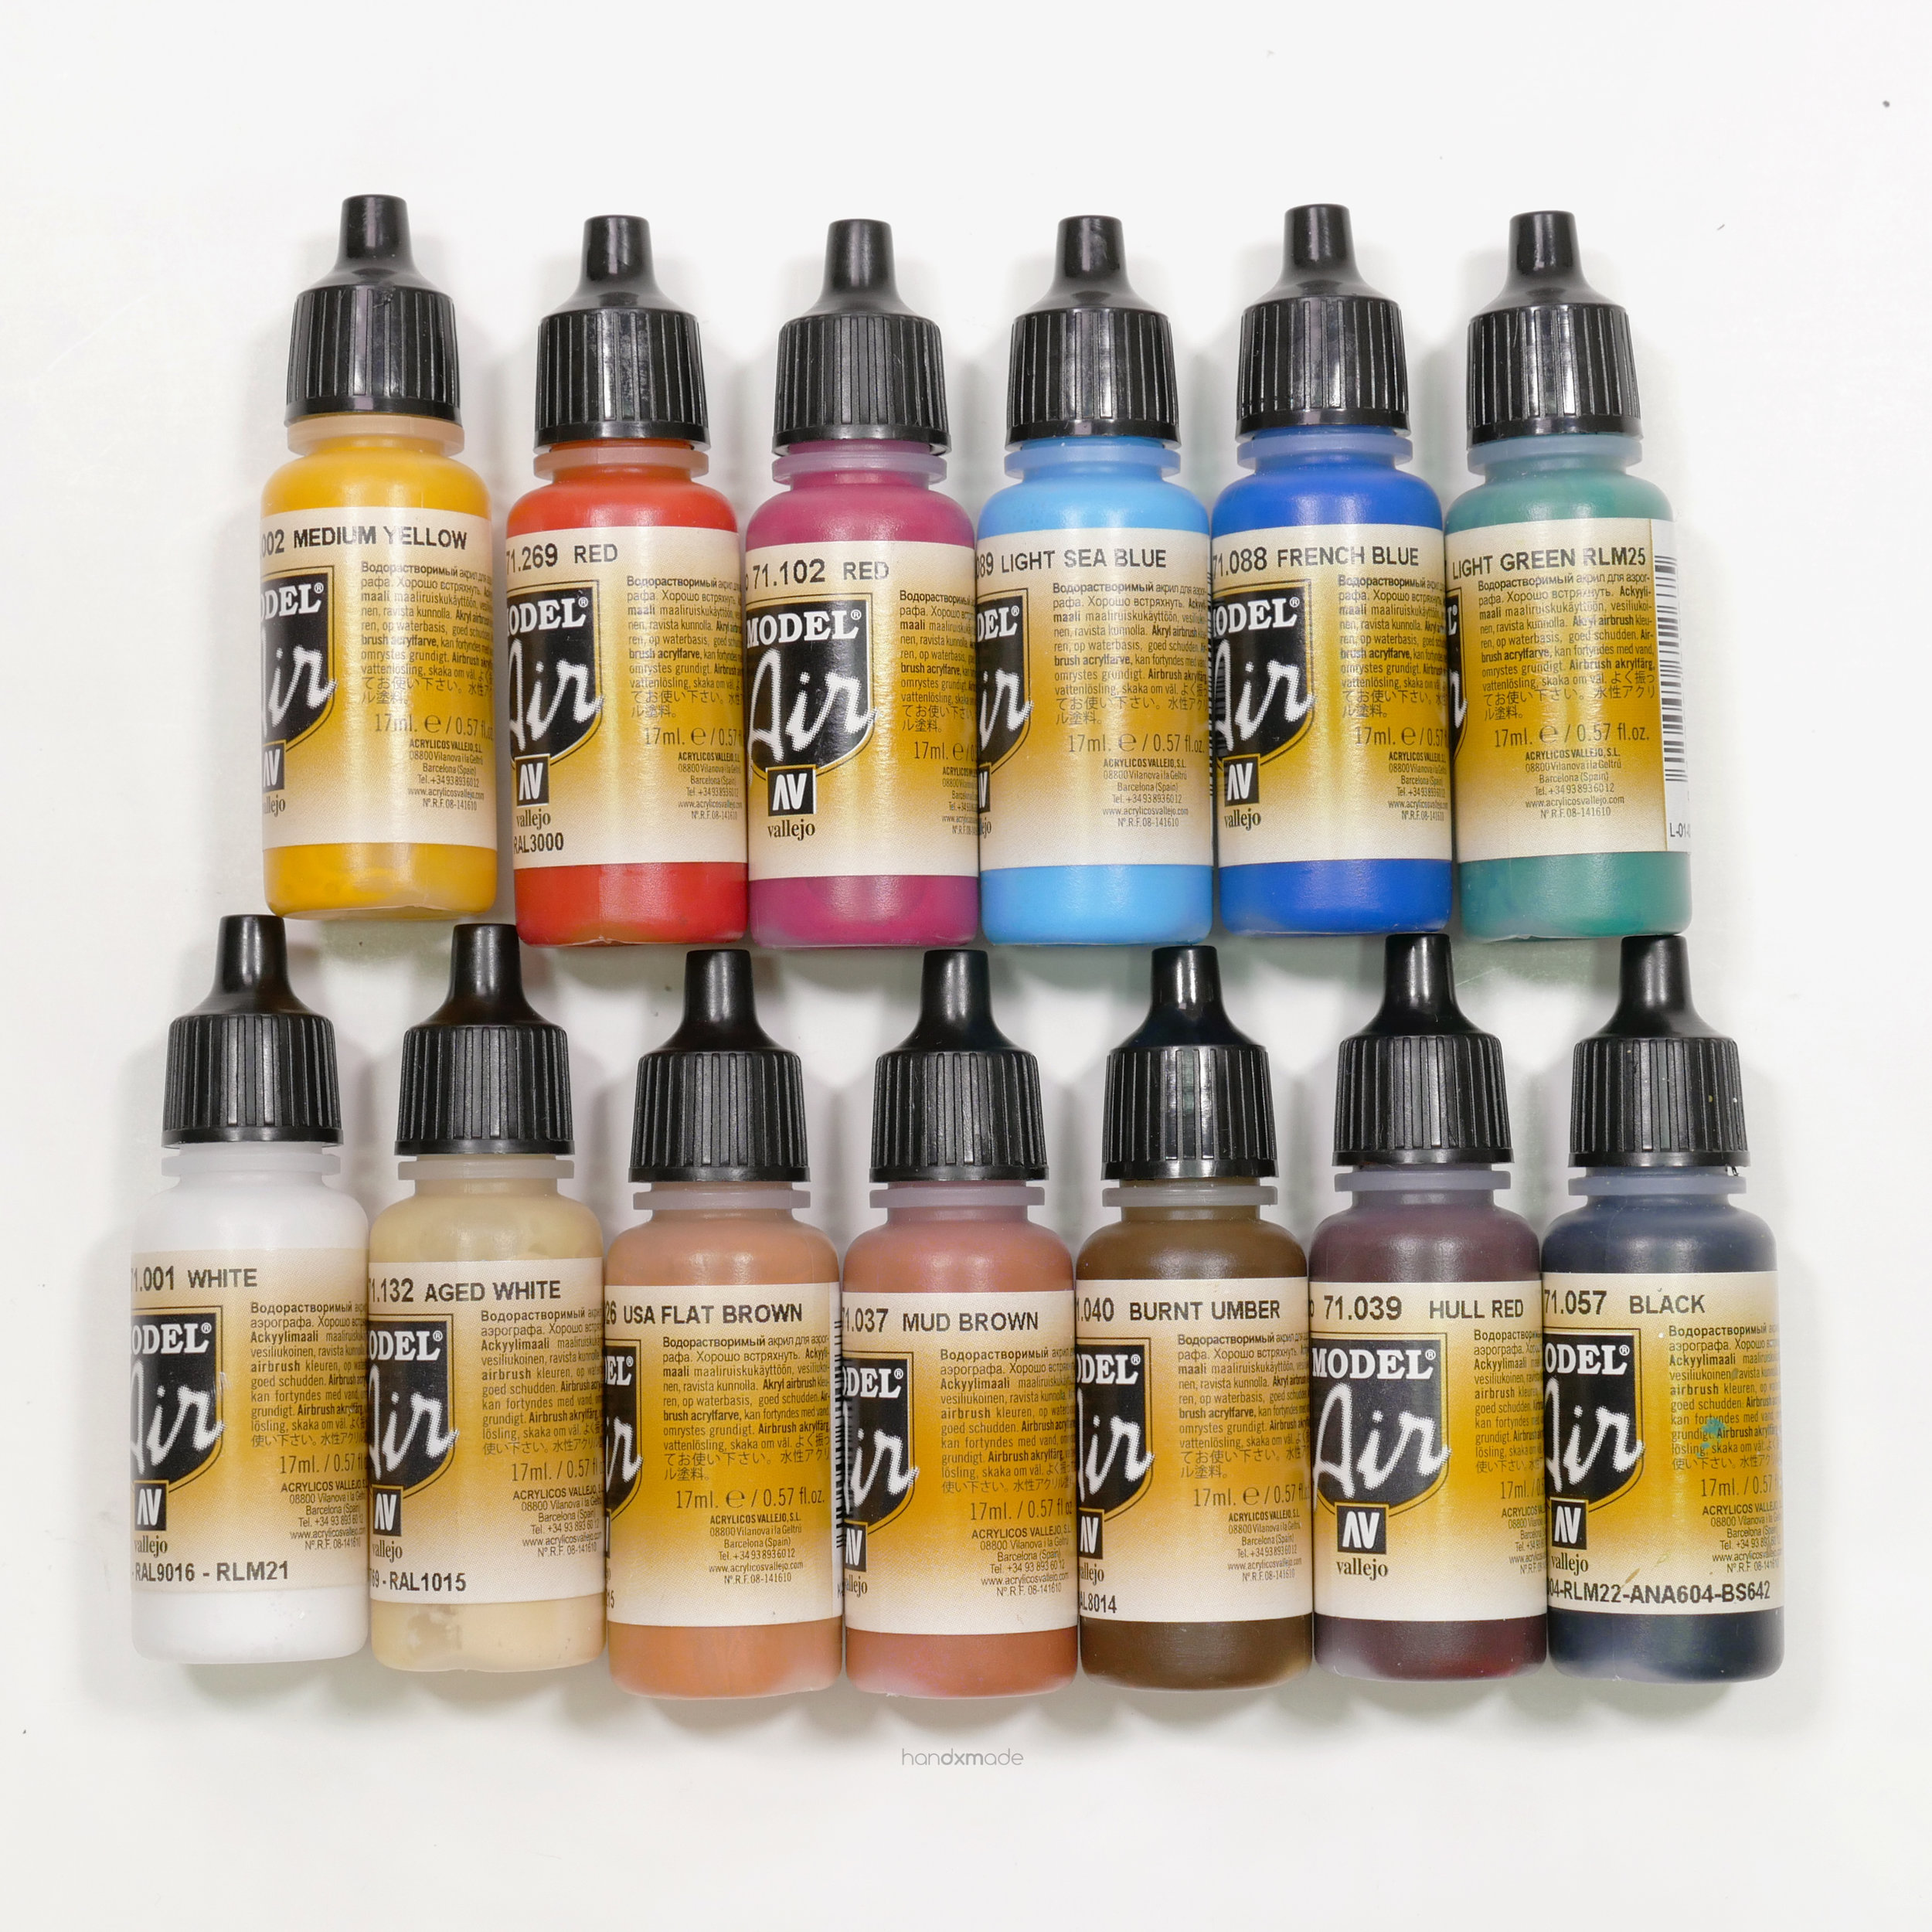
These are the colours I got if you're curious! I try to find a warm and cool tone for each colour, but invested in a lot of browns because those are hard to mix the right colour imo. I've never had any problems getting colours I need with these, and find no need to buy anymore colours as of now. Just remember that pastel colours = add white and honestly you save so much by buying intense colours and toning them down with white for pastel colours! Brighter colours are definitely harder to mix so get those colours first.

Here's the size comparison! Definitely much smaller, but omg seriously they can last you so long!!! The intensity really is insane I tell you.

They also sell primers, and these are very important for model painting. But honestly I don't think polymer clay really need it as acrylic paint stays pretty well on it! You basically paint a primer on a surface you want to paint first to smooth it out while giving it some "tooth" for the paint to hold on to.
Here's a good article on what primer is for!
From this article, it says that usually people use primer for these surfaces:
Raw wood (the primer seals in the pesky resins)
Raw drywall (primer seeps into the paper and provides a smooth paint surface)
Patched walls
Raw metal
Rough surfaces (the primer will help make these smoother)
Stained surfaces
Since baked polymer clay are pretty smooth after you clean up with acetone, it really isn't necessary! Still good to have around though in case I need to paint wood or something hoho.
For these paints, it's essential for you to SHAKE THE BOTTLE WELL. Like REALLY well.
AND LOOK AT THAT CONSISTENCY you don't even need to add water at all!! Just have to damp your brush with water hahaha. It really IS that wet while having the intensity of the paint!! This wet consistency = NO STREAKS I am not joking.
(Also I poured too much paint out again hahahahahah opps)
Here's how it looks like painting it on straight, and then diluted a lot with water. Honestly I use these for SUPER EVEN painting. If I wanted diluted I would use the Winsor and Newton one instead just because it's nicer and it was made to be diluted.
And here's how it looks like when dried!!! ISN'T IT AMAZING???? It also levels up while drying so omg it's so EVEN. Dilution doesn't really work well with these paint though I feel but I'm just glad the streaks problem is gone :')
One thing I love about this paint is the way you take out the paint - which is using the dropper. It keeps you from taking WAYYYY too much paint than you need accidentally especially when the paint is so wet, AND you can use it to "measure" the amount of paint you use, and mix colours accordingly!
It's especially useful if you need to keep using a particular colour you mixed again and again!
For example, here I used the ratio of blue:white 2:1.
Then I do the exact same thing on the other side.
There's basically no difference in the shade, isn't it amazing????
Of course it won't be 100% accurate but this is the most accurate you can get when it comes to paint haha.
On this note, I would like to mention that you'll need to be aware that dried acrylic paint sometimes looks different from wet acrylic paint! In other words, the paint you used might look like this shade and you can mix your wet paint to the shade you see, but when the wet paint dries, it might be lighter/darker than what you intend it to be - which is a hassle for acrylic paint. That's why this ratio mixing would help so much because you will ABSOLUTELY know the correct amount for each colour!
(Oh btw, one cool thing about the Winsor and Newton acrylic paint is that the paint looks the same when it's dried and wet - that was actually one of the selling point of the acrylic paint!)

This is painted with the Vallejo Model Air paint!
Honestly I didn't like how this look that much, with the fur textures with the paint and all, but at least now I know how it looks! It actually looks like it came out of a painting, like literally hahaha.


This one is the shield that was being painted on, and as you can see it really is SUPER EVEN! This paint totally made the fix look like it was brand new imo! Hahaha.
VALLEJO'S METAL COLOR

Vallejo also has the best metal colour in my opinion! They have a lot of product lines for their metallic colours (even for their acrylic colours actually!), but from what I've researched, the METAL COLOR line are the best and is the closest to that metallic look.
Btw that metal varnish is supposedly good for this because it will make the metal colour stay brilliant. I don't really like this for polymer clay though, it feels like it doesn't dry well hm. I used my usual gloss varnish on it and it seems to look fine - but I figured it's still good to have around in case I'm using it for other materials.
For these, you reaaaaaally need to shake it VERY VERY WELL. Check the bottom and make sure there are no parts sticking at the bottom. You should see lots of tiny bubbles like this!!
Drip a few drops like this as usual. It's a shame they don't have brighter gold - they only have this gold which, to be honest, is what gold normally look like hahaha. If you do want a lighter colour, I tend to put some silver in it which works well sometimes.
Look how even it isssssss!! Gold colours are usually tough because you can totally see the pigments on them when it's dried and I HATE it so much ahahah. This one the pigments are so evenly spread out and so tiny!!
I accidentally dropped it so the paint kinda became a bit weird in the middle, but look at this!


I used the White Aluminium (bought this instead of silver because it seems brighter) on this Throne and it came out so well!
Here you can see what a pleasure it is to paint it with :')
BRUSH CARE
Lastly, I wanna talk about brush cleaning and how to make sure your expensive brushes will last you a long long long long time!
Acrylic paints are a paint in the a** to remove from the brush especially when it's dried, and when it gets stuck in the ferrule (the part that holds the bristles together), it might make your bristles go the wrong way and you won't be able to get the fine point you used to have.

This brush cleaner is going to save you A LOT of money down the road!
It's not expensive, and I actually have this for a few years yet I'm not even 10% through it hahaha. It's also really simple to use, and it's amazing how it basically melts the paint yet conditions the bristles! Imagine using acetone which will definitely make your bristles stiff omg.
What you need to do is just wet your brush, and "paint" on the thing to get some of it on your brush. "Wipe" the brush on your hand (which is soft yet stiff enough for brush cleaning so the bristles doesn't get ruined), and watch as the colours come out!
In this case, I had some gold paint on it because of the previous test, and you can see some of it coming out!
I'll usually do this twice, thrice if the colour staining is really bad and I can still see the colour. Basically do it until the colour from the paint is all gone! You can kinda gentle "rub" the ferrule too to remove the paint stuck inside.
You don't even need to wash your brush afterwards! In fact, use it to flatten your brush, or round it according to the shape of the brush, and let dry! It's a preserver, so it actually keeps the bristles in the shape you let dry, which means it's harder for your bristles to get ruined accidentally when you keep them.
You know how when you buy a brush, a good brush would have HARD BRISTLES and it seems to *melt* away after you put water on them? It's the same for this! In fact, you SHOULD buy a brush that has hard bristles because that means it's in the condition that it's suppose to be and no one has tampered with it! 😊
Alright, that's all I have for acrylic paints for polymer clay. This is one of the most exciting find I've ever found out, and this has changed my work wit acrylic paint so dramatically! It's nice to know what kind of paint helps to get rid of the streaks amiright?!? Brush care is also very important and I wanted to show how easy it is too! Hope this helps 💖