
SOFTENING & HARDENING RAW POLYMER CLAY
This article by @handxmade is free for personal use ONLY, any reproduction is prohibited.
If you’d like to show your appreciation for these articles through monetary means, you can send me a ko-fi! ☕️
In my Polymer Clay post, I wrote about how different brand of polymer clay is a little bit different in terms of their texture when they're raw, and also how durable they are when they're baked.
In this post, it's for those clay within the same brand that somehow just feel slightly too hard/too soft and what I do to make sure it's just the right texture for sculpting.
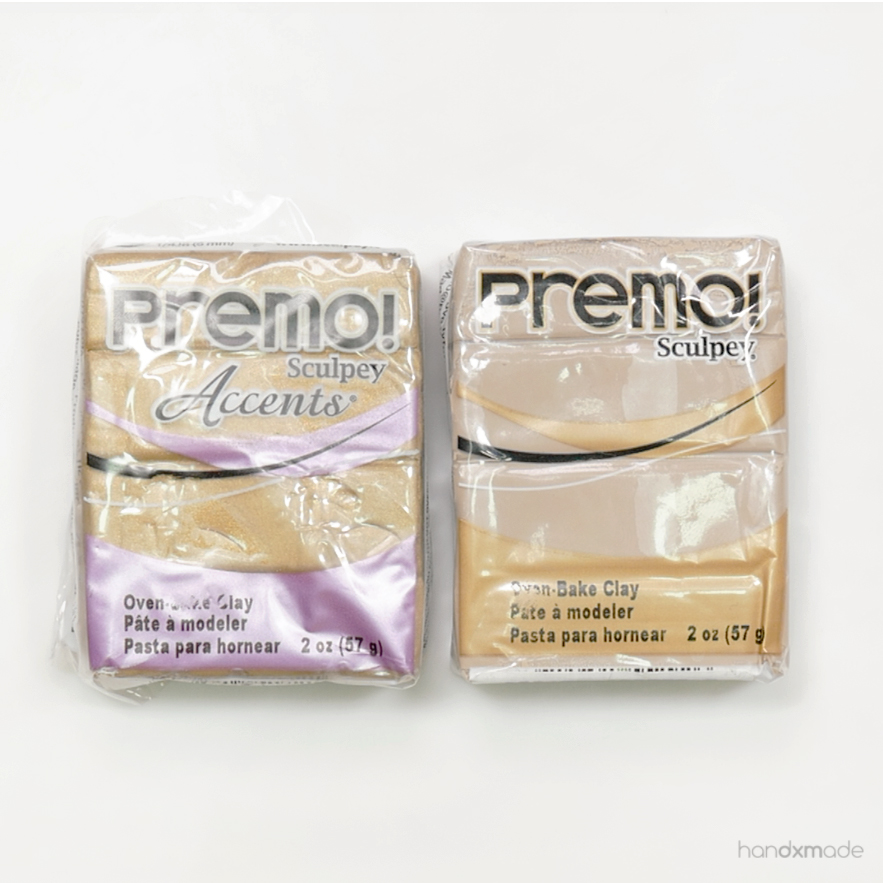
I'll be using Premo Sculpey as example since I use it the most!
On the left is a Premo Accents that I've bought years ago that I just never use and left for probably around 2 years or so after purchase, and on the right it's a recently purchased Premo colour.
CHECK THE CLAY YOU'RE BUYING
Part of the reason why some polymer clay is hard might be because of the way it's stored (leave it out of the sun!) and sometimes you can't help it when the it's the retailer who stores it wrongly. Or sometimes the clay has just been around for farrrrrr too long!
Usually the problem with polymer clay is that it's too hard, so here's how you can check that the clay would be workable and you wouldn't need to waste time softening it when you're doing your purchase 😊
What I usually do is give the clay a little "pinch" with my thumb like this! It should *kinda* feel like semi-melted chocolate, in the sense that you can actually make a slight indent through the packaging fairly easily 😊

You want to use the pink part of the thumb highlighted here to do the pressing most of the time, and sometimes the part highlighted blue to "roll" over the clay! I find that it give the right amount of strength and pressure, and it shouldn't take a lot of energy to make that slight indent I talked about.
Even when I mix clay, I mostly use this part too! So if it's already taking a lot of strength through the packaging, it just means that the raw clay would be too hard on your fingers.
This is how the clay feels like right out of package! With the right amount of stiffness I like, and when I try to roll them together it doesn't crumble, and it stays together. This packet is PERFECT.
Now for the Premo Accent that feels a little bit more hard - think frozen chocolate. Still able to press but takes a bit more effort, and making an indent is quite impossible 😶
NOTE: The hardness could be different even if you bought them at the same time. I have a few other Premo Accents in different colour that actually feels alright and they were also bought years ago! So it really depends on individual packaging and sometimes some colours are just stiffer, like Premo Translucent.
Here you can clearly see the difference of this from the previous packet. It's tougher to pinch them together, and the clay "crumbles" a little while you're trying to mix, as you can see from the bits and pieces falling apart.
This clay is still salvageable though! Like I mentioned, some clays are just stiffer, and you can't avoid those, so I'm going to show you how I remedy these clay! Just make sure for the other colours that can be softer.......BUY THOSE. SAVE YOUR HANDS.
USING YOUR PALM TO SOFTEN CLAY
This is actually the ONLY way I'd use to soften my raw clay. By now I know how to get clay that wouldn't destroy my hands, so this method is usually enough for me!
What you need to do first is use blutack to clean your hands. For mixing, I'll focusing on cleaning my palm like you see here. (Any other time I usually only clean my fingers hehe)
And you just roll it on your palm the same way! 😊 I'll usually make a "snake", and then bend it/twist the ends together depending on the length and repeat until the clay stoped crumbling and you get the right texture you want.
This imparts the oils from your hand to the clay, and the rubbing motion also gives the clay some heat from the friction, which helps the clay to "melt" a little bit (in my head, not sure if it's really happening, but I did read that slight heat helps soften the clay - don't even try to put it in the oven though, it'd just bake hahaha)
In the first few tries, you might find the clay difficult to be mixed like I do, so I would actually use my roller to roll it flat, piece them together and try to roll it with my palm again! This to me makes sure the oils that I'm "imparting" to the clay does just stay outside and is instead embed inside the clay. It works!
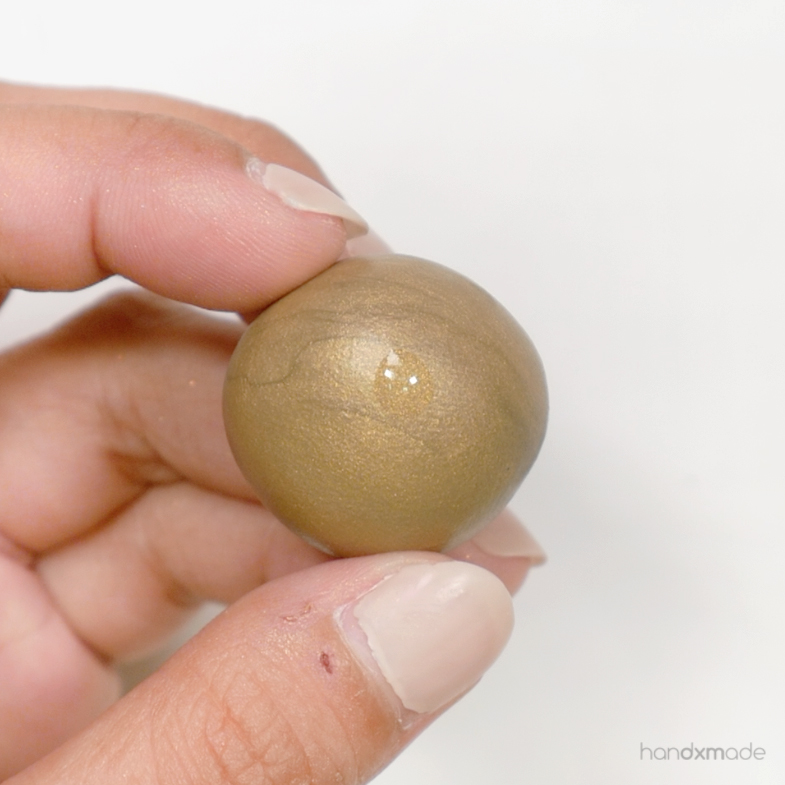
By now the clay would be soft enough to roll it to a longer snake and here's how I twist and roll them another one or two more times 😊
You can already see how it's much softer and easier to manipulate!
This method works really well for me, but might not be so for people with really dry skin (no oil to pass to clay and you might end up just having crumbled clay all over the place while you're rolling it in your palms), or even people with sweaty palms because you might impart TOO MUCH oils 😱 (which might be the reason if you find that you tend to have super soft clay)
I'll show you some other methods to rectify the clay for either scenarios 😊
USING SOFTENER TO SOFTEN CLAY

Photo from google.com
Companies that makes polymer clay actually sells these tiny bottles the size of your palm that's called Clay Softener!
It's an oily substance that you put in your clay and, again, embedding the oil into the clay - same concept, but I am guessing that it's the same "oils" that polymer clay has, so it doesn't mess with the clay's durability after baking?
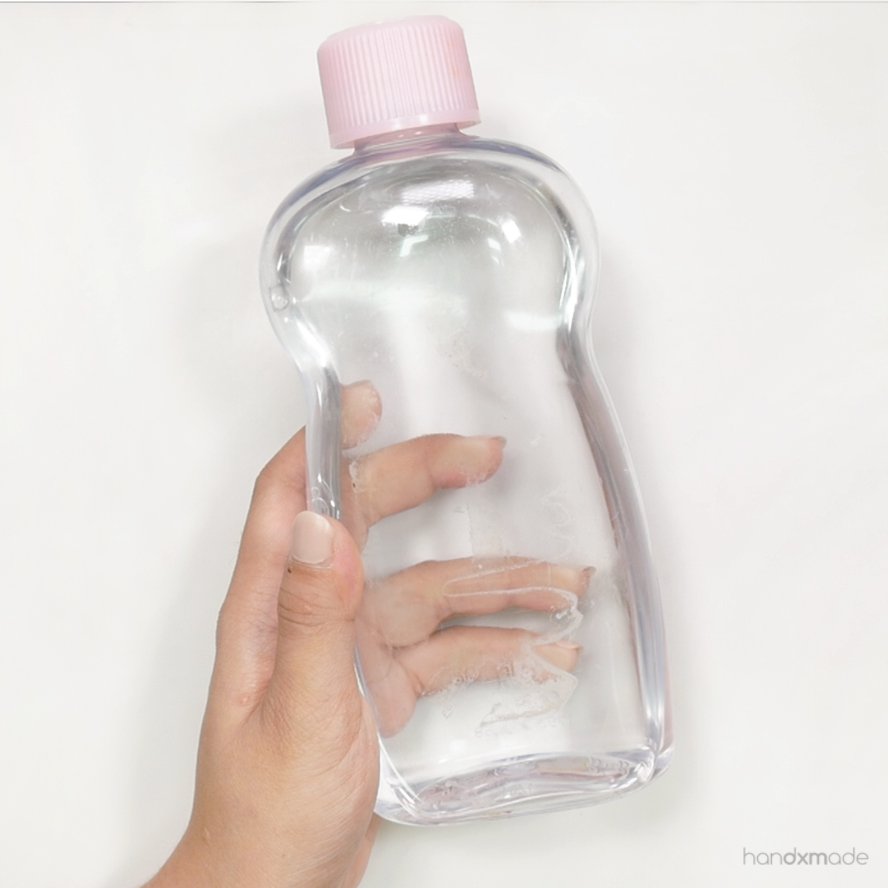
I actually do not have the clay softener (isn't a priority for me to purchase it), so if I want to soften clay this way, I use Johnson Baby oil HAHAA.

Photo from google.com
Here's how it looks like with the packaging idk why mine is completely gone 😶 It works the same way as the clay softener, BUT I THINK it does change the durability of the clay. (I baked a flat piece with this and the piece ended up feeling a little oily after baked, and when I try to bend it, there was some white streaks)
Again, I don't use this method AT ALL for my own piece but I just want to show it to you how it's done, and I recommend you to get the clay softener instead if you plan to use it. They feel the same when the clay is still raw. If you're making thicker pieces/beads and you won't bend the clay at all, I think baby oil is totally fine though. You can also wash the oily polymer clay with soap and I've seen people done that before so that works.
I myself actually HATE using the clay softener (used it when I was helping @aiclay to prep for her workshops) as I feel that the clay just becomes a bit more stickier even when it's not that soft??? The texture is just weird to me and it isn't normal hahaha. (That's why choosing the clay in the beginning is important, just avoid it altogether is the best way 🙃)
To reduce the mess, I put the clay in a zip lock bag. It can get REALLY messing and your hands would be ridiculously oily too so I find that this helps A LOT.
I then pour some oil on the cap because it's easier to control the amount this way, but the clay softener actually has a tip that you can pour the oil directly from 😊
I still poured out too much so I just used a tissue to soak most of it up. You really just want a TINY bit. Too much of the oil would make it very hard for you to rub it in the clay! LESS IS MORE. If you need more you can always add more, but if you put too much you'll really be spending a lot more time trying to rectify it.
Here's a better visual example for a lump of clay this size. Just a TINY DOT, you can even put lesser than this amount.
Even if the amount of clay is bigger, I would still put about this amount of oil. Built it up! A little bit does goes a lonnnnng way.
When you close the zip lock bag, don't zip it all the way! Open one corner so the air can be let through and the zip lock bag wouldn't burst. Rub the oil all over the polymer clay like this....
...and use the rolling pin to make it flatter and let the oil embed to a larger surface area!
If you use too much oil, the rolling pin might just roll off cause it's so slippery hahahaha so again, please be careful of the amount you put in!
Here's how the clay looks like after that oil "treatment"! Much softer YET the correct stiffness.
Btw, if you have clay that looks like this......I'd recommend you just throw it away 😅 The amount of time needed to make it workable just isn't worth it (the first time I did it, it took me around 2 hours.......it's just impossible to make the clay stick to each other omg)
I've heard people using a BLENDER to blend the clay with the oils, and even though I can see how it would work, but just imagining the amount of time CLEANING the clay in the blender.....*faints* (I'm pretty sure you won't ONLY soften ONE clay colour amiright)
LEACHING POLYMER CLAY TO MAKE IT HARDER
Let's say you have sweaty palms and you tend to have polymer clay that's too soft, or got clay that were too soft (SUPER RARE), or put too much oils in the above method, there's a way you can "leach" the oils out of the clay!
Here I've put a RIDICULOUS amount of oil, and omg look at how sticky and disgusting it isssssssssss 😭
Here's how sticky it is 🙃 It's just IMPOSSIBLE to work with, and too soft too.
What you do is to flatten the clay as much as you can, take normal printing paper (try to place the clay on the clean side for rough papers), and cover both side! Use something heavy like a dictionary, or in my case a flat water bottle, and place it on top.
The paper will soak up the oils, and don't worry, the paper won't stick on the clay! 😊
This method takes time though, and there's a lot of waiting involved. Some people even leave it for a day!
Fortunately (or unfortunately), I've really spammed a lot of oil, so it took only about an hour or so for the paper to leach the oils out! Here's how it looks like - very obvious that the oil was absorbed into the paper.
It's was still a tad bit sticky, but look at how much better it is now!
Since it was so oily, doing another pass might work even better for this particular clay. If I did that, I would change to a new piece of paper so it will absorb much better! 😊
Alright, hope these few methods was helpful, and you gained some insight on how to handle your clay better especially if you had issues with mixing with your hands! If your hand is too dry maybe you can put some johnson baby oil before you mix, and if it's too sweaty/oily, dry it with a wet paper towel ok! 😘