
WORKING SURFACE + VIDEO RECORDING SET UP
This article by @handxmade is free for personal use ONLY, any reproduction is prohibited.
If you’d like to show your appreciation for these articles through monetary means, you can send me a ko-fi! ☕️
I personally think that having a good surface is very important, and after making stuff with polymer clay for quite some time and getting so many surface to try it out, I think I have finally found THE ONE. 😀
I'm combining the information of working surfaces with my video set up as I actually figured out the best surface for me thanks to having started my video making journey!
Each working surfaces definitely has their own set of pros and cons, and hopefully this will help YOU find the surface that will work for you 😊
CERAMIC TILES
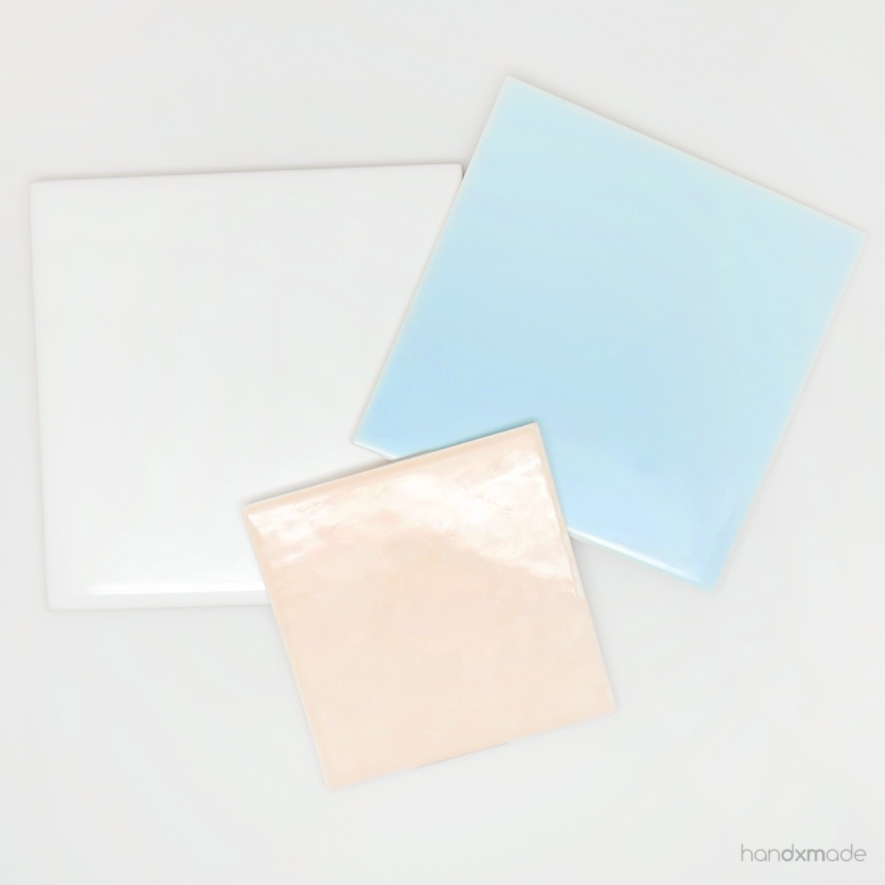
Ceramic tiles is one of the first working surface I found while researching online, and not only does it make a good working surface for polymer clay, I also use it for various other things like baking my clay objects (more information in another article soon), and mixing liquid clay with polymer clay etc.
Polymer clay sticks well on it, and that makes rolling on it very convenient as the clay will get stuck on the tile and NOT on the rolling pin (although you do need to have some control over it)
It's also SUPER EASY to clean it - just scape with with a blade/wet paper towel! Even acrylic paint can be scraped out hurhur.
It's also very durable in the sense that you can use your blade to cut your clay straight down on it and it wouldn't leave a mark! Polymer clay is still relatively soft though so I never have to use much strength, not sure how it'd fare if you try to cut paper on it hmm.
Weight wise it can be relatively heavy, but this size is pretty okay!
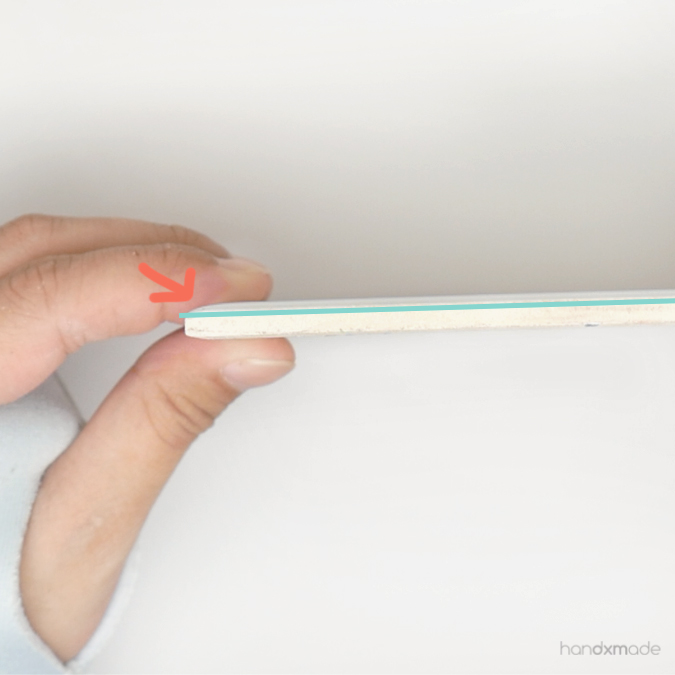
One of the cons with ceramic tiles however, is that it's a little bit curved (especially the sides!). Note that you're looking at the tile directly from the sides - not tilted. The arrow is pointing to the curved part of the tile. Even the middle part of the tile isn't totally straight! (Imagine it being slightly domed)
So if you were to roll your clay piece nearer to the edge, the height of the clay might be uneven. Even 0.1cm is a big difference in the miniature world! It's definitely not a too big of an issue to be honest, but it's good information to know just in case.
I'm still using ceramic tiles once in a while so it's definitely a good tool to have around. It's not expensive too 😉
PHOTO FRAMES
I found out that you can use photo frames as a working surface from @sugarcharmshop - mainly just the glass on those frames!
I know it sounds weird, because I myself thought that you will scratch the glass or smth? But surprisingly it doesn't get scratched and it's as resistant as ceramic tiles!
Even though it's scratch resistant and durable, it IS glass and you CAN break it by dropping it just like ceramic tiles. For me I actually broke one of my glass surface by pushing on it too hard 😅 I think I was making something that required strength AND SUDDENLY IT BROKE HAHA I was quite shocked 😂
I couldn't find a big piece of ceramic tile as I wanted a bigger surface area so this was quite a perfect choice, but the frames does kind of get annoying as my arm would be on it, and it's quite annoying to manoeuvre with something blocking you sometimes! (Oh if you need to get a big ceramic tile, it does exist but you'd probably need to go to some textile shops or smth....those aren't very accessible for me on public transport so I never bothered 🙃 Glass is good for me!)
Price wise it can be quite pricey, I think this was about $20++? But I used well and the size was perfect for me to put in my light box!
SCULPEY WORK N' BAKE CLAY MAT
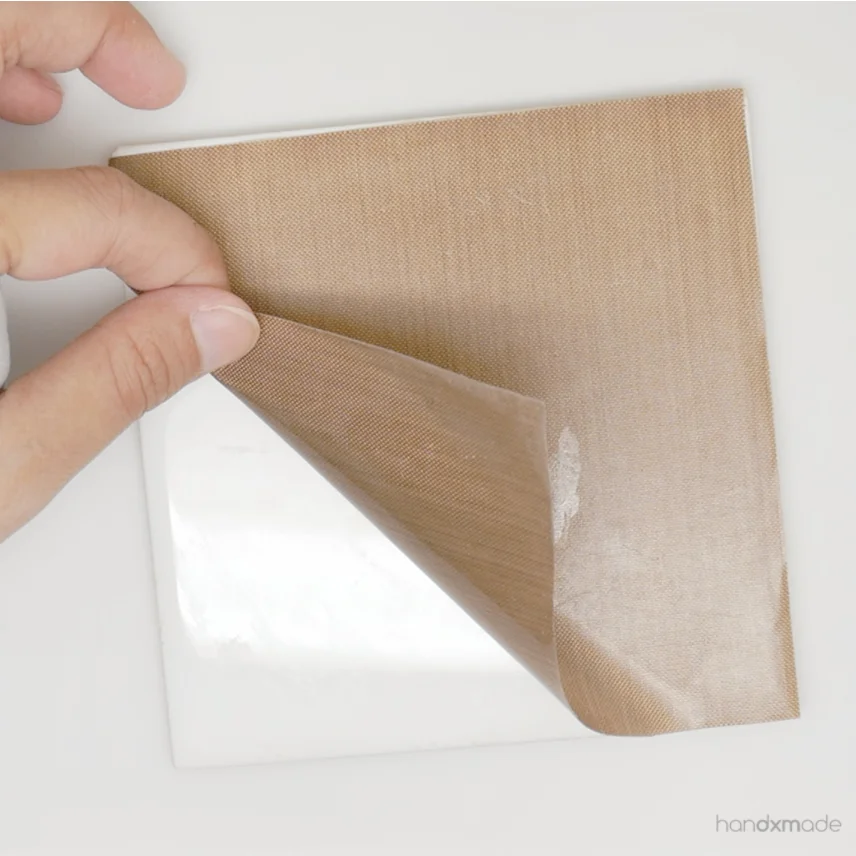
I saw some crafters using this Sculpey work and bake mat, so I decided to buy one roll and try it. I couldn't find it in Singapore so I had to order it online...not too expensive so it's alright.
It has a glossy backing that sticks to glossy things like a ceramic tile, so I trimmed one to the size of a square and stuck it on! If you don't stick on something the sides roll up and that would be really annoying.
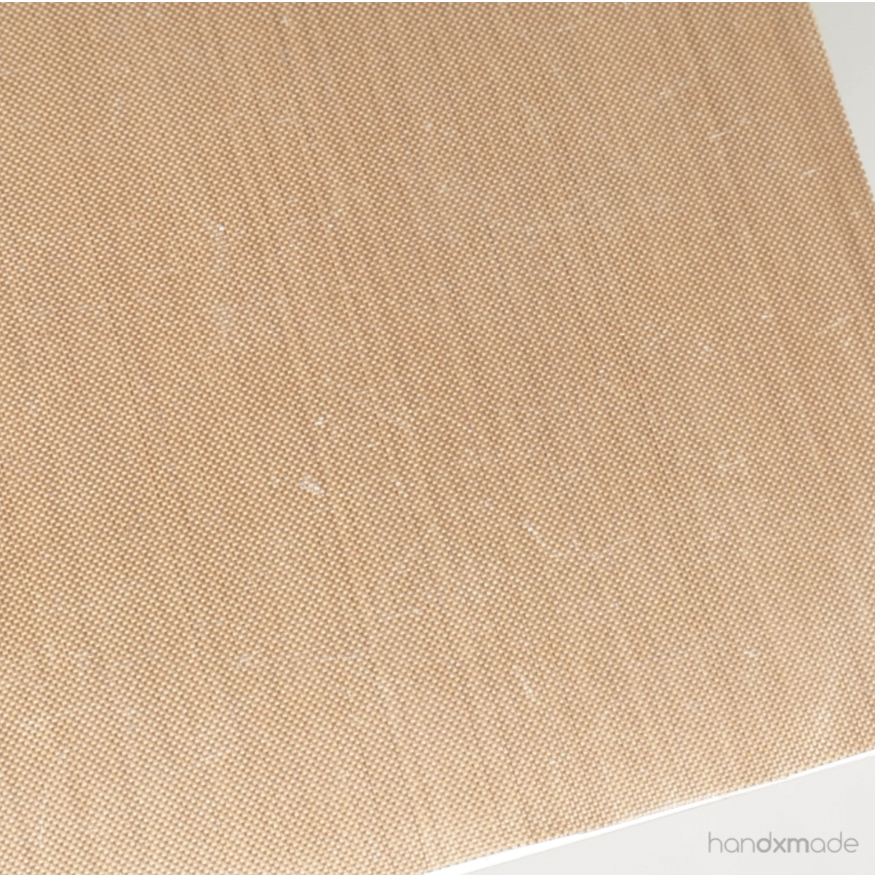
There's actually texture on the mat so if you roll your clay here it might get some textures on it - which makes it quite problematic to be honest, especially if you just want a smooth surface on both side of the rolled clay 😶 But it's not as sticky as ceramic tiles/glass so sometimes when I need to roll thin snakes I do it here 😊
This was when I start to realised that matte surface actually feels different than glossy surface, as this mat is kinda satin. Matte texture doesn't feel as icky HAHA.
If you have sweaty hands, ceramic tiles/glass might make it even tougher for you to roll (you sweat gets on the tile and it becomes oily), so this is a good alternative!
Another con for this mat other than it's textured is that it also gets scratches SUPER easily! These are made when I just used my blade to cut my clay - not much strength! Again, it will give your clay textures that you might not want so it could potentially be frustrating.
Apparently you can bake your clay pieces with this in the oven and I can see how convenient it will be. But I've never tried so I'm not too sure and don't want to tell you something I don't know fully 🙃
ACRYLIC BOARD
I went to @longuevuedesign's workshop about slightly less than a year ago, and I learnt some skills from her polymer clay jewellery making skills! One of the most prominent one is the work surface she uses - acrylic board.
It was completely flat (unlike ceramic tile which has a slight dome), it was glossy (clay sticks well), there's no edge like unlike the photo frame, it doesn't get scratched easily (it will if you truly want to though and sometimes does get light scratches but not deep enough to affect the texture of your clay), it's SUPER LIGHT, it wouldn't break if you drop it or press it too hard, and the size that my local craft store brings in is actually a perfect size!
I've been using this for awhile and I love it so much?????
I do put it on top of my photo frame though just because my photo frame is bigger and it's nice to have more space to put my unused/to be used clays 😂
Sometimes going to workshops really teaches you new stuff and that's why I love going to workshops! You'll take away something that will help your own craft, regardless of whether the craft is the same or not 😊
CARDBOARD PAPER
Okay I know this is a little bit weird, but do hear me out here 🙃
Ever since I started taking videos, I've always been annoyed at this light reflection that my camera captures because of my light placement (which is right at the top)
In this video for example, you can actually see all the oils and all that reflection from the light 😱 It eventually clicked that it was because of the glossy surface, and since I couldn't possibly change my light source direction, I decided to use smth that is matte.
And the result on my video has improved SO MUCH.
Take this video as example! There's NO reflection at all, and the background is so much neater and cleaner! 😍 I was so so happy when I found out how to eliminate the problem 😭
But then problems started to show.......IT GETS DIRTY SO DARN EASILY!!
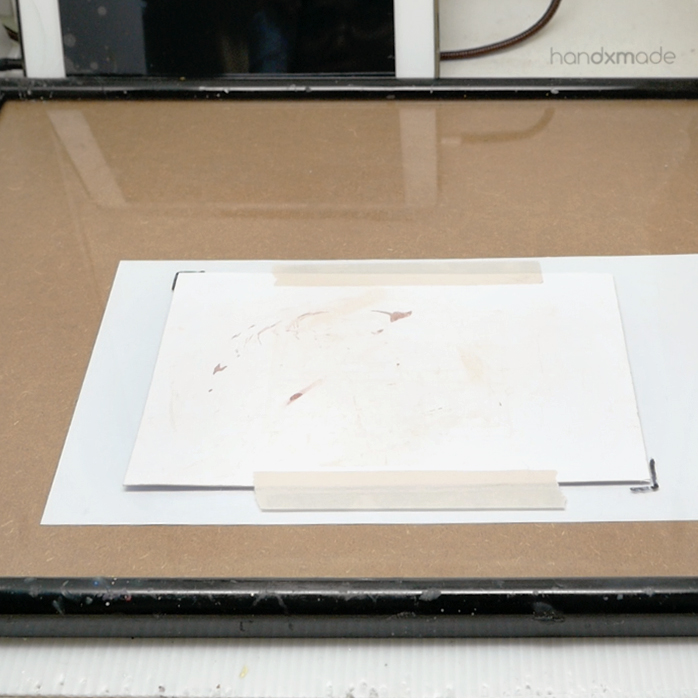
Whenever I paint or use pastels or even cutting coloured clay, the paper will get stained ALL THE TIME and I had to cut and change the paper EVERY SINGLE TIME after I'm done with crafting - sometimes even halfway through 😭 It just wasn't ideal and I'm a lazy bum LOL.
But because of this, I now know I just need to get a working surface with a matte surface!
Oh yeah, I also draw borders/arrows and even trimmed the paper to a specific size so that when I zoom my camera all the way in it films that area and I'd know where to put my hands at! I can't be staring at the camera screen all the time so this really helped me a lot!
The rest of the space is usually really messy, with all my clays laying around hahahahahaha YES INTERNET IS A LIE WHAT YOU SEE IS A LIE OUTSIDE THE SCREEN IS NOT THE SAME 🙃
Anyway see how dirty this piece of paper is I CAN'T POSSIBLY REUSE IT CAN I 😅
MATTE ACRYLIC BOARD
Since I love the acrylic board so much....I started to wonder if I can get a matte acrylic board somewhere.
I heard that they sell matte acrylic board somewhere, but if they do, it's definitely not common cause I couldn't find it - so I decided to make my own!
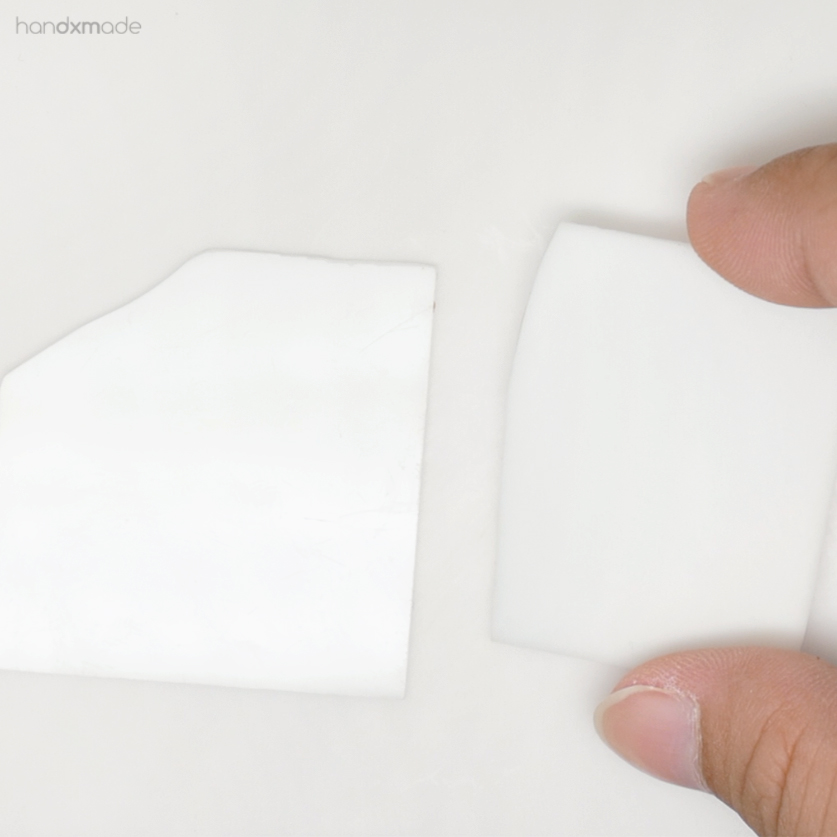
Here's a glossy acrylic (left) and matte acrylic (right) as comparison! Look at how much brighter the left is. It makes everything uneven and actually makes the video annoying to edit because if I brighten too much the reflections gets overexposed etc 😐
SO YES, matte acrylic it is!!
The secret (or not so secret) is....SANDING
Here's a before and after!
It does take some time, and took me awhile to sand the whole acrylic board, BUT IT'S SO WORTH IT!!!!! 😍
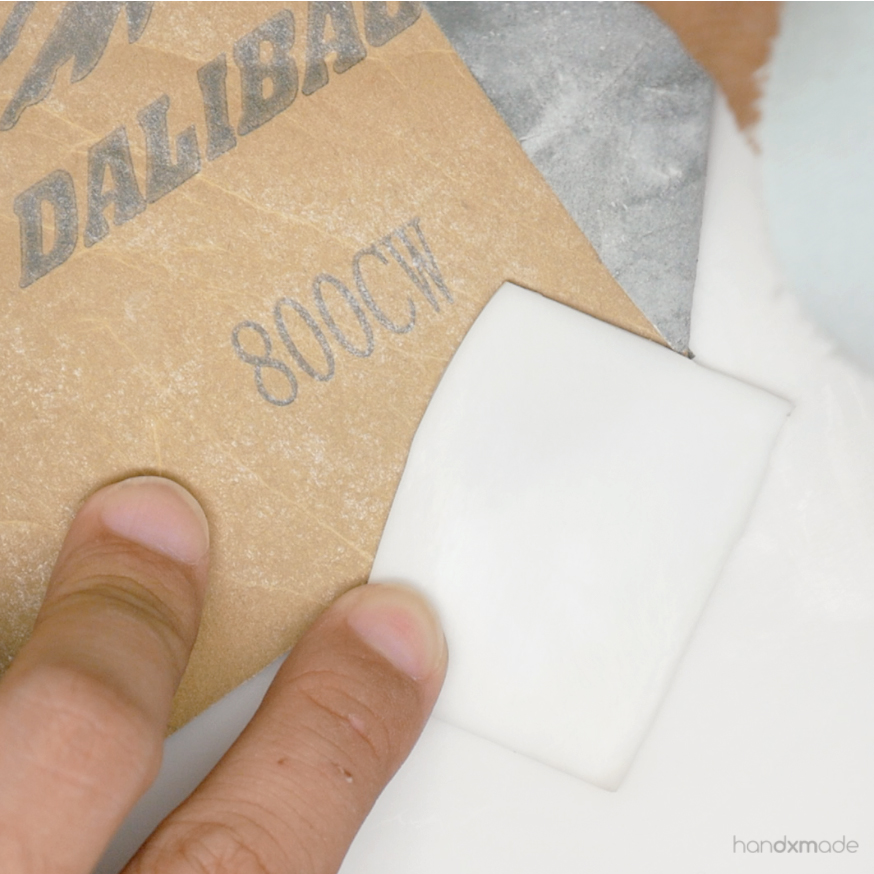
This is the grid I use for the same paper 😊 If you use a finer one it takes less time but will probably be better and smoother, but if you use a coarser one it might not be smooth at all so be careful!
Here's how it looks like after all the zooming! 😀
No reflections at all and not distracting hurhurhur.
Read this post to see how I keep my favourite work surface clean and always looking brand new! 😉
This background was with the matte acrylic board! PERFECT.
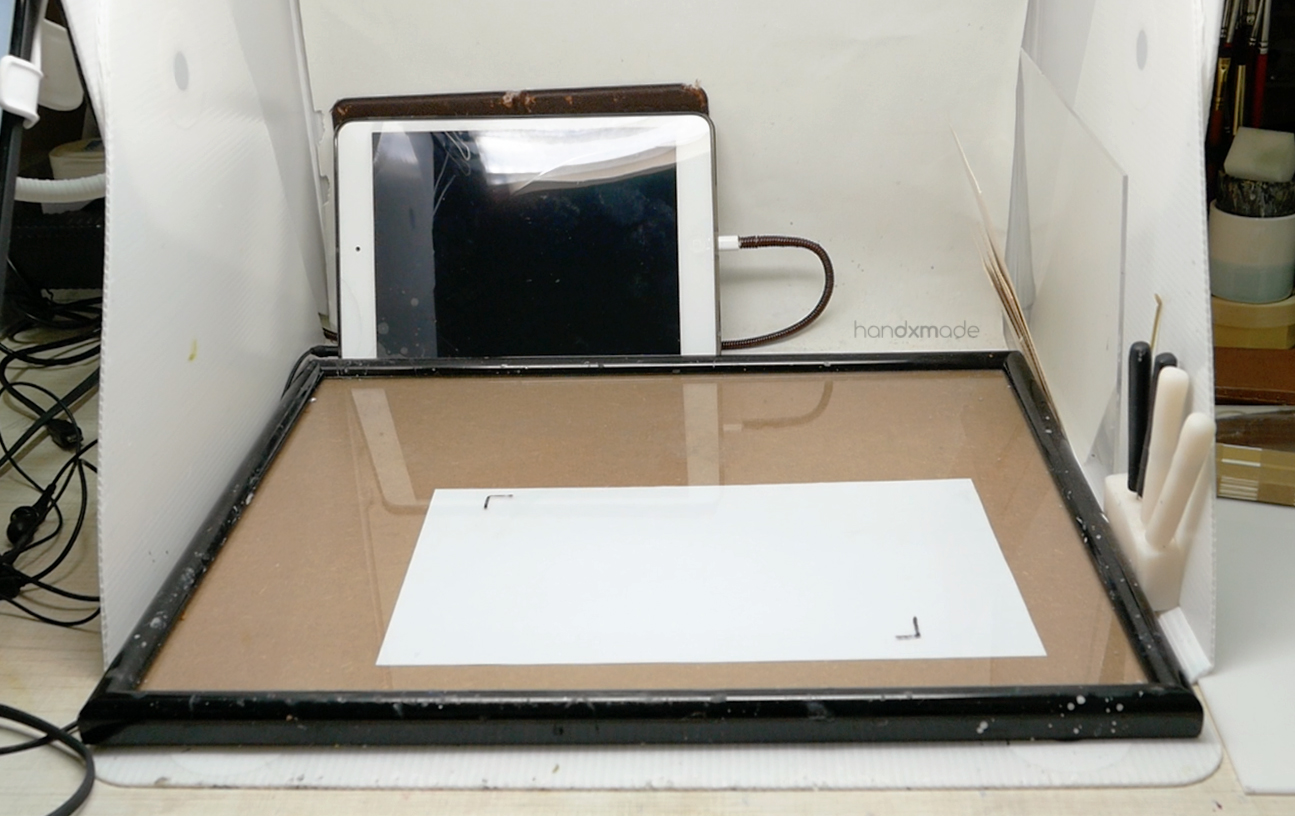
FULL WORKSPACE SET UP
With all that said, here's my full set up!
I work in my custom craft closet that was inspired from Theoriginalscrapbox.com. Built it in SG by countryconcept.com because it was cheaper to find a local contractor than ordering it from overseas and cover the crazy shipping 🙃 It was SGD $3300 and it's a hefty investment but it was one of the best decision I've ever made (especially since it's customised)!
I got Foldio 2 and it's actually a lightbox to take photos in, but I prefer sunlight for my photos and the size was perfect to work in so that's what I did! 😀 Glad I didn't waste the money and actually use it all the time hahaha. The light was perfect to light up everything (except for some shadows which I plan to get more light to reduce).
On my left I have a random cheap phone holder that I use to hold my phone (iPhone 6s plus if you're interested) which is plugged in all the time and I will have my reference photos there!
On my right I have a glossy acrylic board because it's nice to work on a glossy surface for certain things (like rolling the clay flat).
In my Foldio 2 I have my glass photo frame and it covers almost the whole of my foldio which is perfect! I then put the matte acrylic board on top of the frame, securing it with blutack at the back of its corners. I also have my iPad mini to watch (mostly listen) to shows while I work, and a pen rest holder I made with polymer clay to put all my frequently used tools at so it's neater and I'd know where everything is!
At the top of the foldio, I actually cut a hole so that my camera films right through it and gets the top view well, also eliminates shadows/weird angles! I remember feeling very scared, that I'm "destroying" something that was so expensive and potentially ruin it, but I kept the cut out part and I can put it back as and when I want so it's actually not a problem 😂 This was definitely one of the smarter ideas I had HAHA.
I use a Dinkum systems actionpod to support my camera (get a legit one otherwise it'd be flimsy anyway and you'll waste your money), and I use my bf's Panasonic G85 + kit lens to film! The flip screen is definitely one of the best thing about this camera and if I didn't have it I'd have SO MUCH blurry shots 😂 Also the focus is touch screen so that's very very convenient too. Very good camera and lens even though it's just kit lens!
Here's how I zoom all the way in hurhur.
I used to put my previous camera (RX100 MKII) on the foldio and it could withstand the weight, but then whenever I roll something the whole foldio move and the camera moves too LOL so my footage was like shaky 😂 That's why I got a gorilla pod and attach it to one of the shelf! 😊
Okay yay that's all I have for working surfaces and how I film my videos! I know my filming equipments are not cheap and the circumstances might not work for you (not everyone has a shelf on top of their table aye 😅), but hope this gives you a better insight on how I came to find my favourite surface for-possibly-ever and how my filming set up is like! 😊
RECORDING SET UP UPDATE
(23rd September 2017)

On 5th August 2017, I reached my milestone on my Patreon! :')
As per my milestone goal, I (well, my partner did the purchasing because he's the one who knows more about camera and lighting than me 😂) went ahead and purchased some new lighting equipment, and I finally received them 2 weeks ago!
I've been using them for my next few videos, and I'm loving this new "set up" 😊

It's a little bit confusing, messy, and also takes at least 10min to set everything up and prepare some other stuff before I can start work 😅 But I like how I can actually use my whole table to film, which means I can film better watercolour videos, especially for bigger pieces 😍
(Photo is a bit unglamorous because I'm not the tidiest person, photo was taken with my phone, and the new lights is only for my working surface and not any part of the closet opps 😆)
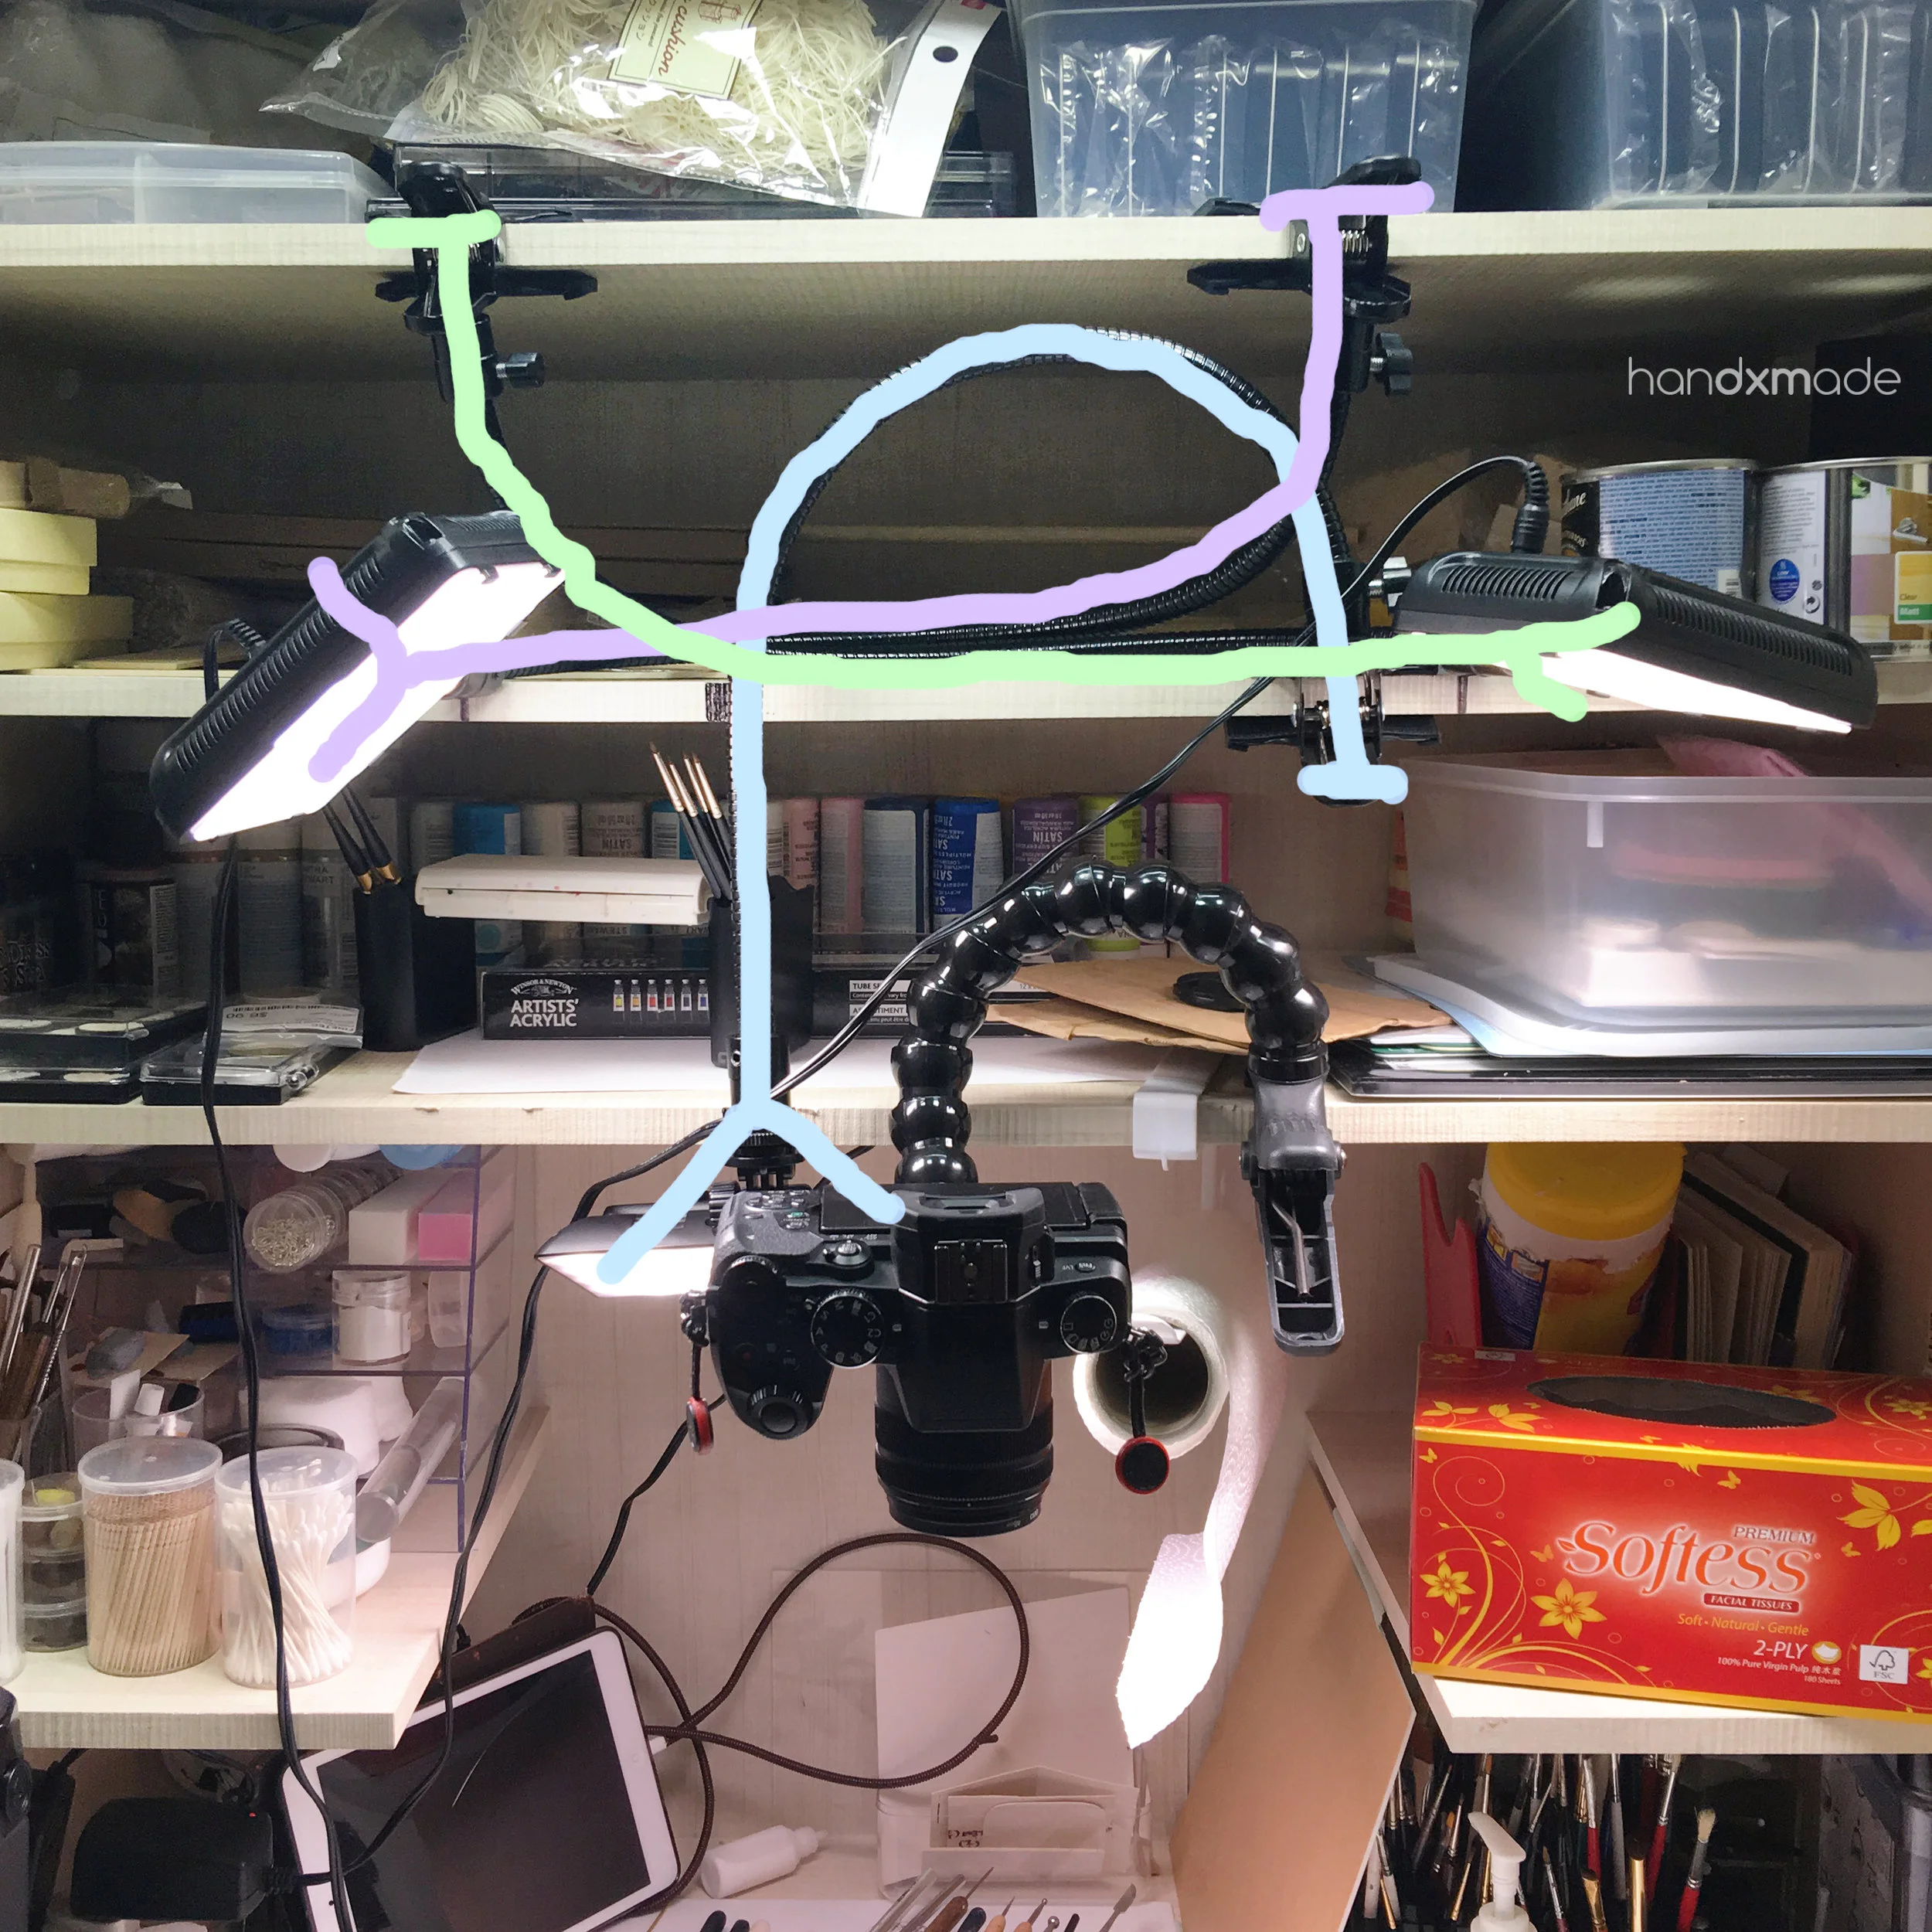
Here's a little diagram to show where do all the light and the clamps goes!
For this set up, here are the things we've gotten and their prices!
Photo Studio 176 LED Video Light Lamp x2 (USD $19.13 x 2 = USD $38.26)
Photography Studio Lighting Light Stand Magic Clamp&1/4 Screw x3 (USD $12.79 x 3 = USD $38.37)
Ninror Black US Plug AC 100-240V to DC 12V 2A Power Supply Converter Adapter for Led Lights Strips x3 (SGD $9 x 3 = SGD $27 = USD $20)
Total: USD $38.26 + USD $38.37 + USD $20 = USD $96.63
Phew I didn't overshoot the target, but that also means I had no extra cash for that month haha 🙃 Priorities aye.
The light on the Blue line on the diagram is a Yongnuo YN300 air which is better than Photo Studio 176 but we decided to get a cheaper one - as long as it works! We also had Yongnuo YN300 air long before we got these new gear so I'm not going to count it in, but it's USD $38. It's better to have all the lights the same as there might be colour issues, but I didn't want to spend another $20 when we have Yongnuo haha.
I'm grateful for my partner who thought through every detail for me - from the type of light and clamps, to battery issue (hence the adapter), ordering and setting everything up with me. Thank you ET ❤
(Do note that prices might vary as seller might increase/decrease their price due to inflation)

DISCLAIMER: Some of the links above are part of Amazon's affiliate program, which helps support me a little! If you're interested in the things I've recommended and would like to purchase one for yourself, it would be amazing if you could use the links provided 💕Here's how the light does on my table! 😊 Look at how even the lights shine on the acrylic board!
The two Photo Studio at the left and right is adjustable so I can make sure that the light covers the sides, which is usually my issue for lighting on the table. It also solved my shadow issues that I needed to fix with Foldio 2, too. Yongnuo YN300 actually shines kind of downwards and at at angle, so that it "avoids" the camera and doesn't cast more shadows!
As you can see, I removed the Foldio 2, and now I actually have space to have more storage space yippee! 😊 I need to store my acrylic paints so this is a great extra space I get. I also don't feel so confined and squashed, working INSIDE the Foldio 2. Now I can reach things at the sides easier too 👍🏻
Honestly think this is the best set up for me right now for filming, or even normal usage - it's just so bright and I love how I don't have much issues with shadows as much now!
Will post a video that I filmed with this set up when it's available (pretty soon!)
DISCLAIMER: Some of the links above are part of Amazon's affiliate program, which helps support me a little! If you're interested in the things I've recommended and would like to purchase one for yourself, it would be amazing if you could use the links provided 💕