
NINTENDO SWITCH COLOUR RECIPE + OTHER INFO
This article by @handxmade is free for personal use ONLY, any reproduction is prohibited.
If you’d like to show your appreciation for these articles through monetary means, you can send me a ko-fi! ☕️
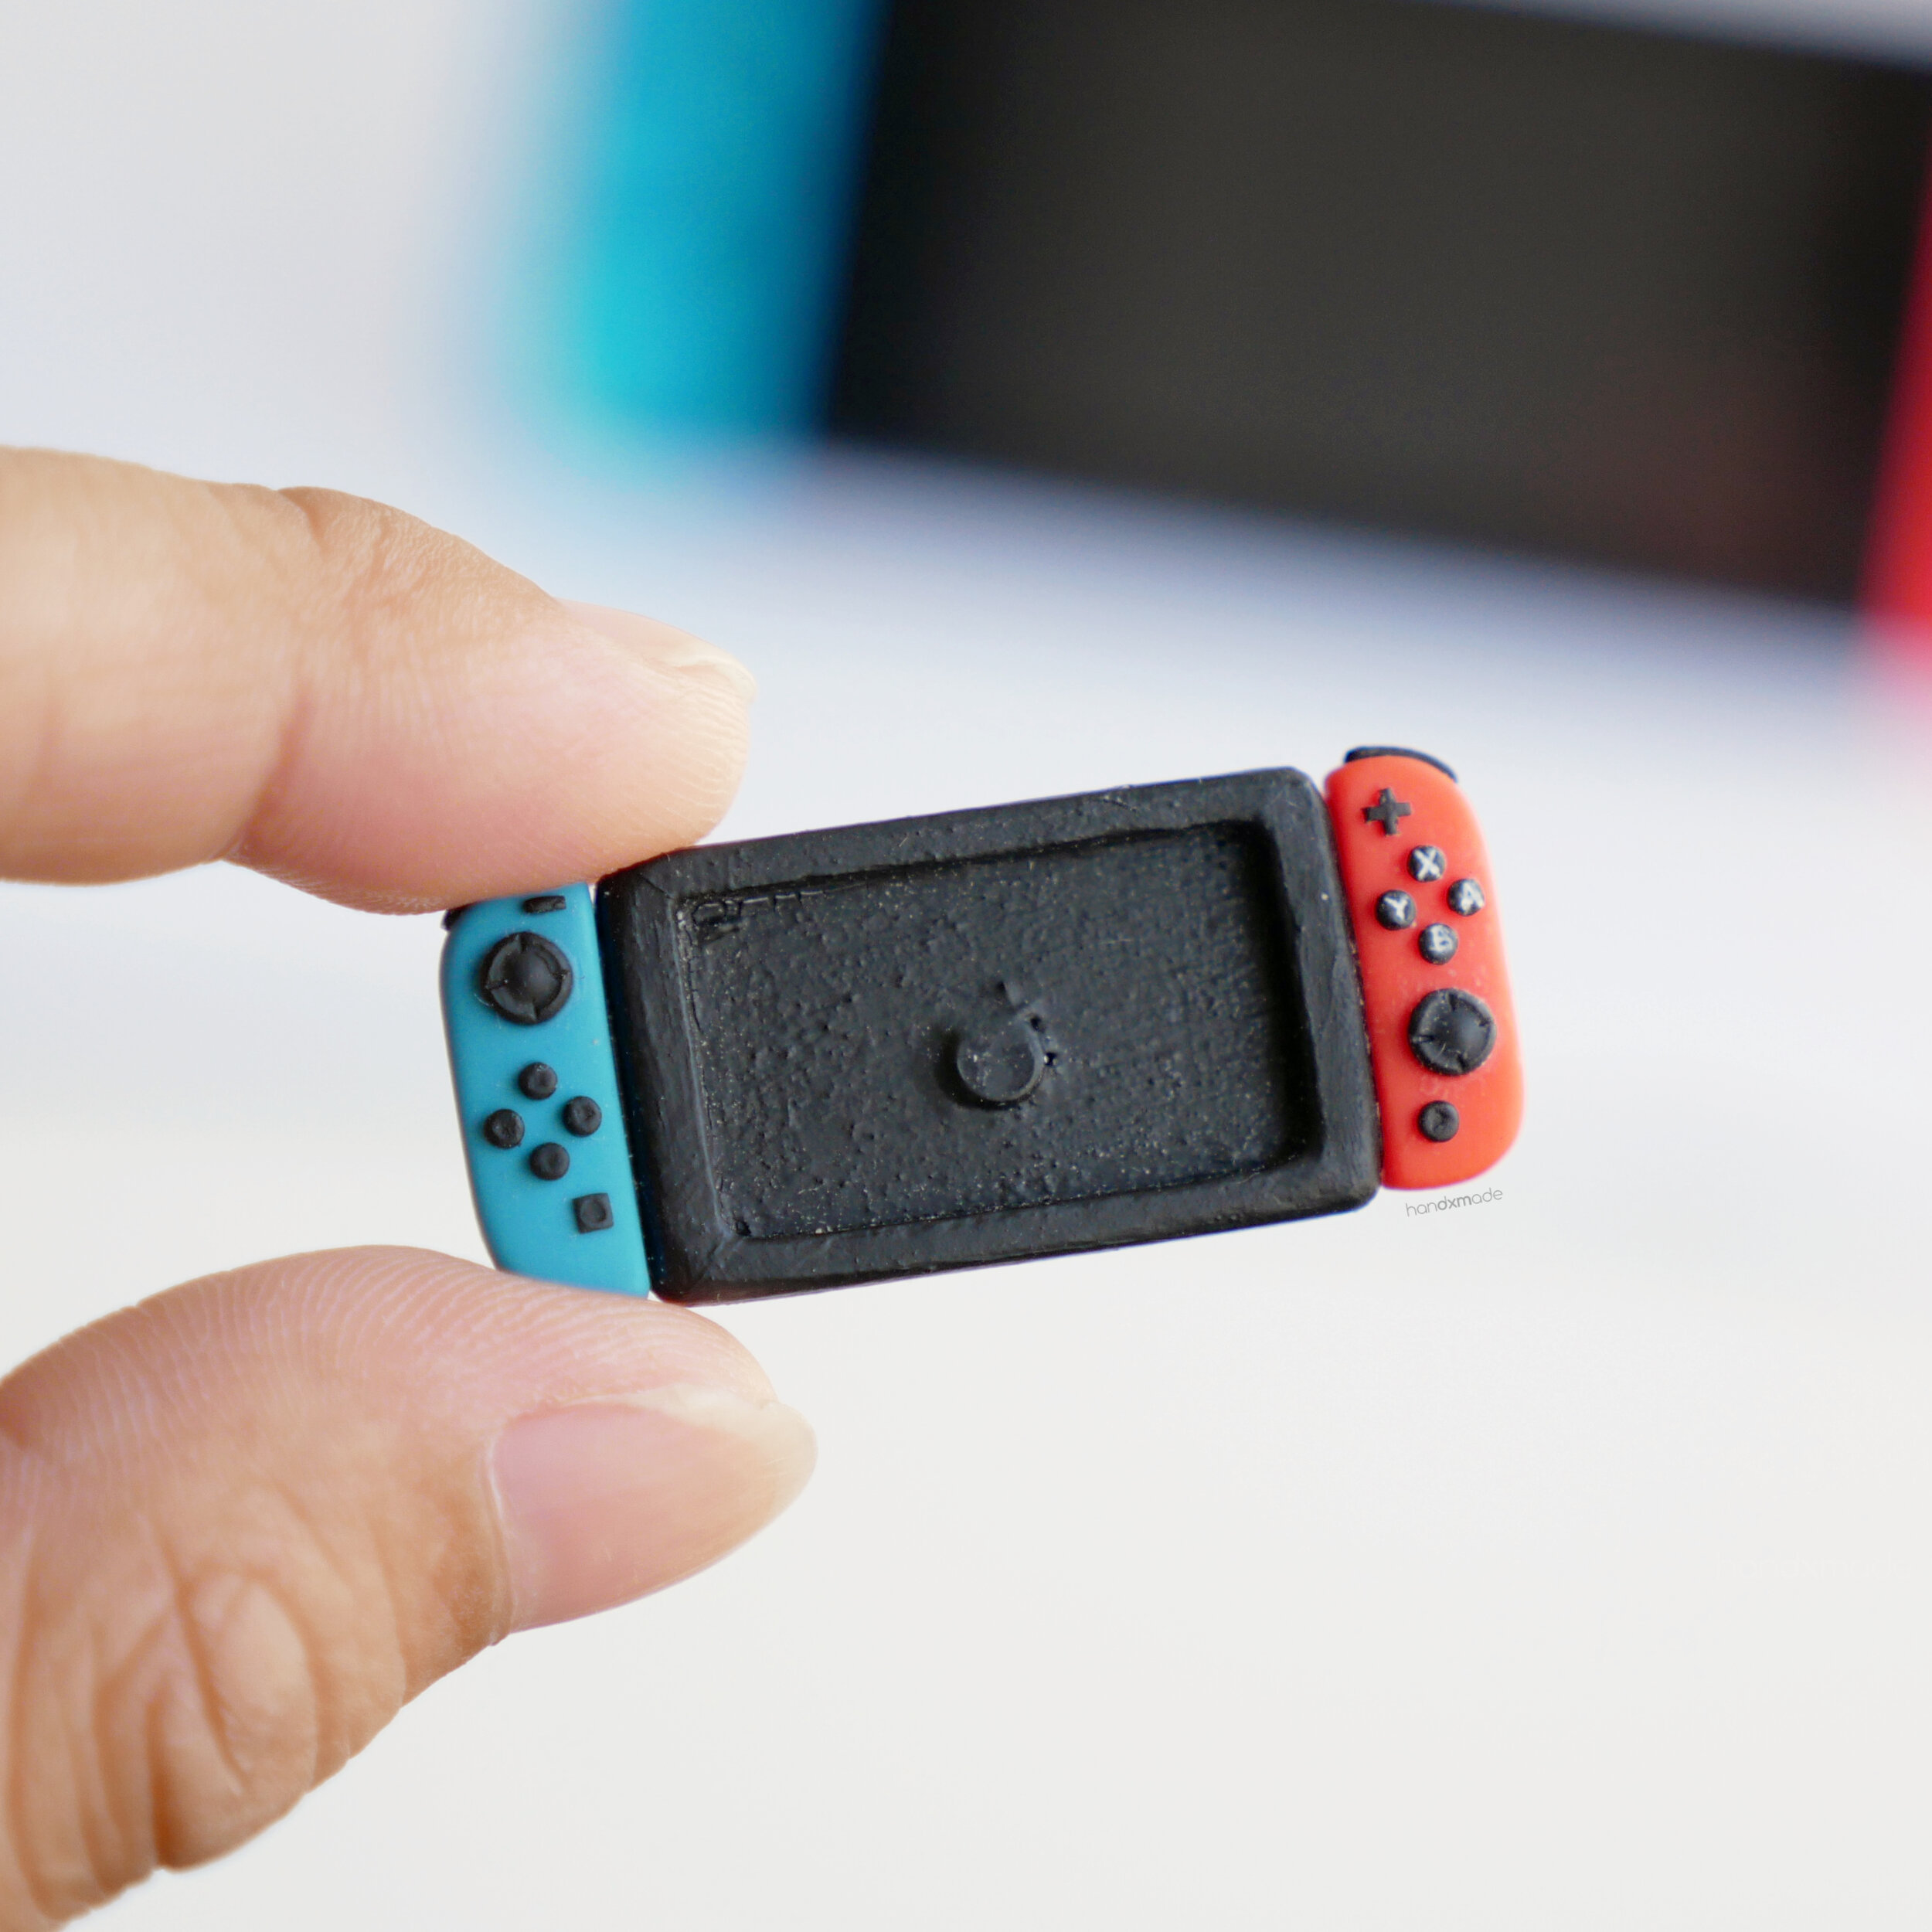
Yooooo!! It’s been a while (more than half a year omg) since I have a colour recipe for you guys - ever since I started on the miniature house, I just have no time for other stuff… But since I’m putting it aside as a side project, focusing on creating a few smaller completed projects like this one, here’s all the information you’ll want to have before you start making your own miniature Nintendo Switch! 🥰
Before that, here’s the process video I made - if you haven’t watch it yet, please do so you have a better idea of how each part is formed! 😊
Scroll all the way down for colour recipe immediately if you don’t wanna read my musings HAHA.

Here are the notes I did up while I was working on the colours + everything else!
I find that writing things down helps a lot, especially with my horrible memory lol. So this is what I’ll be referring to if I ever need/want to remake a miniature switch again! 😀
I also use frixion pen, which helps to erase stuff while I’m still figuring things out! Especially for things like colour recipe, there’s just so much trial and error hahaa.
You might not be able to understand some parts, because they’re written with my own tools in mind (PK = pocket kitchen for example, which is in reference to the pocket roller in pocket kitchen). But you’ll be able to get a few information off this page!
I also use basswood for the wood portion, and I bought my wood from a local craft store call Artfriend. The sizes are all there, and unfortunately they’re all in inches. Hopefully this still helps somehow! I’ve also included the size of the styrene I used for the screen - but this isn’t that important anymore if you’re peeling it off afterwards like I did. (Watch the video if you don’t know what I’m talking about! Haha)

Note that the brand of polymer clay I use for everything is Sculpey Premo, but this time round I also used Dukit clay for the red joycon, as I could get a brighter red thanks to the neon colour from Dukit!
Not sure if you can see the difference, but irl it really does look quite different to me. The one I use in the video and in photos is Dukit Mix.
COLOUR RECIPE
JOYCONS

BLUE JOYCON
Cadmium Blue (1) : Sunshine (1/4 + 1/8) : Turquoise (2) : White (1/8)
RED JOYCON (Premo clay)
Cadmium Red Hue (1) : Orange (1) : Sunshine (1/4)
RED JOYCON (Dukit clay)
Scarlet (1/2) : Fluorescent Pink (1) : Orange (1/4)
Have fun, and do let me know how your miniature Nintendo Switch turned out if you do attempt it! 💖