
DIY MINIATURE GLASS GLOBE HOLDER TUTORIAL
This article by @handxmade is free for personal use ONLY, any reproduction is prohibited.
If you’d like to show your appreciation for these articles through monetary means, you can send me a ko-fi! ☕️
It’s been awhile since I wrote a “tutorial" kinda post! I couldn’t find any information I wanted online about a miniature glass globe holder, so I decided to YOLO and made one myself HAHA.
I’ll be writing about my thought process and everything, so if you want to jump straight to the tutorial just scroll down! 😀
THOUGHT PROCESS
When I was making this Sumikko Gurashi series, I needed to make a base for this miniko Obake - I wanted to auction it and it’d be weird to just auction Obake by itself…it’s too tiny to be an individual decoration hahaha.
Since Obake is essentially a ghost (a hecking cute one at that), I wanted it to kinda float! For Hokori (dust ball), I put him in a miniature bottle, but somehow I didn’t want the same for Obake.
I then remembered I had some miniature glass globe I had purchased (because I’m a hoarder), and heyyyyy Obake FITS!
However, I didn’t want to auction it as a necklace piece (which is what the glass globe is intended to be I’m assuming), and I remembered seeing glass globes holder around so I researched it and found a picture of it:

I figured this would make the perfect holder for the glass globe, and Obake will be able to float all the way!
Since I couldn’t find any tutorials online for this glass globe holder for miniatures, nor was anyone selling it, I decided to make one myself out of craft wires ✨✨✨
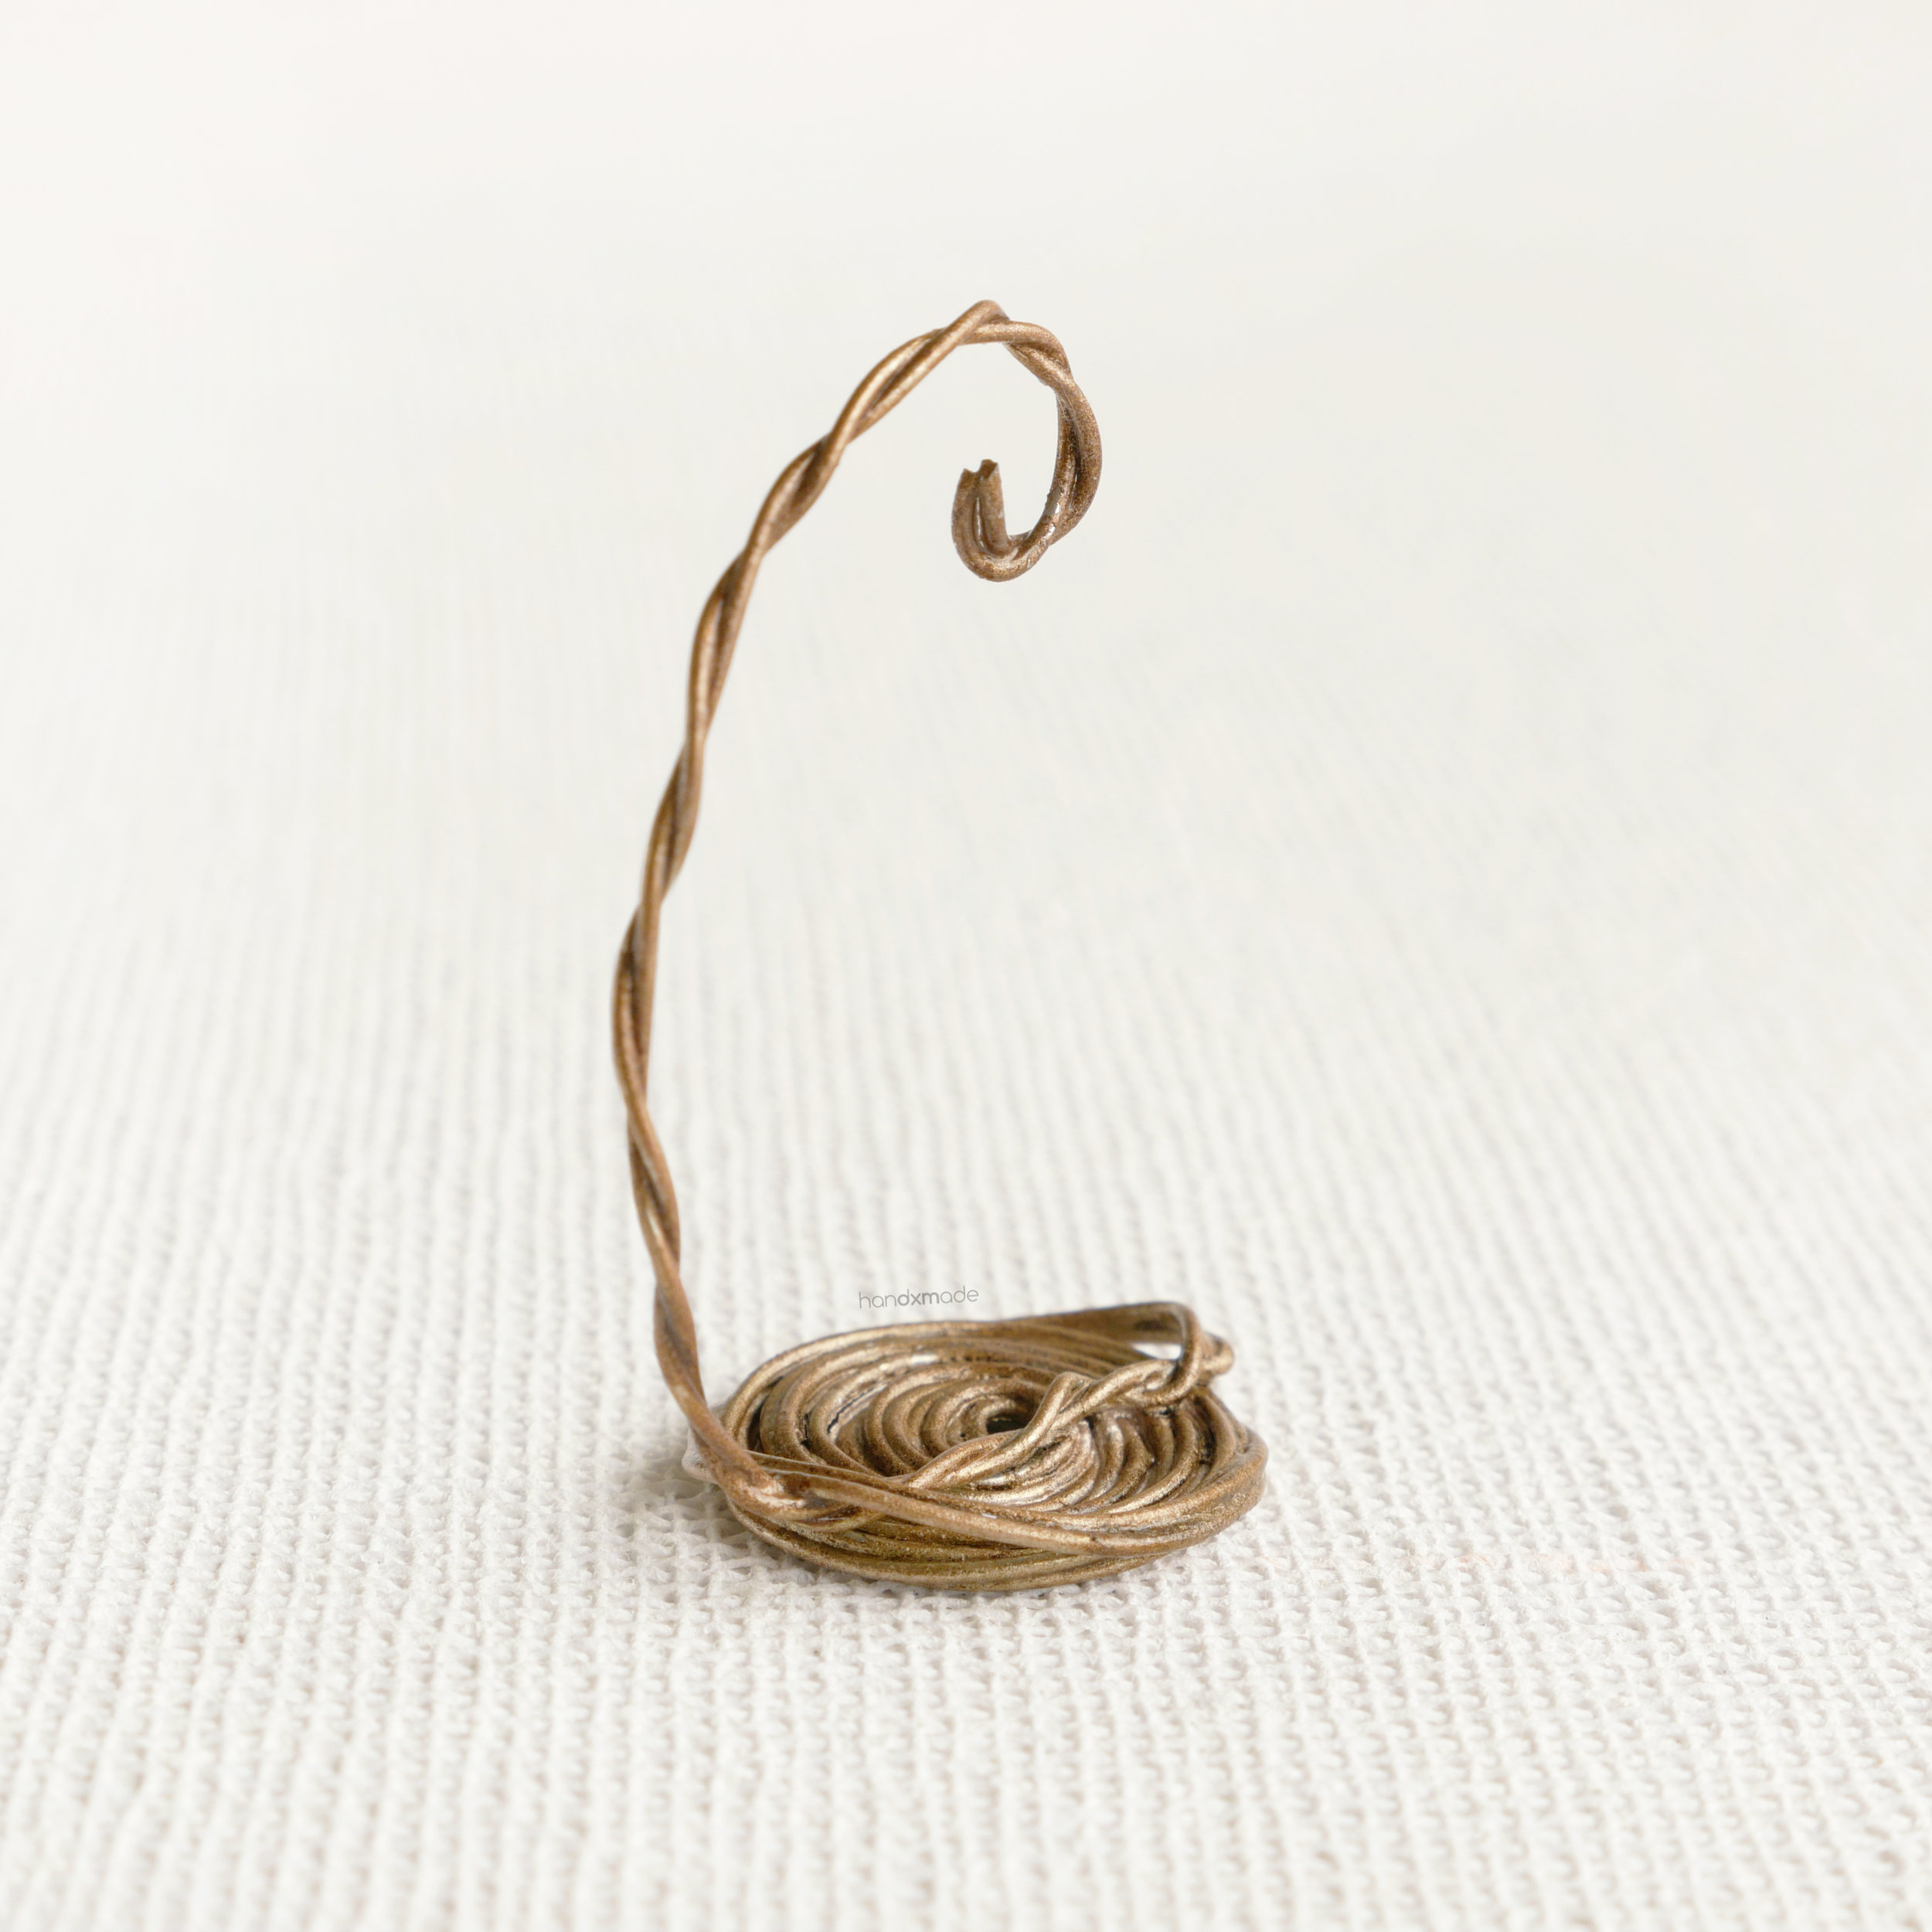
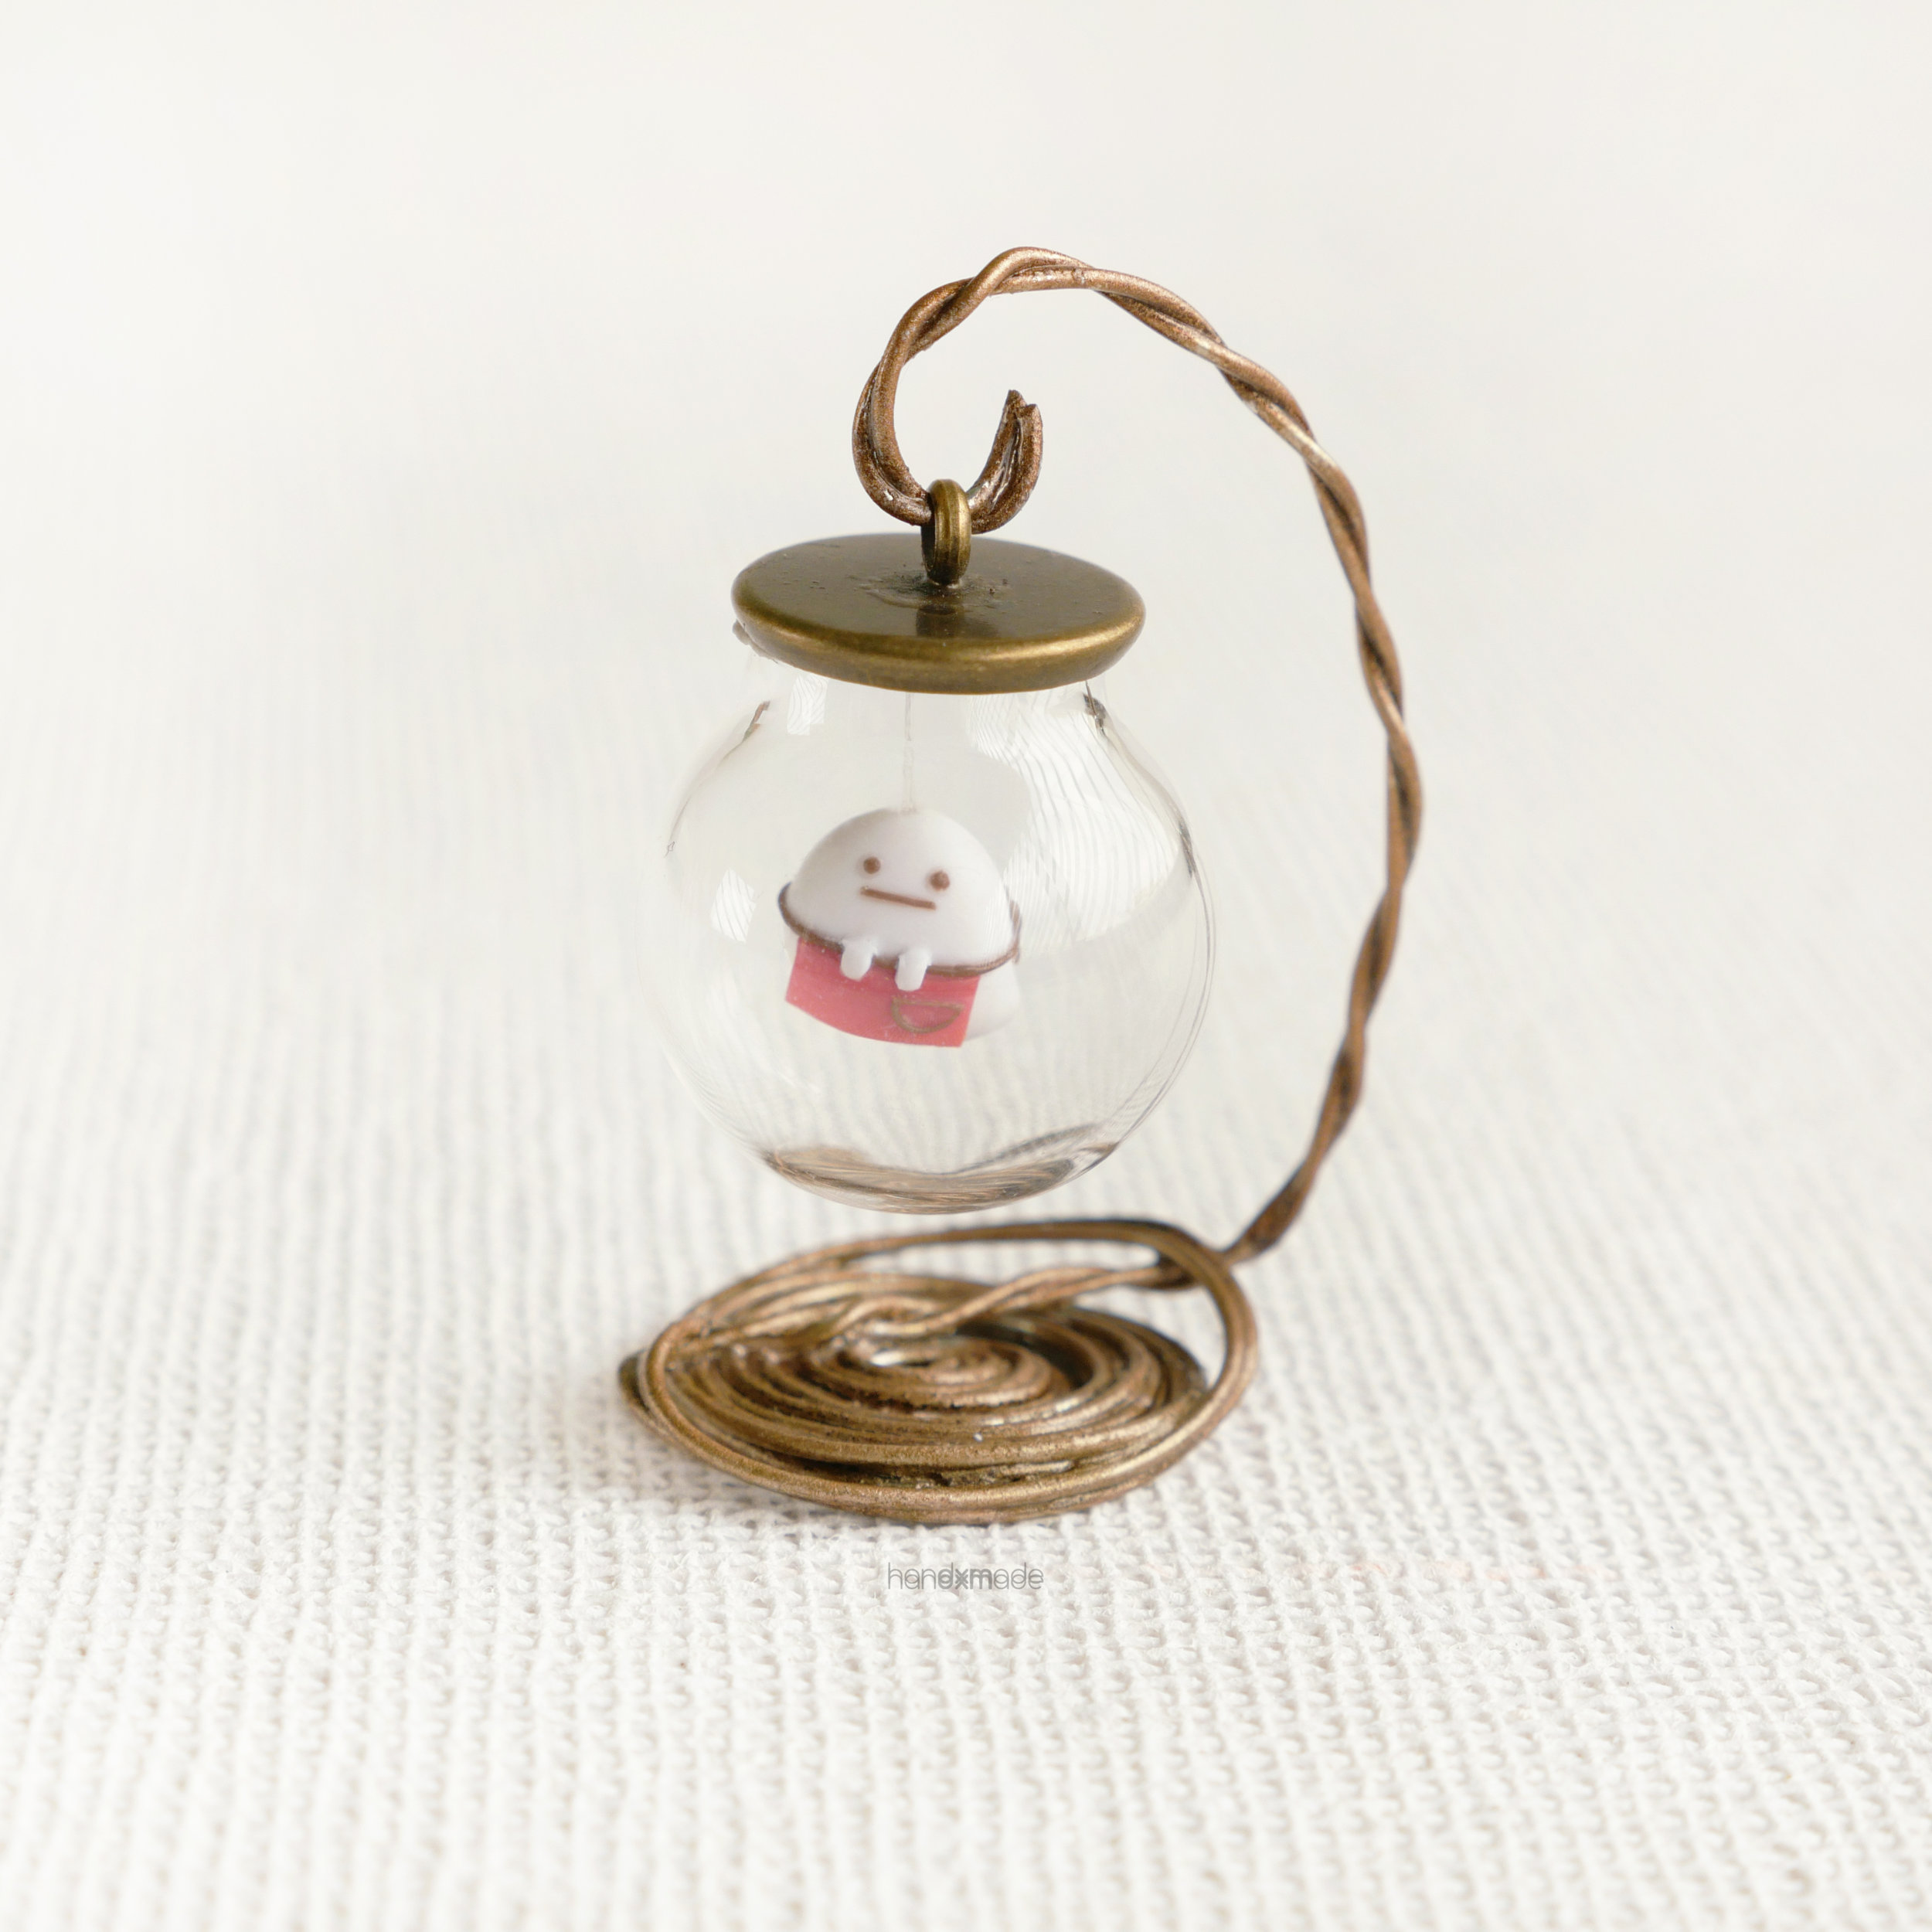
Here’s the end product! 💕

Yes it’s pretty tiny, but it fit my 2cm in diameter glass globe super well and I wouldn’t have it any other way! I’m so proud of it omg hahaha but it’s really easy to make, and I’ll show you every single step with GIFs below, so don’t worry 😉
Please read before proceeding:
This article by @handxmade free for personal use ONLY. Do NOT distribute. Any reproduction is prohibited.
If you’d like to show your thanks for this free template, maybe consider being my patron or sending me a ko-fi - it will definitely make my day and help me with my expenses for my future craft endeavour! ♥️
WHAT YOU’LL NEED
• Glass Globe/whatever your holder will be holding
(Note that my glass globe was 2cm in diameter,
and depending on the size of your glass globe, the size of the holder will vary)
• Craft wire/jewellery wire (colour of your choice)
• Wire cutter
• Round Nose Plier
• Flat Nose Plier
OPTIONAL
• Acrylic paint (if you don’t have craft wires in the colour you want)
• Paint brush
• Gloss varnish
HOW TO MAKE
A MINIATURE GLASS GLOBE HOLDER
Before we start, I would like to mention that my glass globe is 2cm in diameter, so the dimensions and measurements I’ll be providing will be for a glass globe of this size. I’ll be leaving tips on what to look out for if your glass globe is of different size, so don’t worry if the subject’s size is different from yours - you CAN use what you learn here to make a holder you need! 😊
That said, my holder’s dimension is 4cm in height, and 2.3cm in diameter for the base, for a glass globe of 2cm in diameter.
The GIFs provided below is in REAL TIME! It’s in an infinite loop, so you can take your time to watch it again and again if needed 😀
Take your craft wire, and unspool around 80cm worth of craft wire.
It’s always better to have MORE craft wire than less!
We will start from the base of the holder.
Fold the two ends of the 80cm wire together, and pinch the rounded side of the craft wire with a flat nose plier.
With your round nose plier, roll that same end into a circle. It might take awhile, so don’t rush through it and you’ll get the hang of it soon enough!
Switch the a flat nose plier to get a better grip after you get a circle!
For me, I find that once I spool it around a few times with the pliers, it was easier to use my fingers to roll the wire side by side - better control this way!
You need to build up the base with the craft wire to the diameter you need, which MUST be bigger than your glass globe in order for it to hold it up. For me, it was about 2.3cm in diameter for a 2cm in diameter glass globe. I would go for that or even 2.5cm for a good support, and I wouldn’t go too far as I didn’t want the base to be too big and make the whole decorative item look unproportionate.
This is purely personal preference and a stylistic choice, but the rule of thumb is to make sure the base of the holder is BIGGER than your object - so it will be able to support your object well without toppling over!
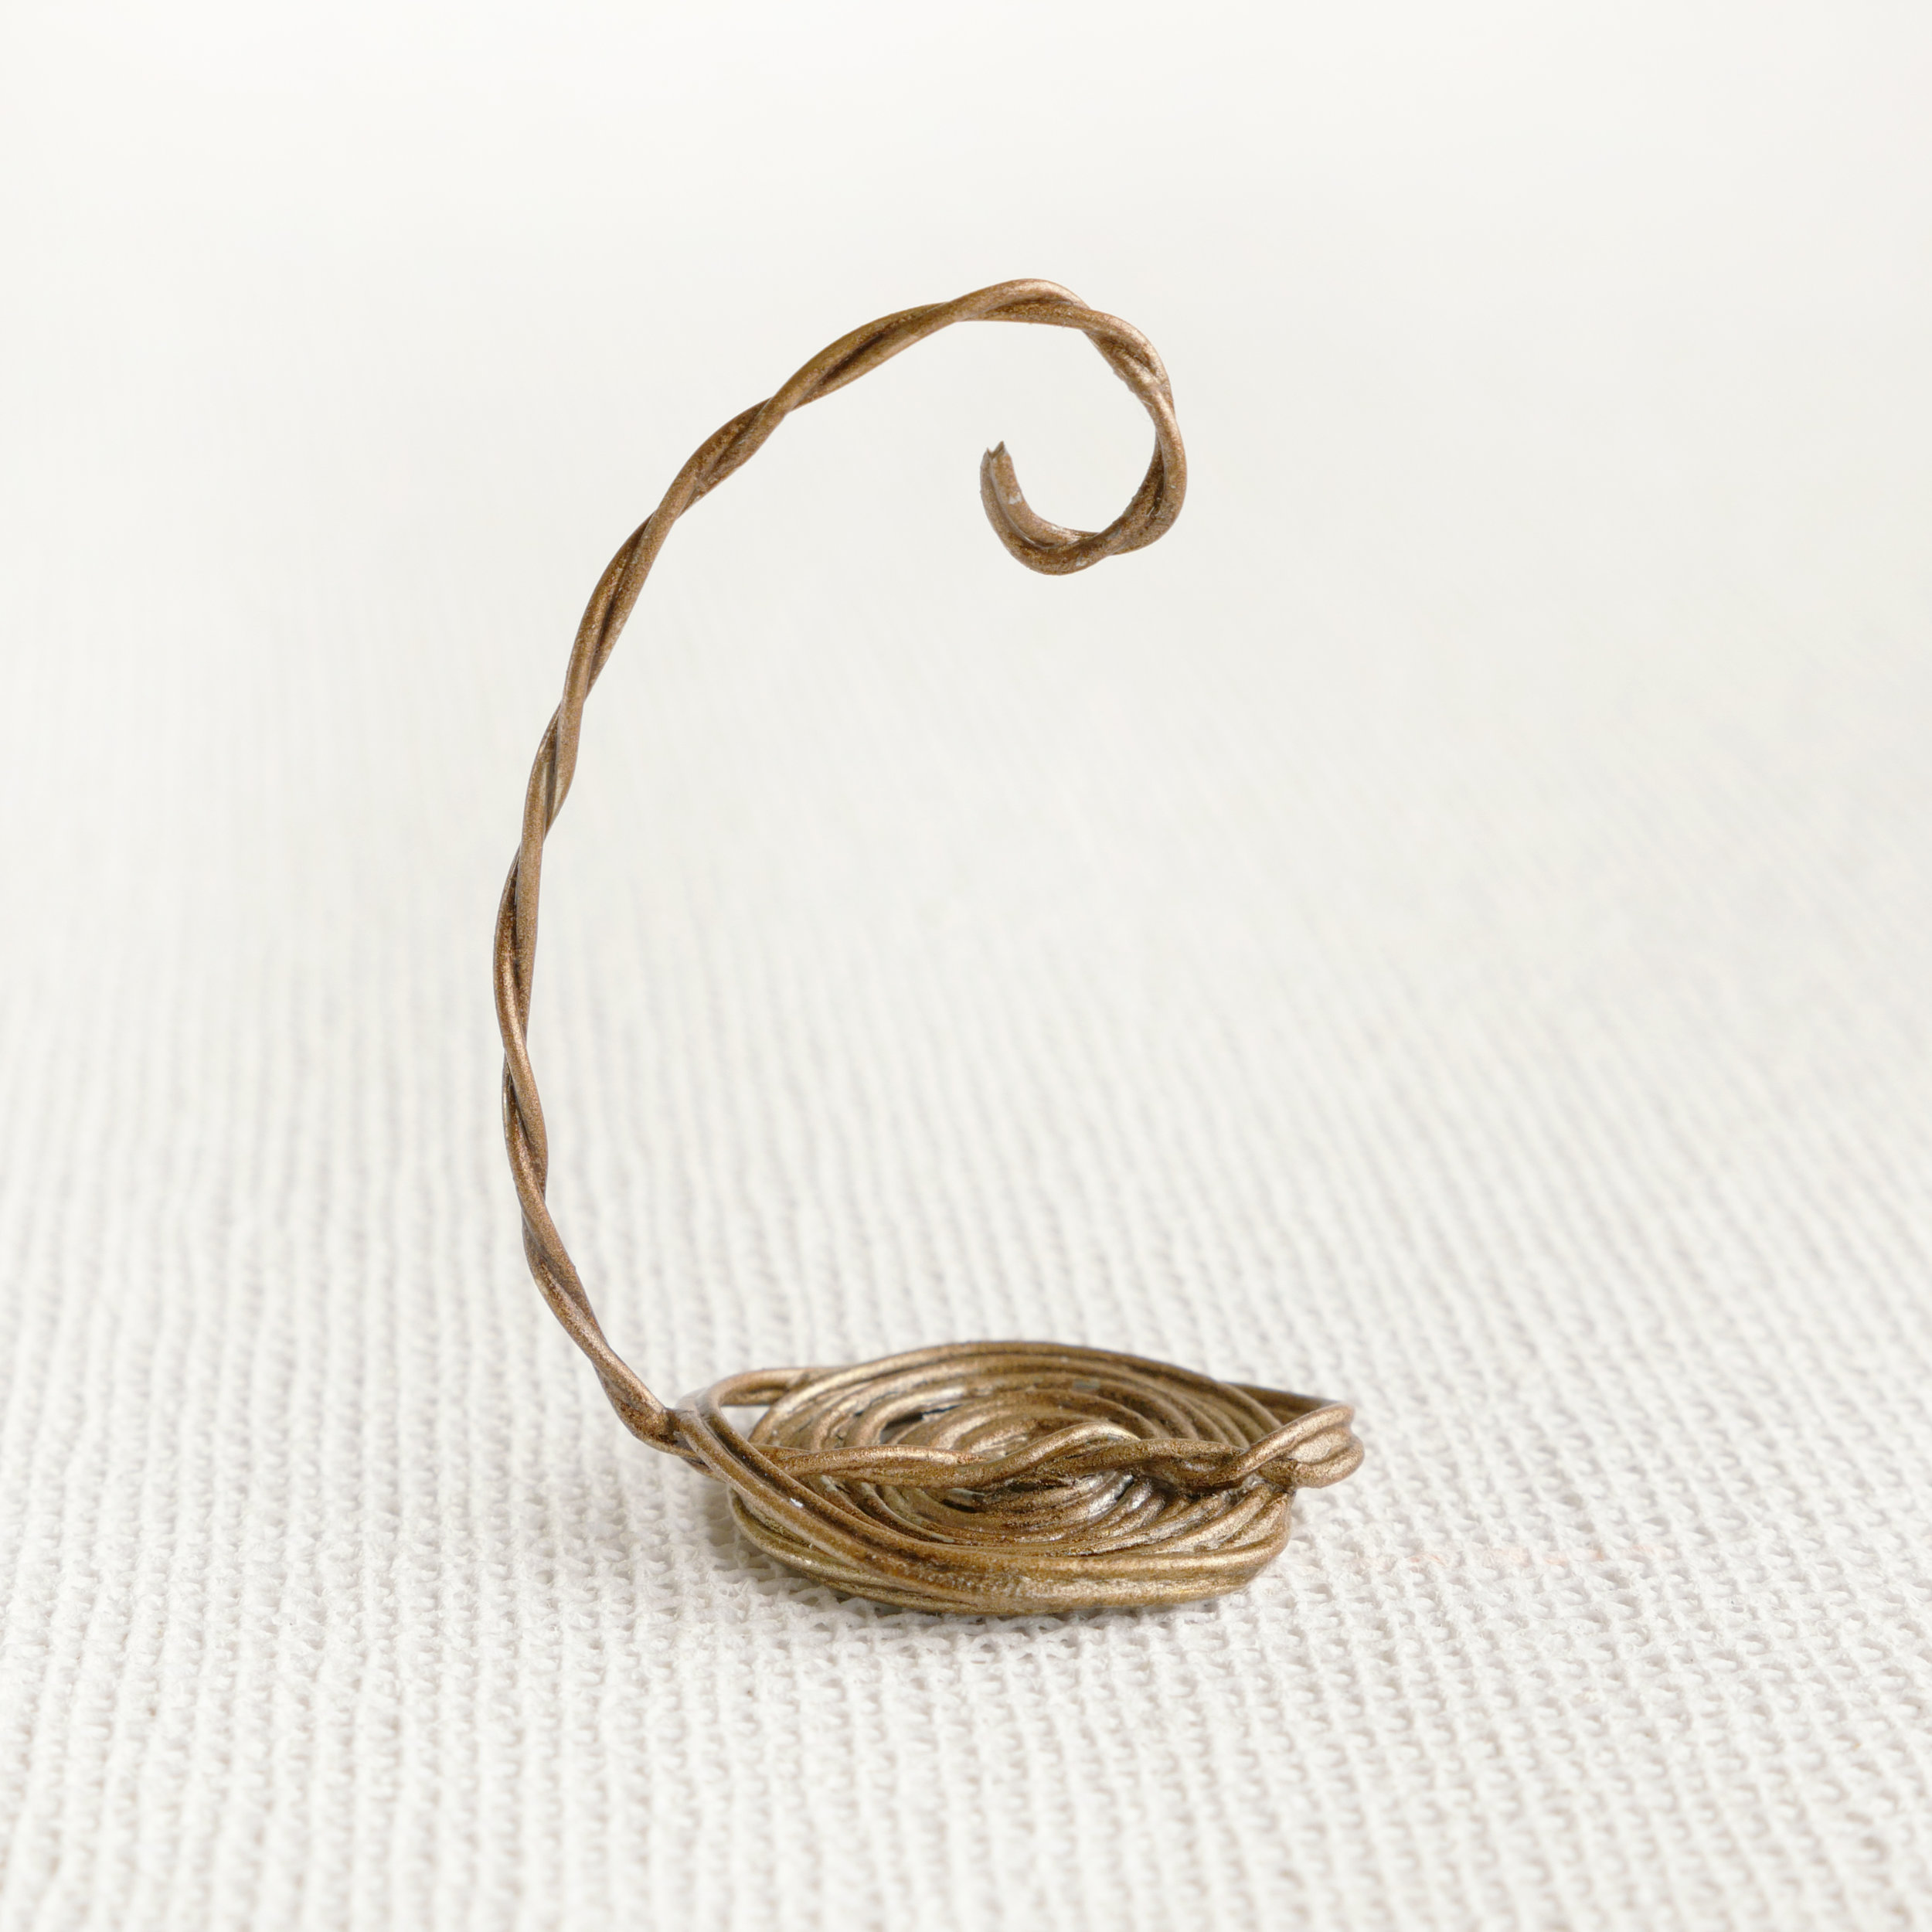
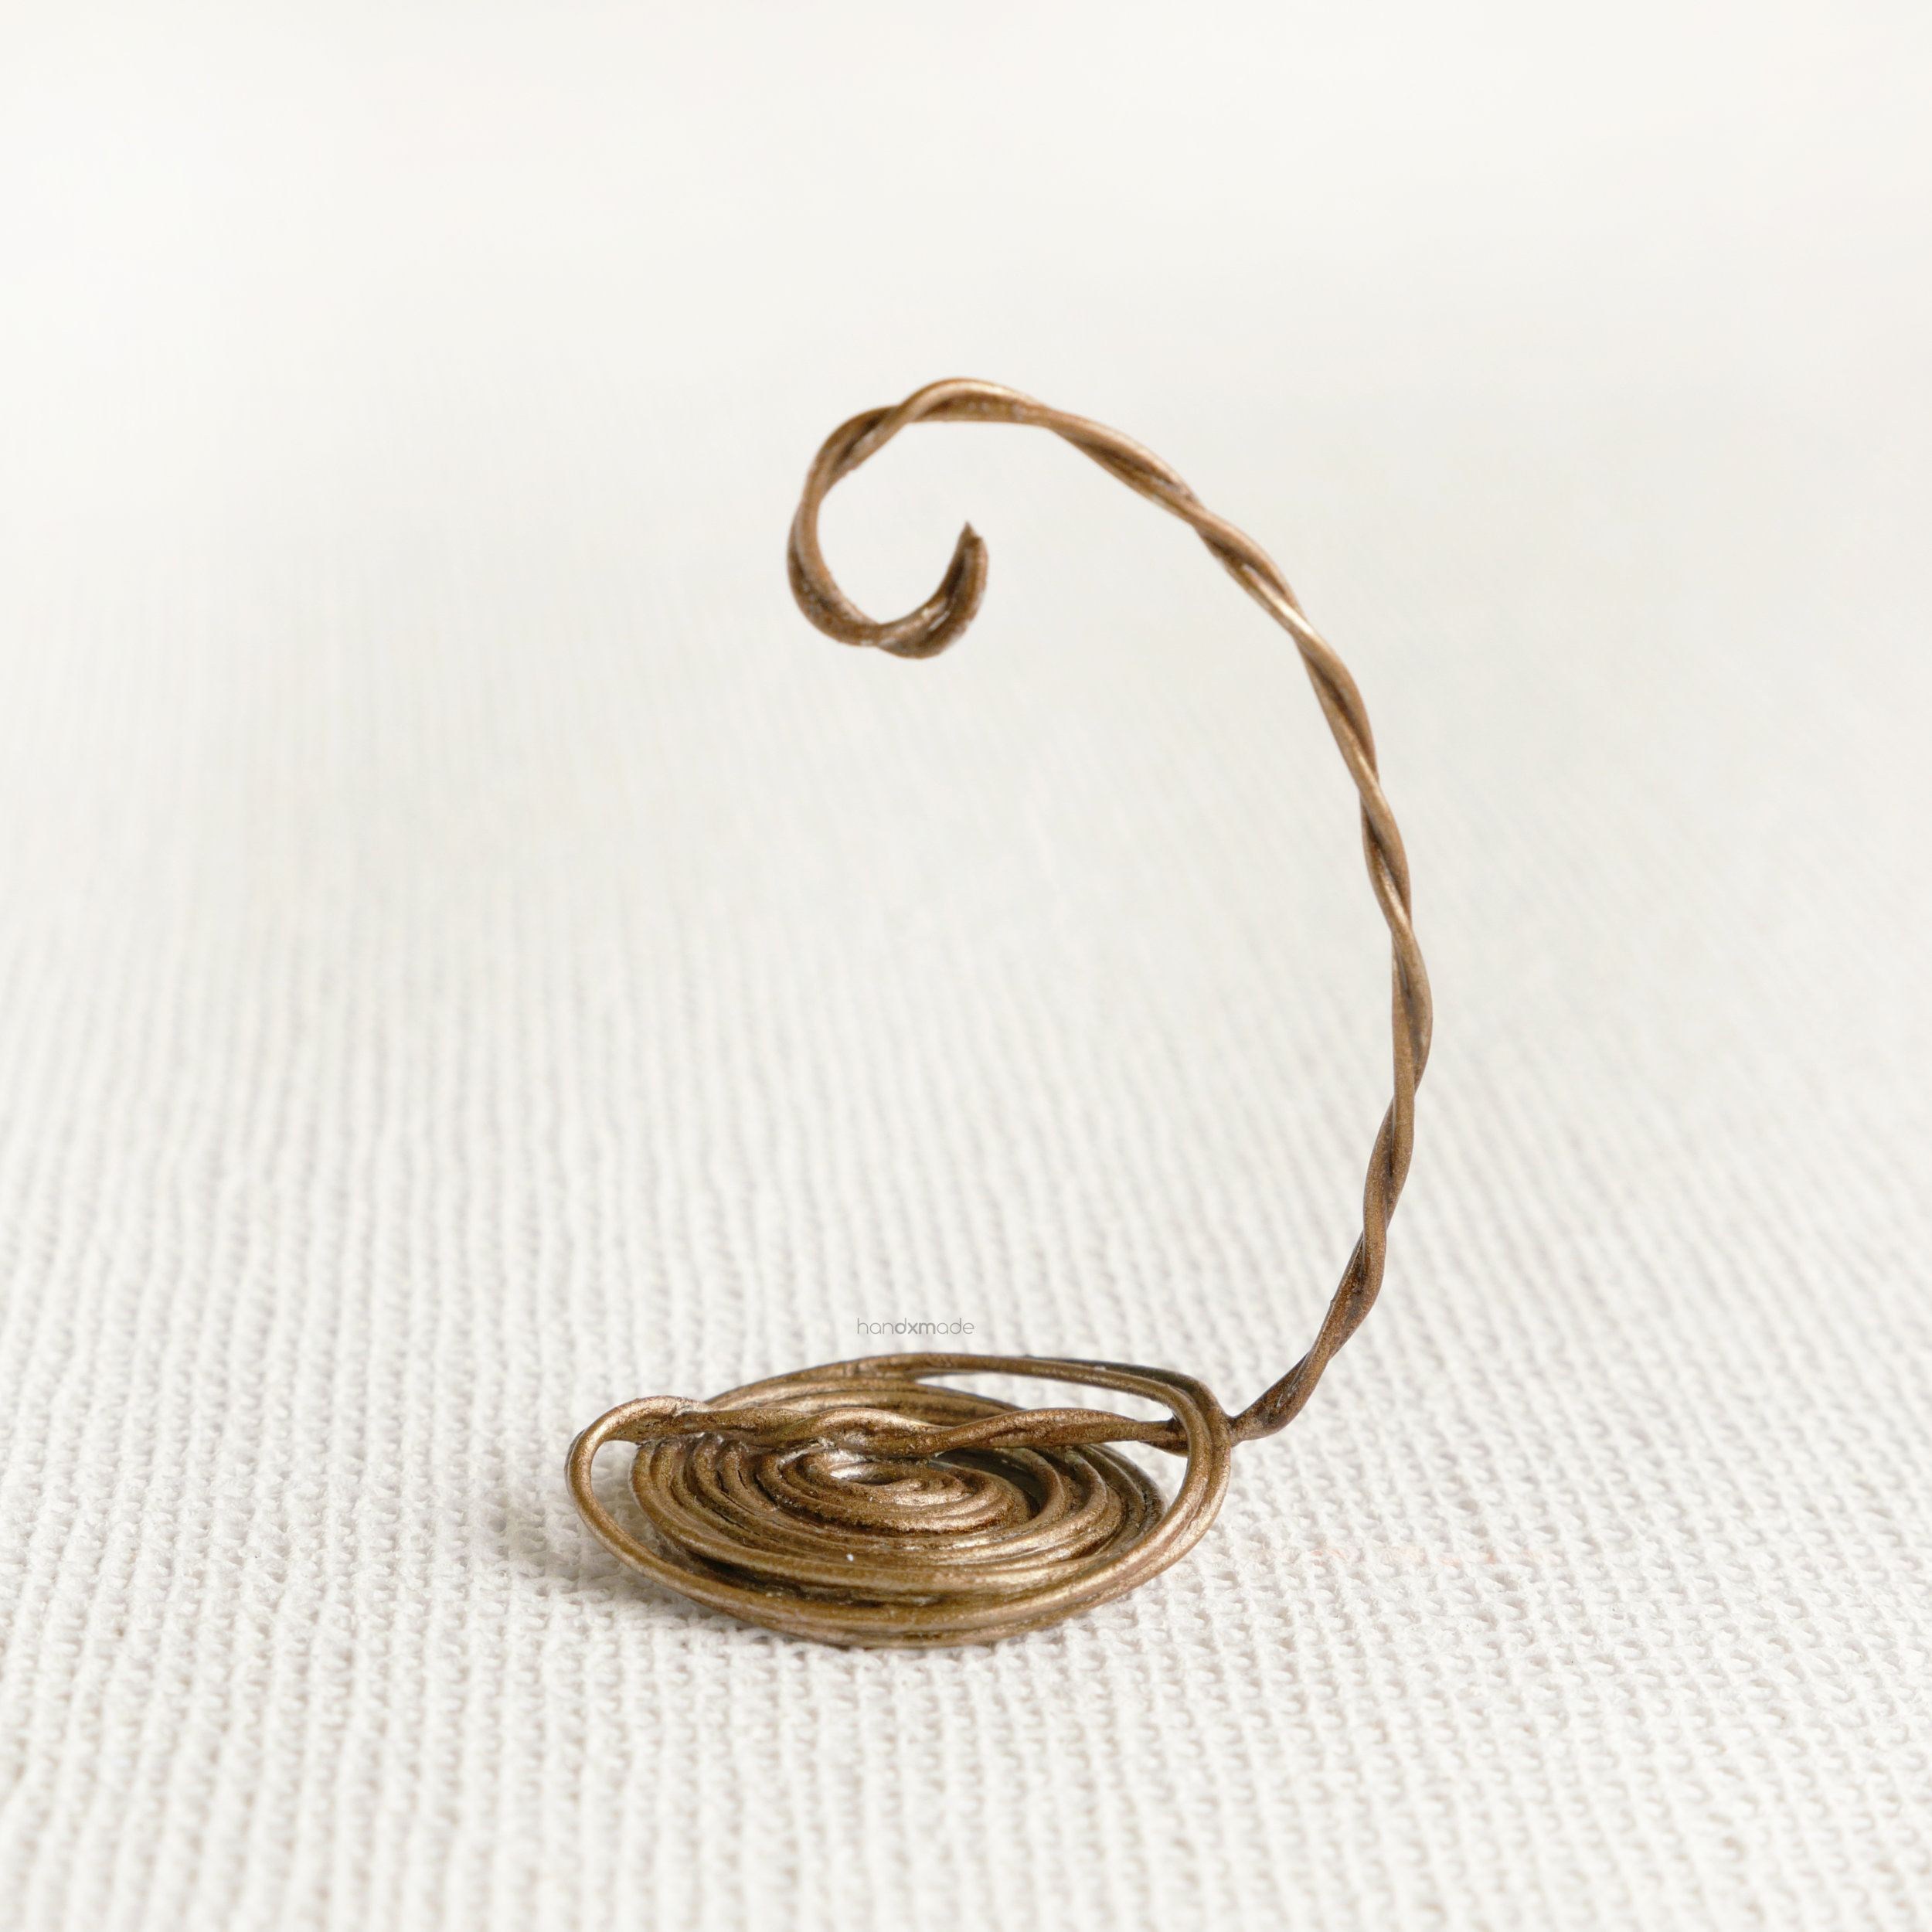
Once you reach the size of the base for the holder that you want, fold the excess wire to be perpendicular to the base. I used a flat nose plier after my fingers to ensure it sits perpendicular properly.
Twist the two wires together. Try to make it consistent if you can! One tip is to make sure you are twisting BOTH at the same time, not one wire over another.
Trim off the excess wire with a wire cutter!
I twisted about 9cm worth of wire. Again, MORE is better than less!
Take the twisted craft wire, lay it against the base, go through the last loop you made for the base. This is the ensure the twisted wire will stay in place and not move around so easily!
Bend the twisted craft wire into a crescent shape (or any shape you want, really), and trim off the excess! (the length for mine was about 6.5cm)
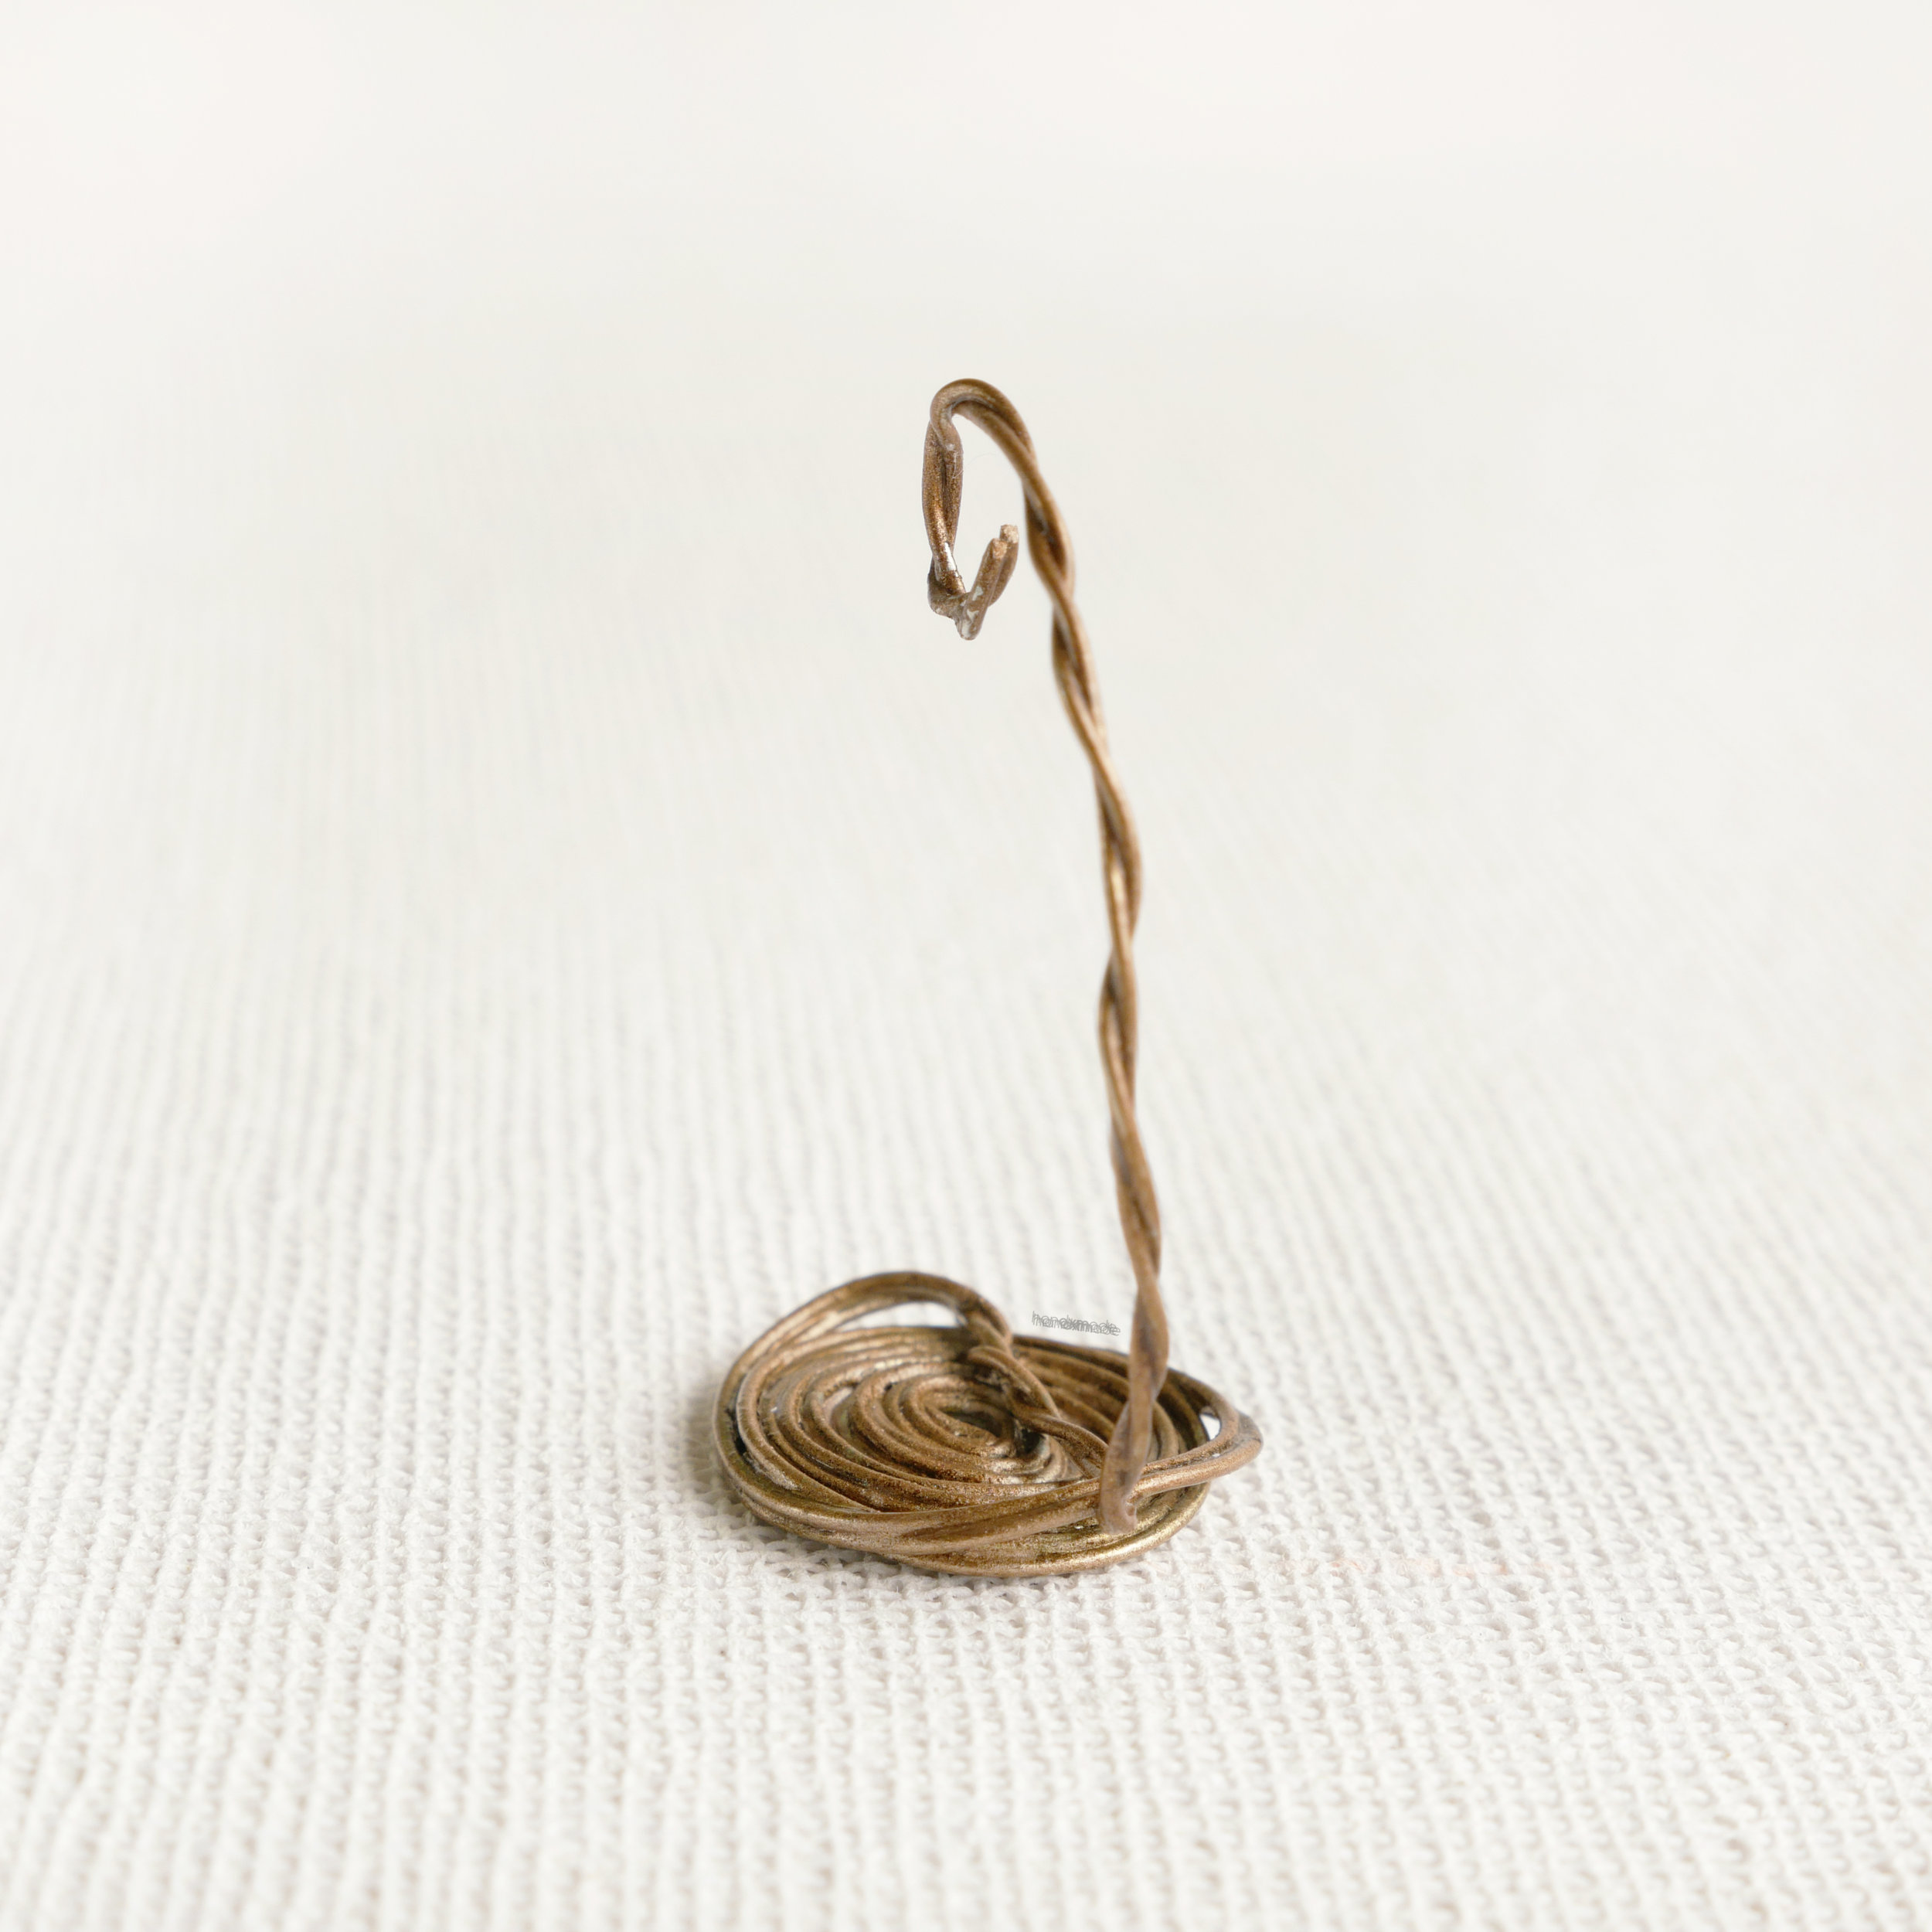
Use the round nose plier and curl the edge of the twisted wire into a hook - this will be what you will hook your object with, so make sure the end of the hook really points to the sky!
Note how I used the thickest end of my round nose plier! This will leave a lot of space for the glass globe to hook on to.
Put your glass globe and make sure:
The glass globe or your object can go through the hook you made
Size of the base is to your liking
The base is flat and stable enough, and it can STAND with your object in place
OPTIONAL
For me, I only had silver craft wires when I was making this, so I decided to use gold acrylic paint to paint it to the colour I wanted!
There are other craft wires with colours around, as you can see here - so if you fancy, you could just get the colours you need and skip this step!
I switched to copper acrylic paint afterwards as it fits a lot better with the cover for my glass globe! 😊
Painting on craft wires is kinda tricky, the paint doesn’t stay that well and it kinda pools together. You can use a primer if you’d like, or you could just paint a few layers like what I did.

Remember to use a varnish to lock the acrylic paint down better! I use FIMO gloss varnish, as I want the glossy look from the acrylic paint.
And you’re done! Congratulations! 💕✨

A little extra note, just in case you’r interested/want to try to have a single line instead of the twist.
The reason why I did it this way is because just using one piece of wire isn’t stable enough for this to carry the glass globe without toppling. In fact, it was actually having trouble standing by itself! Having double the wire increased the weight of the base too, which should be heavier than the glass globe itself to ensure the best stability.
I prefer the look of the twisted wire too as it was easier to shape it to a smoother crescent, whereas one wire can look sloppy especially since it would bring attention to all the imperfection a lot more.
I just wanted to tell you about the thought process so in case you want to try another method, you’ll know what’s needed for the holder to be a stable one for your own craft! 😊
….and this is the end of the tutorial! I hope this helped you, especially when I couldn’t find any tutorial online myself. This would be great to hold any glass globe you have and use them as a decor instead of a necklace (especially if your glass globe’s cover is like mine!)
Hope it was easy to understand, and let me know if you have any questions! You can contact me via my Instagram @handxmade where I’m the most active, or email me at info@handxmade.com 💖Do share it with me through these medium if you made one yourself too, I would love to see it and share it! 😊
This post includes links that are part of Amazon's affiliate program, which helps support me a little! If you're interested in the things I've recommended and would like to purchase one for yourself, it would be amazing if you could use the links provided 💕Handxmade is a participant in the Amazon Services LLC Associates Program, an affiliate advertising program designed to provide a means for sites to earn advertising fees by advertising and linking to amazon.com