
VARNISHES + UV RESIN
This article by @handxmade is free for personal use ONLY, any reproduction is prohibited.
If you’d like to show your appreciation for these articles through monetary means, you can send me a ko-fi! ☕️
Ahhh....varnishing. I'll be frank with you, I reaaaaaaaally dislike putting varnish on clay, (or glazing, as what I sometimes call it but people get confused by it sometimes hahaha).
The thing is, varnishes on polymer clay is actually UNNECESSARY. Polymer clay after baking is actually pretty water resistant, and varnishes doesn't bond your clay pieces together stronger. If the clay isn't baked properly, or doesn't have any skeleton, a thin later of varnish would NOT keep it together (there are exceptions which I will go on a little later).
These are the reason why you would want to glaze your polymer clay creations:
1. Since polymer clay turns matte after you bake it, if you want it to be glossy and shiny, you need to put a layer of gloss varnish to get that effect.
2. If you used other mediums on the clay like acrylic paint or soft pastels, as those might be scratched off easily.
3. Protection against UV light for some of the varnishes (to be honest...I think it's unnecessary too but many people seems to like that idea)

Here are some of the finish I have for polymer clay, and I'm glad to say that after TONS of test and trial, I finally got an idea of how to glaze my polymer clay creation and I'm glad to be sharing this with you so you can save yourself some time 😊
Other than the different type of finishes, there's also a couple of ways to actually put the finish on your creation. I'll mention them as I go down the type of glaze, since I use different methods for different finishes! Hope you won't be confused by it haha.
FAVOURITE MATTE FINISH
UPDATE: 15 DEC 2022
WE HAVE A NEW FAVOURITE MATTE FINISH!!
Scroll down to UV Resin to read more 😀

The ONLY matte finish I go to is this Golden Polymer Varnish with UVLS! In the beginning, I couldn't find any local art stores in Singapore that sells this finish, and I could only order it online. Eventually, I realised that I couldn't ship it because it was considered flammable... But one day I found a local art store call Straits Art and Co which brings in the brand Golden (which also makes acrylic and oil paints), and I found these varnishes too! 😍
(Btw i showed you the Satin varnish just to let you know it comes in different sizes. But I NEVER use the satin finish 😅 It's just weird and uneven. Maybe I don't know how to use it but yeah I just don't. If I want a satin texture I would just mix matte and gloss varnish I think but I never really had to do that for now)
I love matte finishes, even for other things. I just don't like it when it's glossy when it's not suppose to be. Many crafters seems to like to glaze every single charm with gloss varnish, and I guess I can see why because it makes the product feels more "finish" and completed. But I really don't like to do that! Personal preference I suppose.
For me anything that has a lot of water content SHOULD be glossy (like eyes, the ocean, water), and things that has lesser water content like skin, should just use translucent clay, or liquid clay for that effect. Everything else should be matte!!
That's why I tried my best to find the best varnish that looks exactly like how baked polymer clay looks like!
But ohhhhh mannnnn this varnish gave me so much issues! 😭

One of the method of putting glaze on your creation is to brush it on with a brush. But if I try to use it, it would leave STROKES (example further down) especially if the glaze was thick. Even if it was thin, as long as I try to put thin layers (which is always recommended), the brushes strokes will always be there no matter how soft the brush is.
I'm glad to say I found a method on how to rectify that issue! But before that....here's my
FAVOURITE GLOSS VARNISH

Photo taken from Google.com
Varathane, a brand name of a type of polyurethane varnish is definitely my top gloss varnish to go to! It's actually a type of varnish that's used for wood, furnitures etc.
Sometimes it's also called Diamond Flecto as the previous company was called Flecto! (This information was so crucial because I was trying so hard to find how to buy this online haha)
Now again, Singapore doesn't sell this brand of finish and trust me, I've been to almost all the hardware stores I see. So the only method was to buy it online. Again, this is sometimes considered flammable and the shipping costs is quite crazy, but I do like to have to best for my creations 🙃 I bought it from polymerclayexpress.com, and basically they repackaged it sell smaller quantity. The name for this is called Flecto Varathane! (See what I mean by confusing names hahaha)
TINY BOTTLES FOR CONVENIENT GLAZING

When I got @aiclay's Pocket Kitchen, there was a bottle of FIMO gloss varnish included in the kit! FIMO gloss varnish is actually not too bad to be honest! But you NEED to be careful not to put too much glaze in a go otherwise it might built up and leave white residue (more about this later)
It was because of this I realised HOW CONVENIENT it was to be able to access my finishes without using normal paint brushes, and don't have to go through the trouble of cleaning the brushes! Seriously, I reach out to these oh so often! 😍 The brush in this is kinda like nail polish brushes. Maybe that's the perfect brush for brushing on varnishes hmmm.
(BTW DO NOT USE NAIL POLISH AS A VARNISH! It might look good and all but nail polish reacts to the polymer clay, making it sticky and eventually your creation will be ruined in the long run so DON'T DO IT!)
The bottle on the left is actually filled with Diamond Flecto because I had already use up the FIMO gloss varnish. I preferred Diamond Flecto so I refilled it instead (left the packaging on so I know it's gloss finish haha). I actually bought another FIMO gloss varnish when I was done with the first one, and refilled it with my Golden Matte varnish! 😍
Now I have both matte and gloss varnish right at the tip of my hands, and I don't have to clean any brushes with water yaye!! A lazy crafter's dream is definitely to reduce the amount of effort to get the desired effect 😀
(Please ignore the incorrect label, it's actually Diamond Flecto and not FIMO gloss)
Here's how I would use the varnish - just unscrew the cap, and brush the varnish on! The varnish itself is actually a translucent white in colour, but it would dry clear!
HOWEVER. You DO NOT want to put a thick layer right in the beginning! If it's too thick, the varnish might take longer to dry properly, and in FIMO gloss' case, the built up of the varnish might leave white residue on your creation, especially if there are crevices! 😱 Yet at the same time, you want to create as little stroke as possible on the varnish, and you do that by brushing very very lightly, almost just dropping the glaze on and move on, only spreading the varnish when it's too thick.
Good thing about Diamond Flecto and FIMO gloss is that they are actually pretty watery, and they kind of level itself before it dries completely! 😊
Ahhhh, here's the tricky Golden Matte varnish!
If you see in the previous photo of the back of the varnish, it actually says to dilute the glaze to vanrish:water 4:1! But the raw form of the varnish is actually really really thick - think smashed jellies thick. I tried 4:1, 1:4 (by accident haha), and eventually, found that 2:1 is actually a PERFECT amount!
You want the consistency of the mixed varnish to be very much watery like this. And ALWAYS do a test piece before you put it on your creations! I find that when you forget to/the cover doesn't close tight enough, sometimes the water evaporates and the mixture becomes less watery and inconsistent again 😭
Always shake your bottle vigorously to make sure the mixture is mixed well too! Sometimes the varnish does sink.
Now here's how you want to apply the matte varnish mixture. PUT IT ON THICK. Do not spread the varnish too thin, keep adding varnish to the areas!
This is the only exception for any varnish. Since brushing on the glaze leaves strokes (which is oh so obvious on matte varnish especially), this method works well because I imagine the water just evaporates eventually and leaves a neat layer of matte glaze that looks exactly like how baked clay looks like!
Here's how both varnish looks like after they're dried 😊 NO BRUSH STROKES! 😍
The line at the end of the matte glaze happens sometimes, and that's why it's still very tricky to get a perfectly flat and even finish with matte. (I presume it's because I DID fiddle with it a bit more than I should at the edges)
Notice how the flat the end product looks like, with the water all evaporated 😊
The matte varnish does take a bit to get used to, but I assure you that you WILL get used to it and the results will be stunning ❤
(Using my old test piece's pedestal for this haha, ignore the broken head 😶)
Now here's what you don't want to do for other varnishes - putting on a thick layer in a shot on textured surfaces. ESPECIALLY FIMO GLOSS. Sometimes the white part pools and doesn't dry properly, and you actually get white spots in those indents!
You can't exactly fix those by the way...sometimes you just have to deal with it, or dig the part out with a sharp needle tool and eventually ruin the whole finish/take them out. If you can take it out without damaging the paint or pastel on the creation, then at least you can revarnish again, which isn't that bad. It really depends on situation.
Here's the preferred method: The brush on this fimo actually takes a lot of varnish. Which is very good for my matte varnish mixture, but not so much for FIMO or other varnishes. So what you want to do is wipe as much as you can on the side of the bottle, AND THEN dab the brush on a piece of tissue to let it absorb more of the varnish on the brush!
As you can see, there's still plenty of varnish on the brush to still glaze the creation with 😊 (Although I did take out a bit too much haha just to make a point)
When you're glazing the creation though, I'm actually going in more of a half dabbing and brushing motion, to reduce the chance of getting brush stoke marks on the glaze.
Here's how it looks like after it's dried. Fortunately, my Diamond Flecto dried COMPLETELY clear even with that thick layer of varnish! That's why I prefer this over FIMO gloss because trust me, that glaze does give you unexpected results.
Notice how the superrrrrr thin layer at the back is more like a satin texture - I really took too much glaze out haha but hey! Here's how you can get satin texture 😆
HOW TO DRY THE VARNISH ON YOUR CREATION

As many Singaporean knows, Singapore is a very very humid place and that's just not great for drying varnishes. It either takes AGES, or it doesn't dry properly and ends up being sticky ☹️
We actually invested in a small electric dry cabinet which basically lets you adjust the humidity inside the cabinet, and I dry my bigger and more important pieces in there. Sometimes I store my creations here too haha!
Dry cabinet is also good for storing cameras, so it's a 2-in-1 situation for us!
However if you don't have a dry cabinet (it can be quiteeeee costly, it was $100+ for this one if I'm not mistaken), what you can do is switch on your air conditioner 😊 All the test pieces here are dried in my room with my air-con switched on and they dried properly. 👍🏻
For my smaller pieces, I always make sure that they are left alone for at least an hour before I attempt to touch and see if there's any problem with them. It's always best to leave them at least overnight/24 hours to make sure the varnish is completely dried though! This is also another reason why you shouldn't varnish a lot in a go, as it'd take so much more longer and being an impatient crafter...that's really doesn't help haha.
THE DIPPING METHOD
Before I figured out how to brush on my matte glaze properly (it really took me ages to figure it out), I actually tried the dipping method! It's a method that a lot of ceramic clay artist uses to glaze their huge creations like vases etc, and it usually gives a good result because the glaze flows down evenly and there's no brush strokes whatsoever 😍
There are some of the things you need to get though. Since it needs to be hanged to dry, I found this plate/cup drying rack on Daiso that has grills and also is tall enough for most of my creations to hang on. Since I don't have a lot of space in my studio, this size was perfect for my table!
You can use paper clips for this, but I don't have any, and found that these huge binder clips I have actually was perfect!
It's stiff enough so the shape stays, huge enough for you to hold the "handle" and dip your creation without you getting too close to the varnish, and has enough length at the side to hang on the drying rack!
(Using one of my first few creations with polymer clay as an example for the dipping method 😶 It's quite ugly don't mind it 😂)
Dipping method is actually perfect for charms since you'd have the loop at the top, so you can loop the binder clip in! 😊
For figurines without any keychain loops, I actually just stick blutack at the end and dip them in. The blutack can help the creation to stand too! It is quite dangerous though because blutack sometimes does move a bit and you might accidentally touch your glaze on the creation, but it's the best method I've found so far for creations without any keychain loop.
You'll also want to get a jar with a huge opening to store your varnishes in! I got these jars in Daiso too, and to be honest, the air tight seal isn't very air tight because I always feel that the thickness of the varnish does get thicker, so I'd add a little bit of water before I start.
Again, you WILL get used to how to use this varnish eventually, and you'll be able to gauge the amount of water needed for your matte varnish mixture! 😊
Here's how I dip the creation in! Easy peasy for charms as I mentioned 😊
Hanging it is also very simple. If you want the binder clip to stay better though, you can either bend the metal a bit more, or use blutack!
Here's something you need to be careful about though. The dipping method WILL have excess varnish pooling at the bottom! Think about the excess glaze slowly dripping down so you leave a nice, even and thin layer of glaze. You don't want to leave the pool of varnish there because it might dry up there and cause a very ugly pool of wrinkled glaze at the bottom.
Just use a piece of tissue, or even a dry brush to absorb the extra varnish, and watch the charm carefully during this period because it might happen a few more times afterwards! DO NOT touch the creation at all, do your best to avoid doing so as it might ruin the glaze. Just think of touching the excess glaze and go! 😊
Leave the glaze to dry for AT LEAST 3 hours before you attempt to check it!! This method does take longer to dry compared to glazing thin layers with brushes.
It IS little bit more work compared to just brushing it and leaving it, but you do get a beautiful piece of product at the end! 😊
For the matte varnish as usual, it's a little bit trickier. It's a bit hard to see but at the bottom, there's actually some shiny spots which occurs quite frequently for this varnish. The top of the charm is perfect though! 😍
So if this sort of thing happens, I'd either dip it again or just use my brush to fix that area. I would glaze the whole area and not just that spot though, because that would just cause more problem (remember how the edges sometimes leaves shiny spots?)
And these two are done with the matte finish, with no shiny spots, and looks exactly like baked clay 😍
(These were totally unnecessary to be glazed at all since they were all made with polymer clay haha. But if they were painted on, this would have been needed!)

When you're drying the pieces though, do be careful of crevices like this. When the varnish pools up, especially for the mixed matte varnish which evaporates the water quite a bit, it might leave you holes like this when they're dried 😭
Use a tissue to dab it away, or make sure you're drying them in a direction that doesn't collect the glazes. You can avoid this by making sure the glaze isn't thick so they flow downwards better! You can't exactly fix the holes, cause you really might just do more harm than good...so...best is to avoid them as much as possible!
MAKING VARNISH SHINE MORE
One day, I need to add some clay pieces on a varnished piece of creation (with matte varnish). After it came out of the oven, I noticed that the glaze had turned shiny! It was almost like it was satin, which was nice but wasn't what I intended 😟 I ended up re-varnishing the whole piece haha.
So through this mistake, I realised that baking your varnished creation will help to make the varnish shine better. I don't know why, but it does ahahaha.
Even 5 min in the oven would be enough, the varnish is flammable remember! So be careful. (Although I did baked it for like 1 hour and nothing happened BUT OK NOT RECOMMENDED HAHAHA)
(The one on the right wasn't varnished properly as I had accidentally touched it, that's why you see some uneven spots. The results would be the same throughout the whole varnish!)
I baked my gloss varnish to see if there'd be any difference, but I don't think there was much ahaha.
HOWEVER, if you varnished a layer that was too thin like I did on the pedestal, and you wanted gloss but not satin, pop it in the oven and you'll see the varnish becoming as glossy! 😊
PADICO VARNISHES
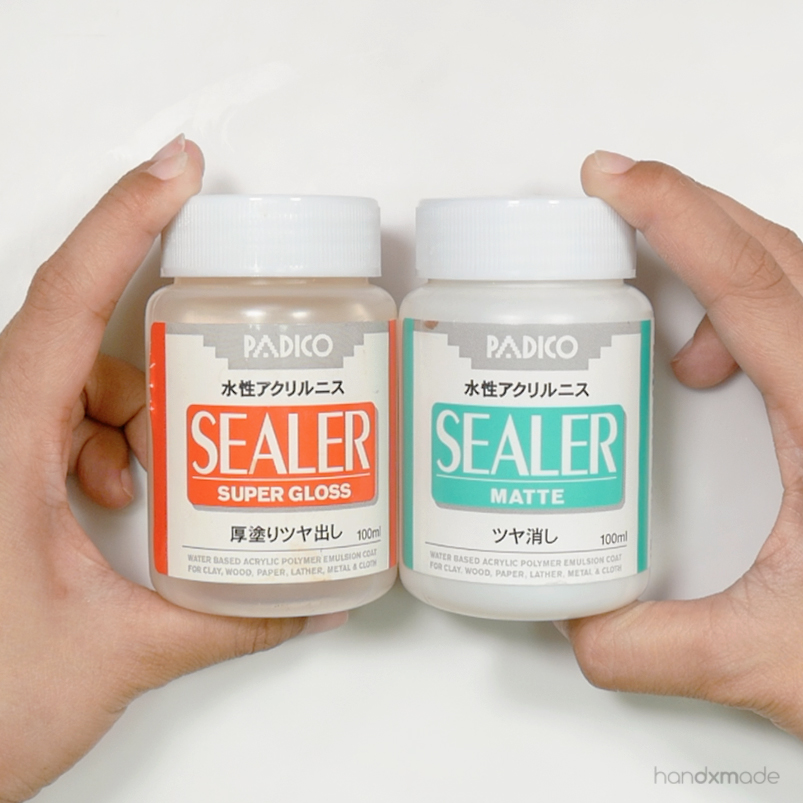
Padico actually have a lot of varnishes so I wanted to try them. These are the only two I bought (super gloss and matte)and honestly I never use them unfortunately. I bought them because they're water based and I think only water based varnishes works well with polymer clay. I do want to try their other varnishes though!
For varnishes like these, I use a soft, flat brush to brush the varnish on. I don't really like them because they're kind of thick and sticky, which means the varnish doesn't level by themselves before they dry!
Even the matte varnish, despite the colour, is also the same texture. They are not meant to be diluted with water, so I can't do anything with them.
Maybe I should try the dipping method with these hmmmm.
And here's the results... Honestly, the super gloss is reaaaaally very glossy, and it does leave a ceramic-like texture in the sense that the varnish leaves a pretty thick layer! If the dipping method works, I can see it giving a really neat ceramic-like texture!
The matte varnish however.....looks like satin. I can't remember if I mixed the bottle properly - sometimes I forget to, and matte varnish is very sensitive to this sort of inconsistency because the particles sinks. I had this problem with Golden Matte Varnish in the past too.
This is also what I mean by brush strokes! 😭 Honestly I reaaaaaally hate it haha. I'm not sure if it's the brush I use or what either... 😔 Should I try with the FIMO brush? Hahaa. Maybe that's the solution!
Honestly I haven't been testing much with them because I've already found my favourites, and I stopped using these because they didn't work the first time and it's a lot more goopy than what I'm used to hahahah. I totally should experiment with them more. Will update if I do!
Here's a comparison of Padico matte and Golden Matte! Such a huge difference hahaa.
If you're using a brush to put your glaze on, remember to clean it! There's these "soap" for paint brushes that actually has conditioning ingredients inside so it keeps your brushes soft while cleaning it! Oh this is sooooo helpful and actually saved a lot of my brushes (which isn't cheap hahaha)
There's a couple of brands but the one I'm using and many painter's favourite is The Masters Brush Cleaner and Preserver. One tub can last you a longggggg time. I've had this for more than a year, and I've probably used only 5% of it??
You don't have to wash the "soap" off completely btw, you can use it to keep your brushes in shape by shaping it with your fingers and leave it, when dried it's actually hard! That's how new paint brushes feels like, and it'd be gone once you put the brush in water. In fact, do not buy new brushes that doesn't have hard bristles because that means it's been tampered with.
FIMO LIQUID CLAY AS VARNISH
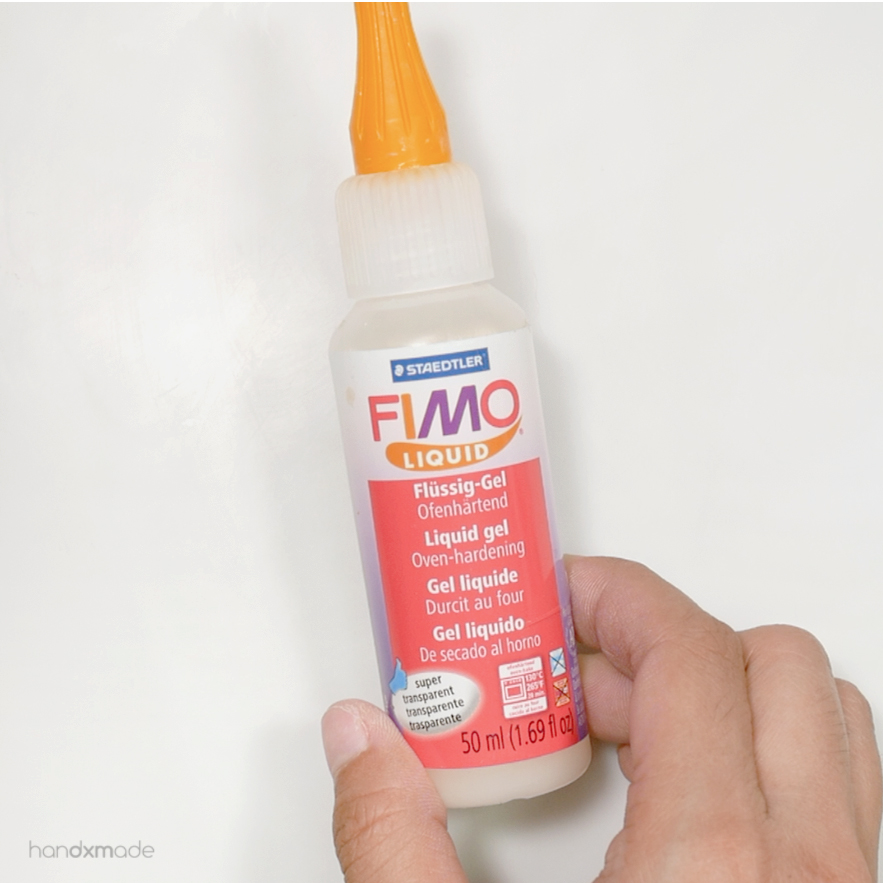
I've talked about Liquid Clay, and how I use it as a glue, and many other things. One of the popular usage of liquid clay is also to use it as a varnish!
If you do want to use liquid clay, I advice using only FIMO liquid as it's one of the clearest liquid clay on the market.
I use my colour shaper instead of a paint brush for this though because it's just so sticky and it doesn't exactly dry up until you put it in the oven..save myself the trouble haha.
Liquid clay really isn't the smoothest to apply with though.
Here's how it looks like after baking! It does level by itself but not in a way that improves the end product. I've actually put a bit more at the top which does makes it a lot better and smoother. So this only works if you don't mind the thickness of the glaze, and it works better on a spot instead of a whole area.
Liquid clay actually becomes matte after baking, just like polymer clay, but I guess I put it in the oven for too long and it's more semi-gloss than matte 😶
One of the pros of using FIMO liquid clay as a varnish would be the fact that you won't really need to be scared that it won't be dried completely, since the oven helps you to ensure that!
Also, because liquid clay is essentially clay, it MIGHT help to reinforce your creations a little bit more.
But I won't really use liquid clay as a varnish though hahaa. It's not completely transparent, and gives your creation a bit of a foggy feeling to it.
UV RESIN AS A VARNISH

This is something that quite a lot of crafters do too, but they'd usually use normal resin which takes 24 hours to dry completely 😱 I prefer UV resin because I KNOW it would be dried when you put it through UV light hahahah.
I bought these UV resin from Padico, one of the problems with UV resin or resin in general is that they turn yellow. But these resin are quite expensive and high quality, so I haven't been experiencing that.
The little purple tube on the far right is actually a gift from @msparkpark, and she actually found it in Daiso! I'm not too sure about yellowing because I never used it, but @msparkpark uses it to glaze her charms and she says it's much watery than other resin so she likes it. So I'm putting it to the test too!
They are a little bit like liquid clay, goopy and thick, and it doesn't dry up so it WILL have a certain thickness.
I don't recommend using gummy resin because they tend to get dirty easily, but I wanted to see if the texture is different to apply. Nope, the same hahaha.
The Daiso UV resin actually doesn't feel that much different to be honest hmmmm. Maybe I'm using it wrong 😶 @msparkpark did mention that she use a paint brush to apply the resin though! I'm not going to put my brushes through that abuse I'm sorry 🙃
I got this UV resin light from carousell.com, and it's for curing gel nail polish! It works well for UV resin so yeah hurhur.
I usually will put a cloth over the light just to cover it, since it's UV light and all and not particularly...healthy haha.
Here's hwo they look like after curing!
I actually put a bit more at the top to show you how it works better with thicker amounts compared to thin strokes as it pools together! The Daiso one actually DID level by itself, but not enough. Maybe putting more would be helpful!
Just wanted to show you the difference between the hard and gummy one haha. After a bit of pinching of the gummy resin, it actually turned matte-ish, which means it probably absorb some of the oils in my fingers and as a result making the resin a bit blurry. So if you want to use UV resin as a varnish, just use the hard one!
UV resin is also kind of like glue, so it also might reinforce your pieces if they're weak! (But again, don't count on it to fix your creations although it's a possibility haha)
(Using a test face figurine piece as an example haha ignore the bad eyebrows haha)
Now this is the only place where I use UV resin as a varnish - making figurine's eyes! Like I said, human eyes does look glossy because of the water content inside. So UV resin is perfect as it gives a slight dome and at the same time levels itself if there's a lot of it.
But be careful not to put too much as it might overflow and that's not a good sight 😶
Here's how it looks like after curing! Noice how the eyes actually is a little bit concave, and the UV resin actually fills it up 😊 The glossy eyes makes the figurine looks just a little bit more alive and brings the attention to it imo, compared to just varnishing the whole figurine! But again, personal preference 😊
UPDATE: 15 DEC 2022
NEW FAVOURITE MATTE FINISH HERE!!
I know I warned y’all against using nail polish top coat as a varnish, as it reacts badly to baked polymer clay. (Turns sticky eventually, etc)
HOWEVER, I had an epiphany of sorts, and realised that UV gel nail polish are essentially..NOT the normal kind of nail polish. Its’ component is different and we CAN use UV resins on polymer clay, why not UV nail polishes? 🤔 Especially since UV gel top coats are always consistently even!
So……let me introduce you to my newfound matte finish — a matte UV top coat!
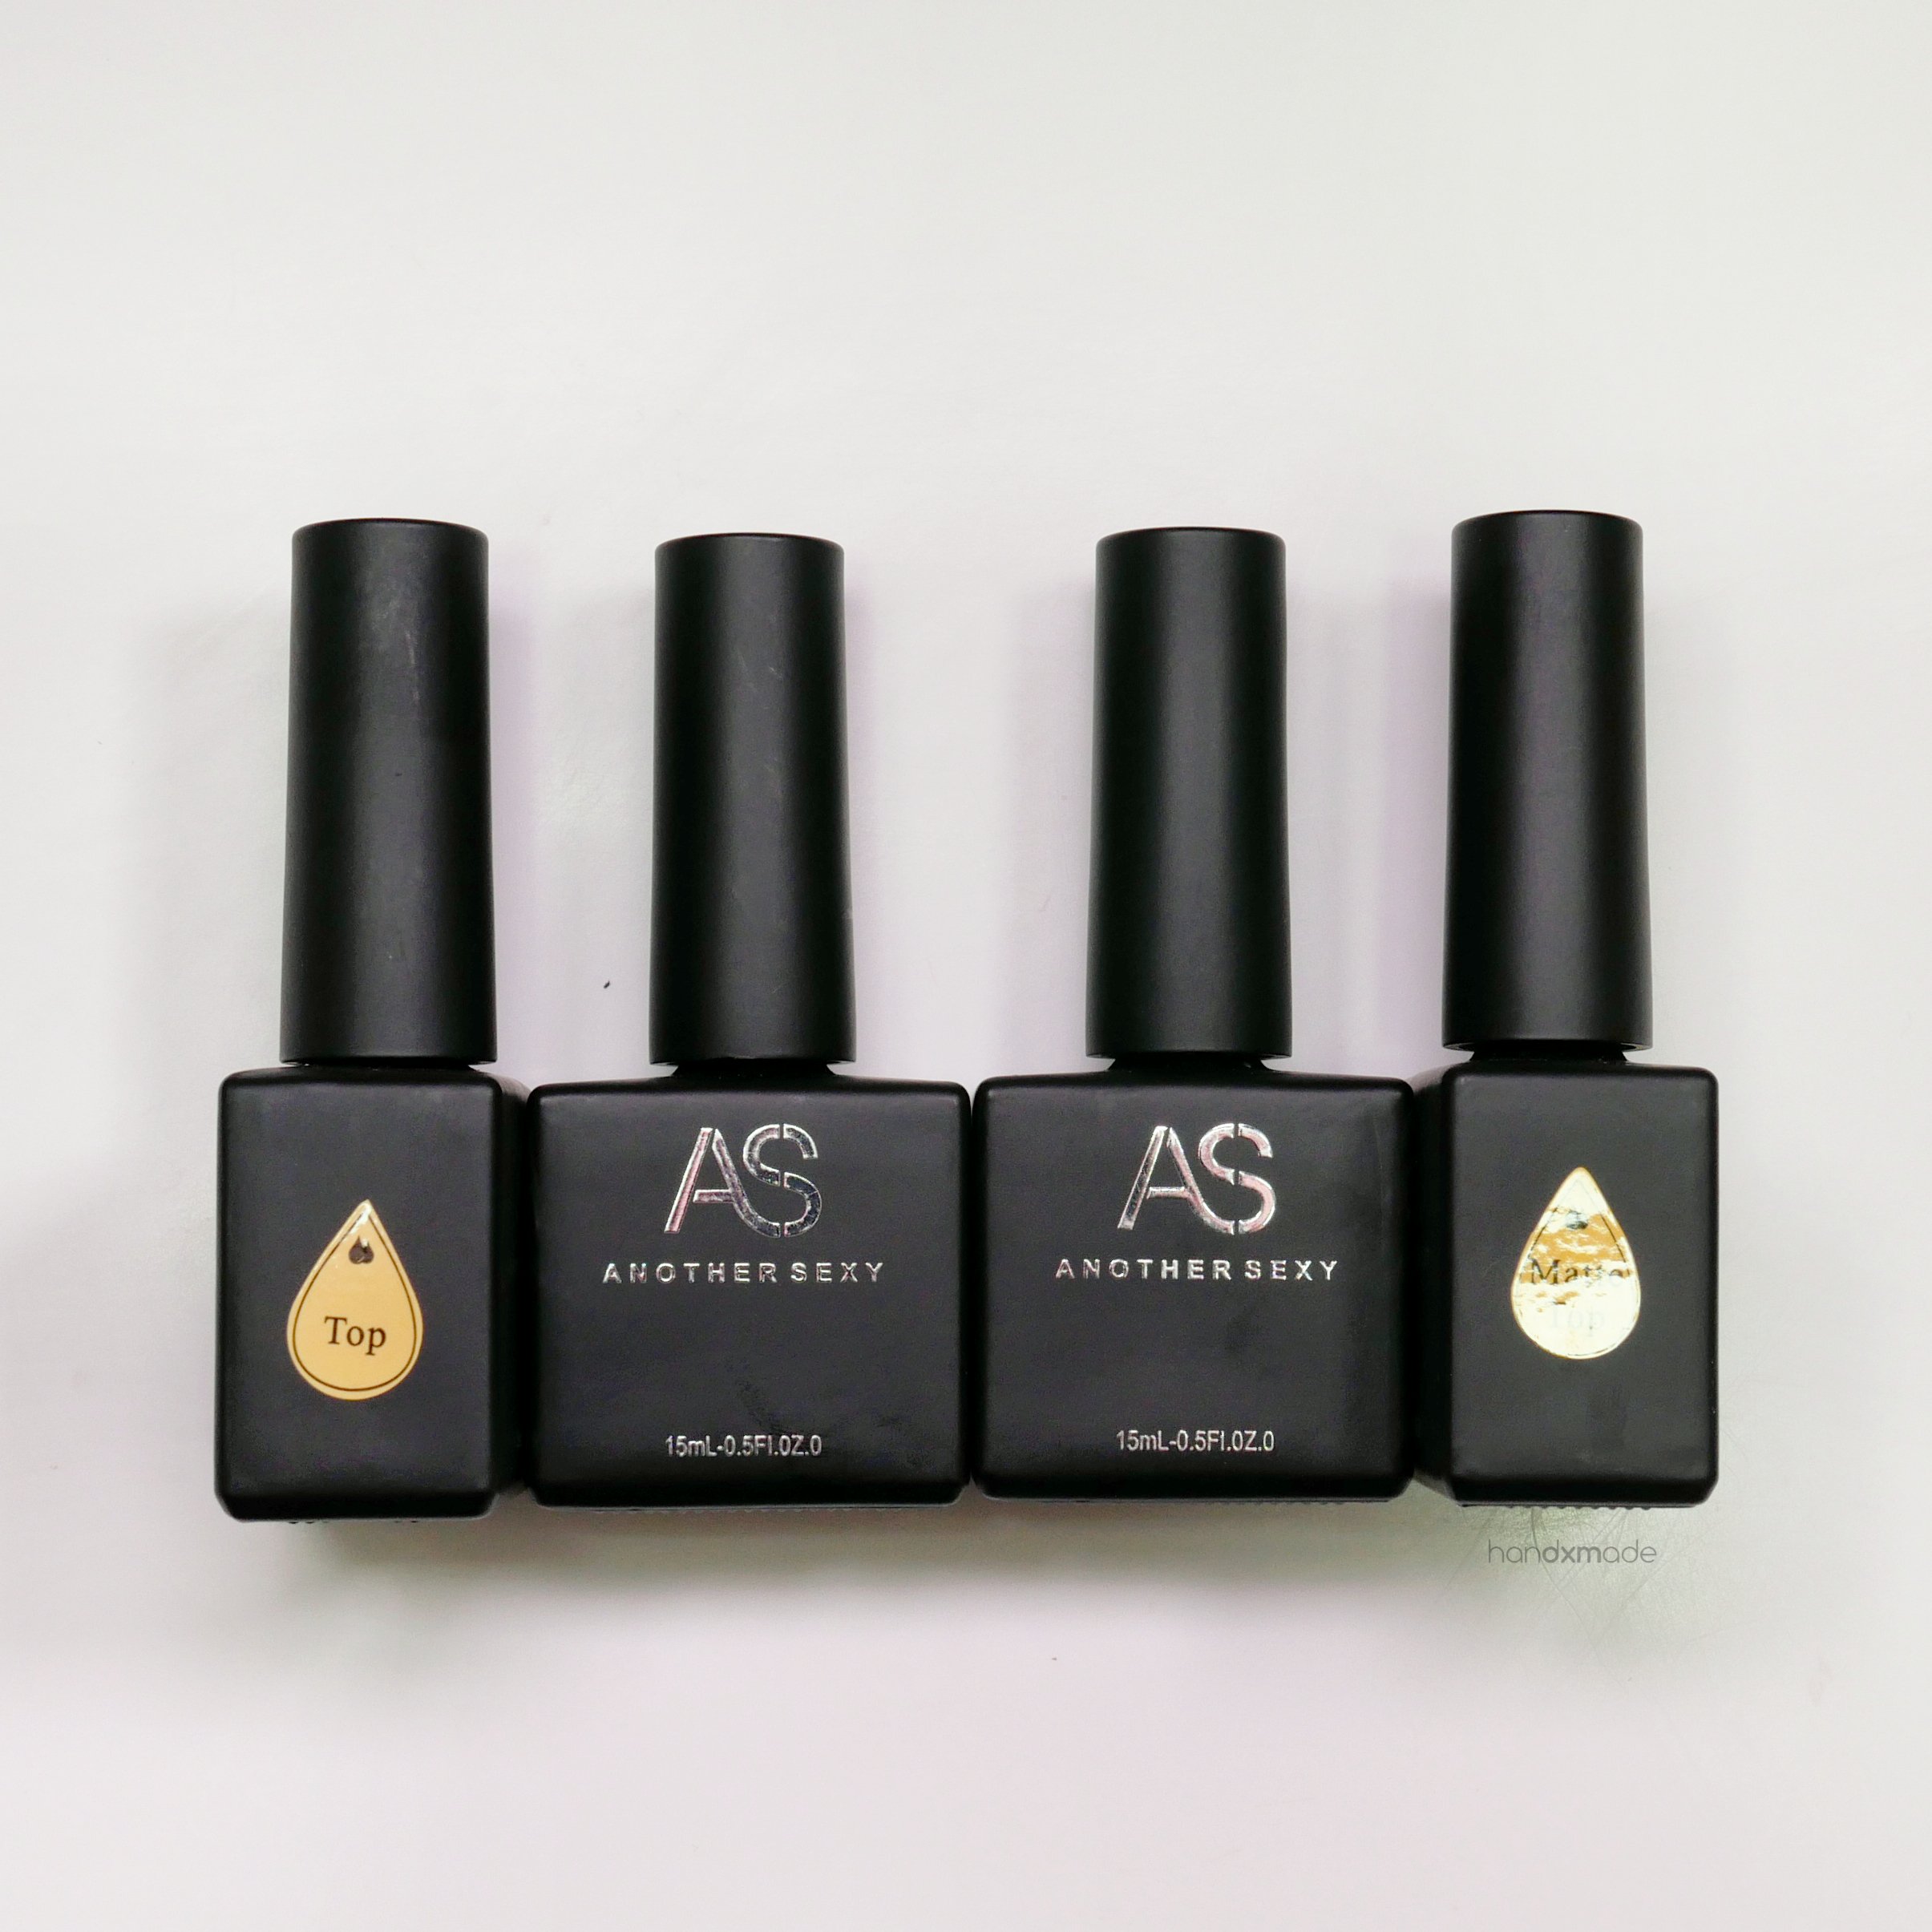
This is the Matte UV Top Coat I’ve been using for my keycaps! Here’s a shopee link to this specific product if you’re located in Singapore.
I actually didn’t specifically look for any particular brand, in fact, this is probably not a known brand 🤣
I just got my hands on whatever that popped up first. So if you want to try other brands, feel free to do so!
Now, why gel nail polish top coats instead of actual UV resins? For one, they dry SUPER FAST with any of the manicure lights! I was also having trouble “drying up” some of the UV resins with the lights that I have (they felt a bit sticky and made me feel a little bit insecure), but I presume because of the nature of gel nail polishes needing to be smooth, even, and dries up fast, the formula just works?
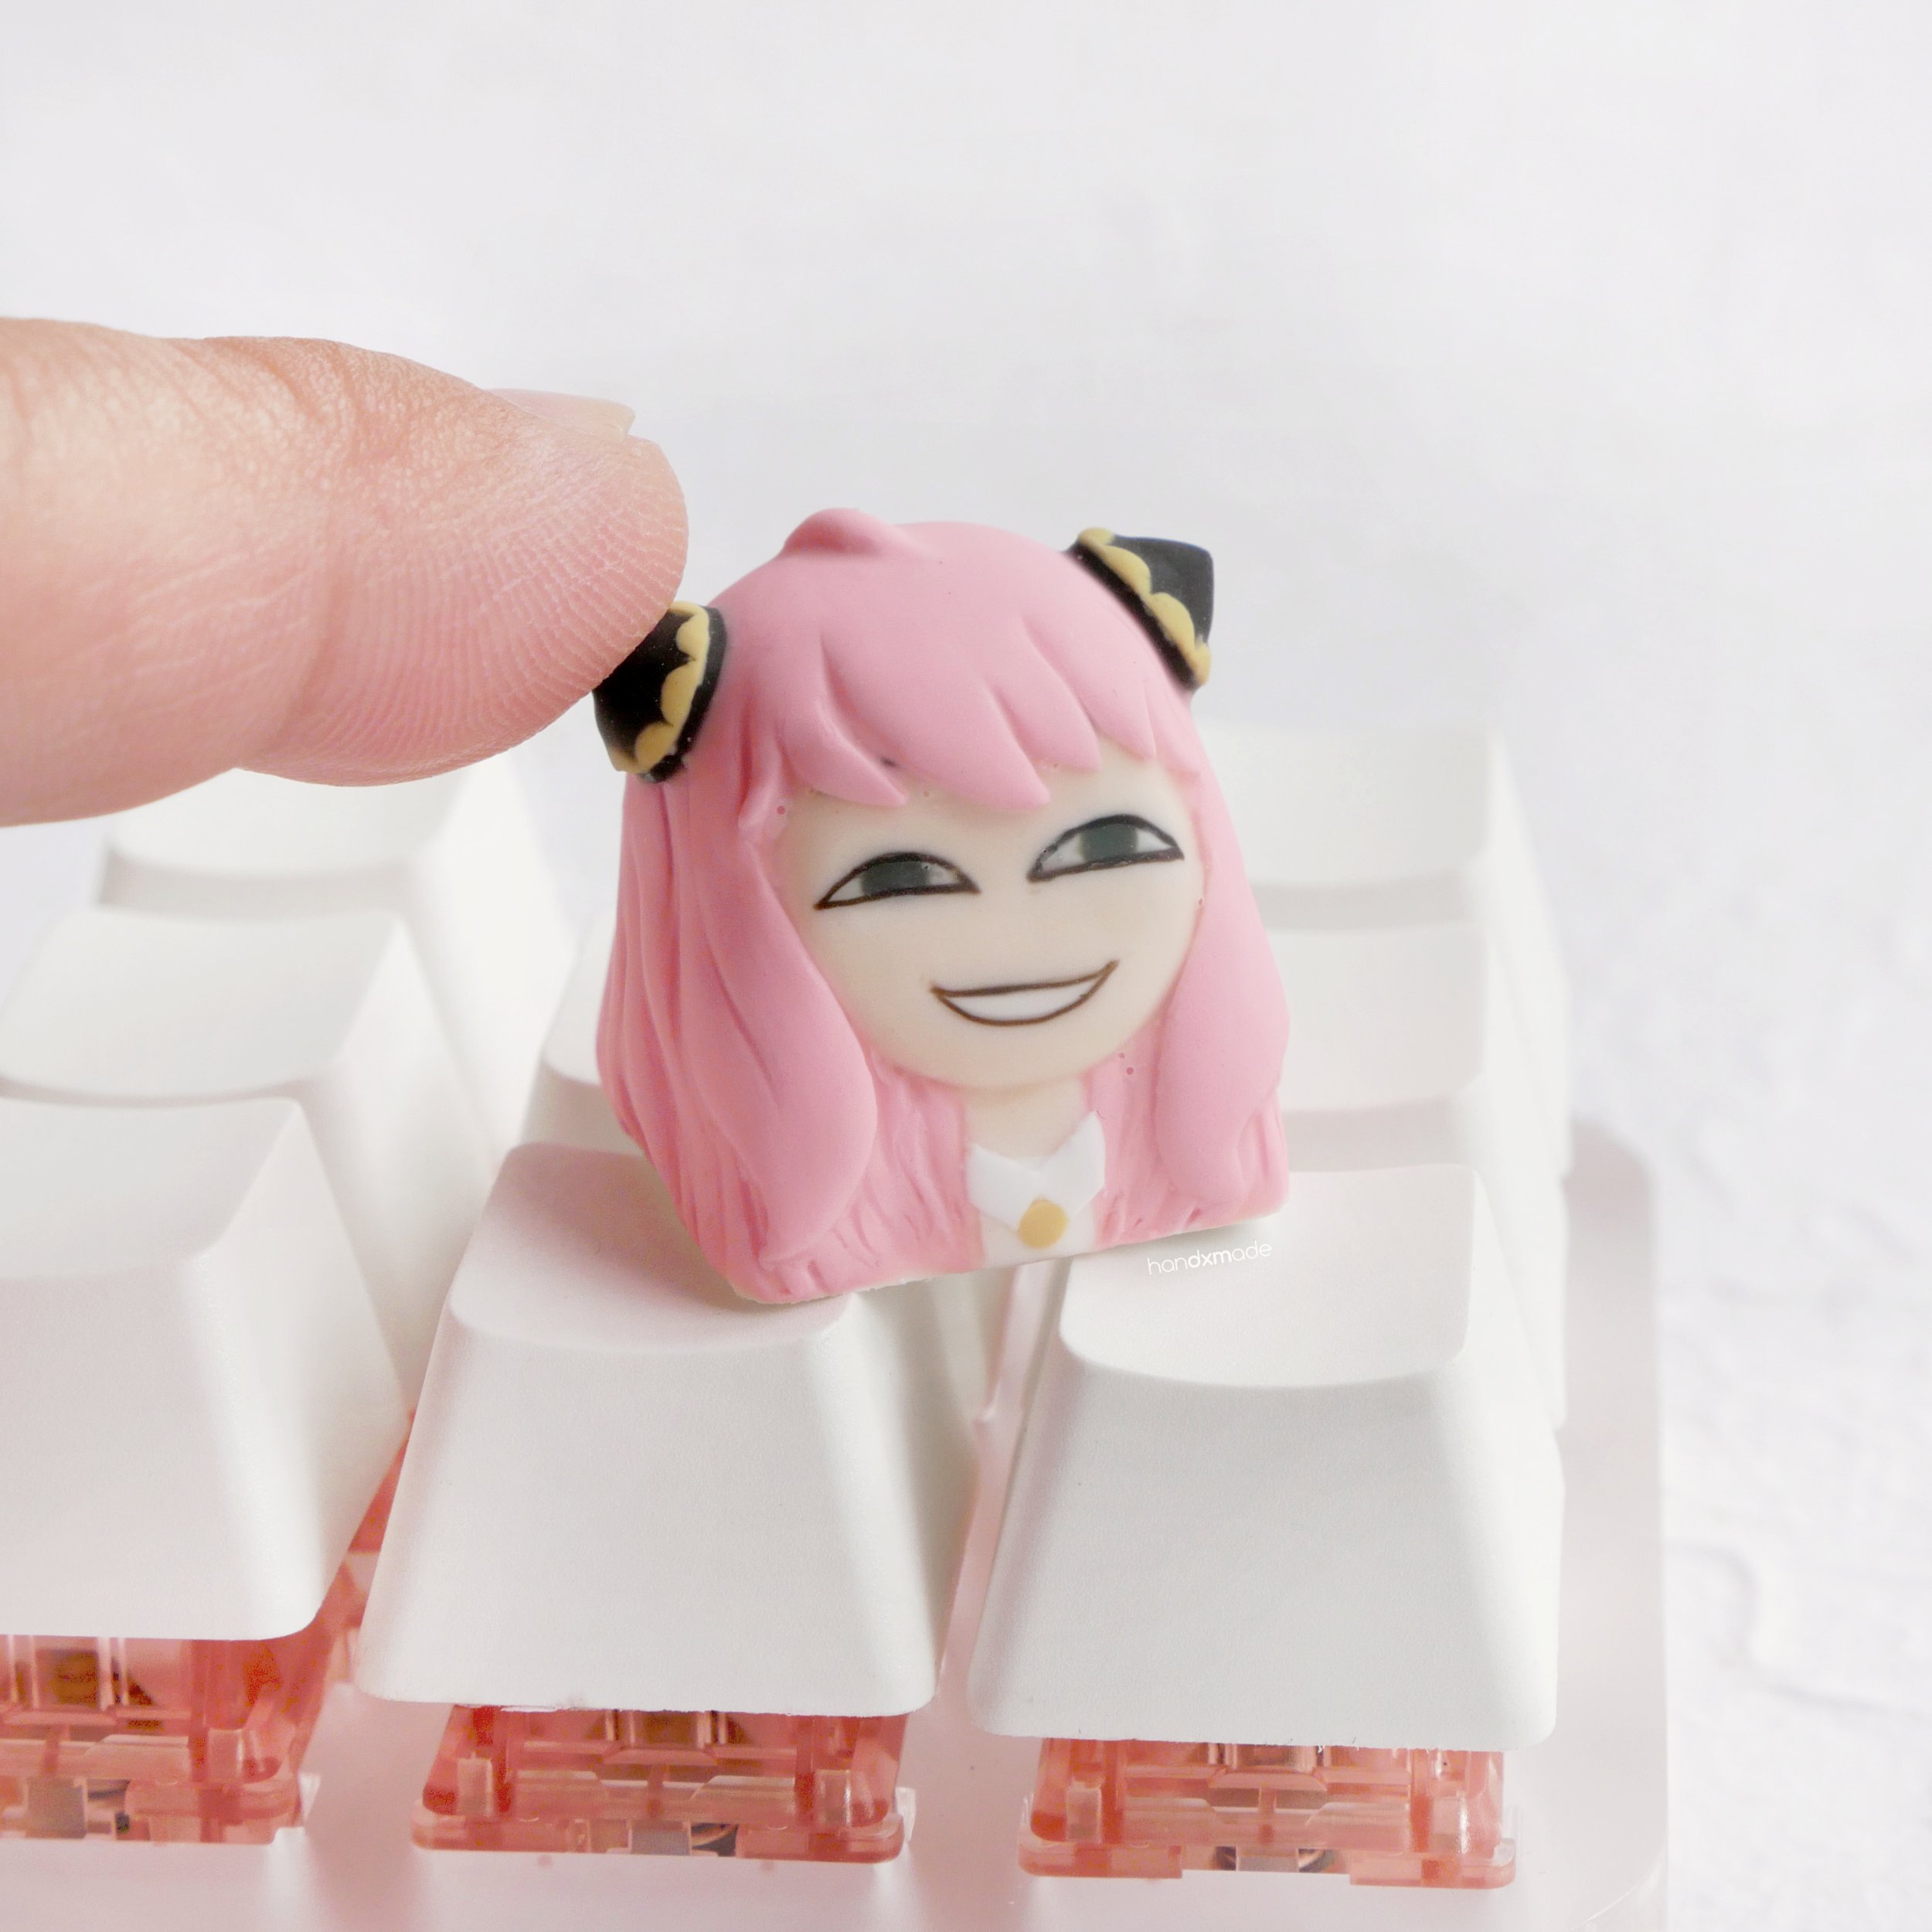
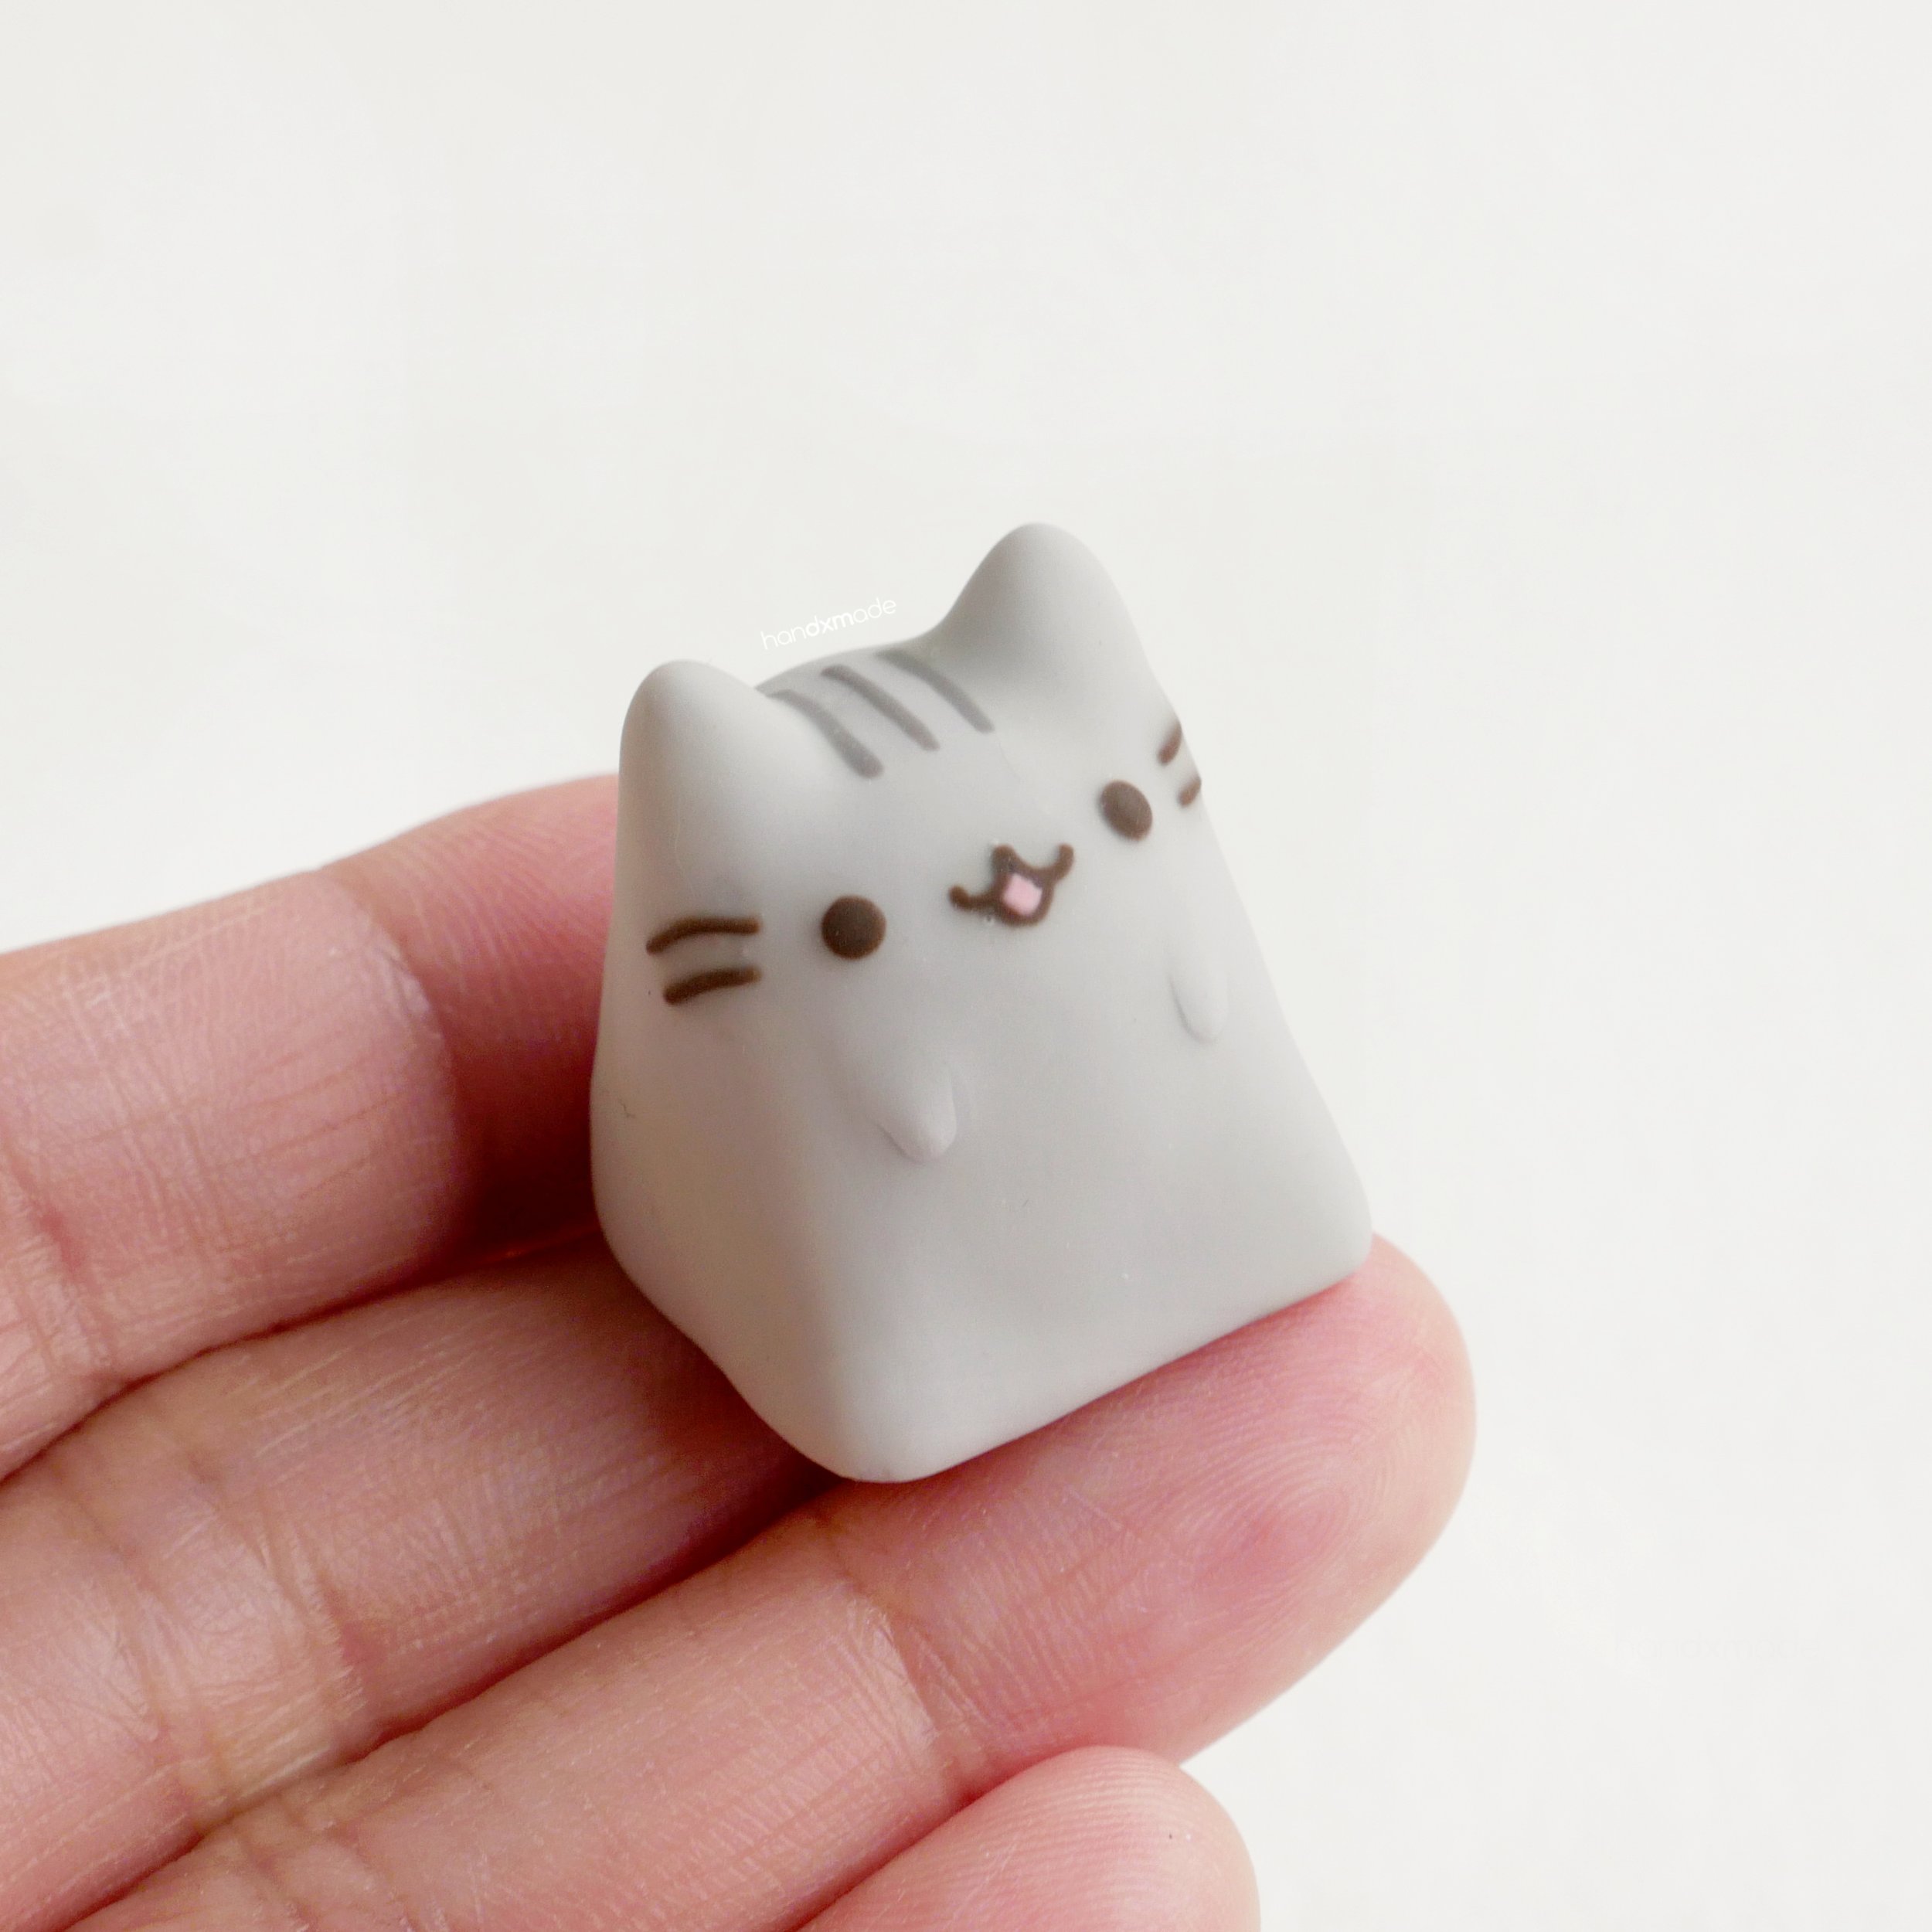
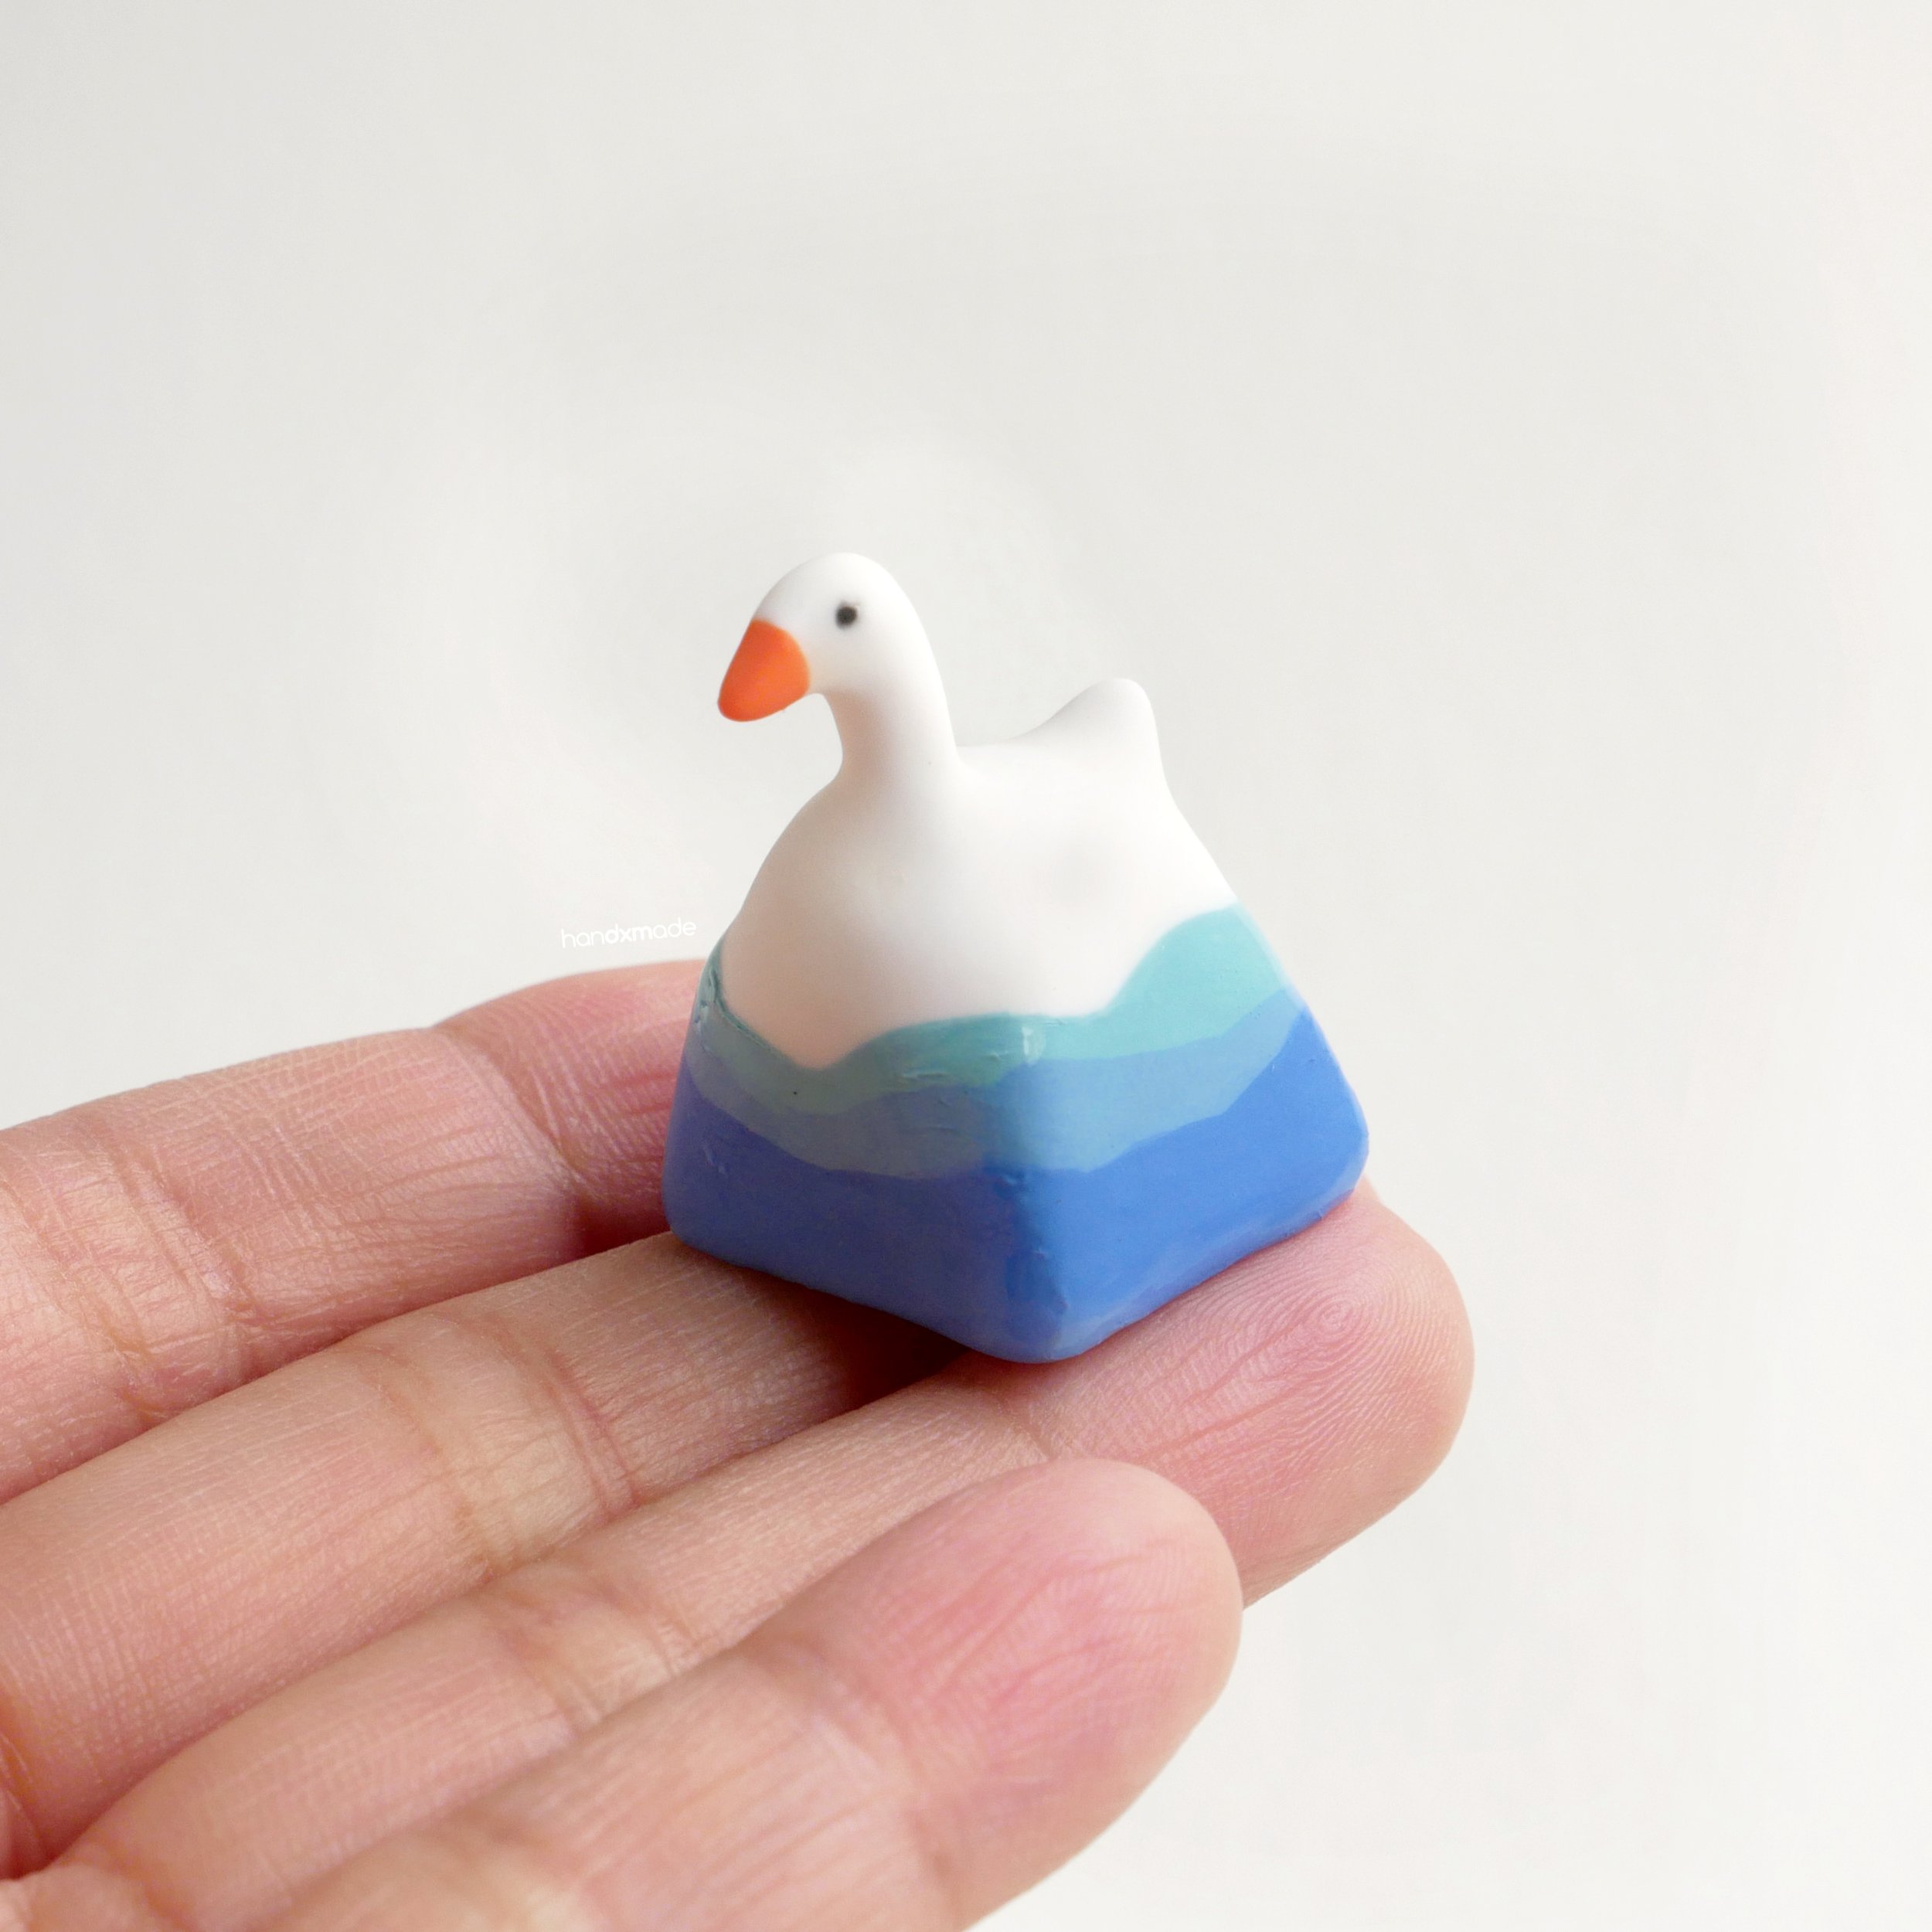
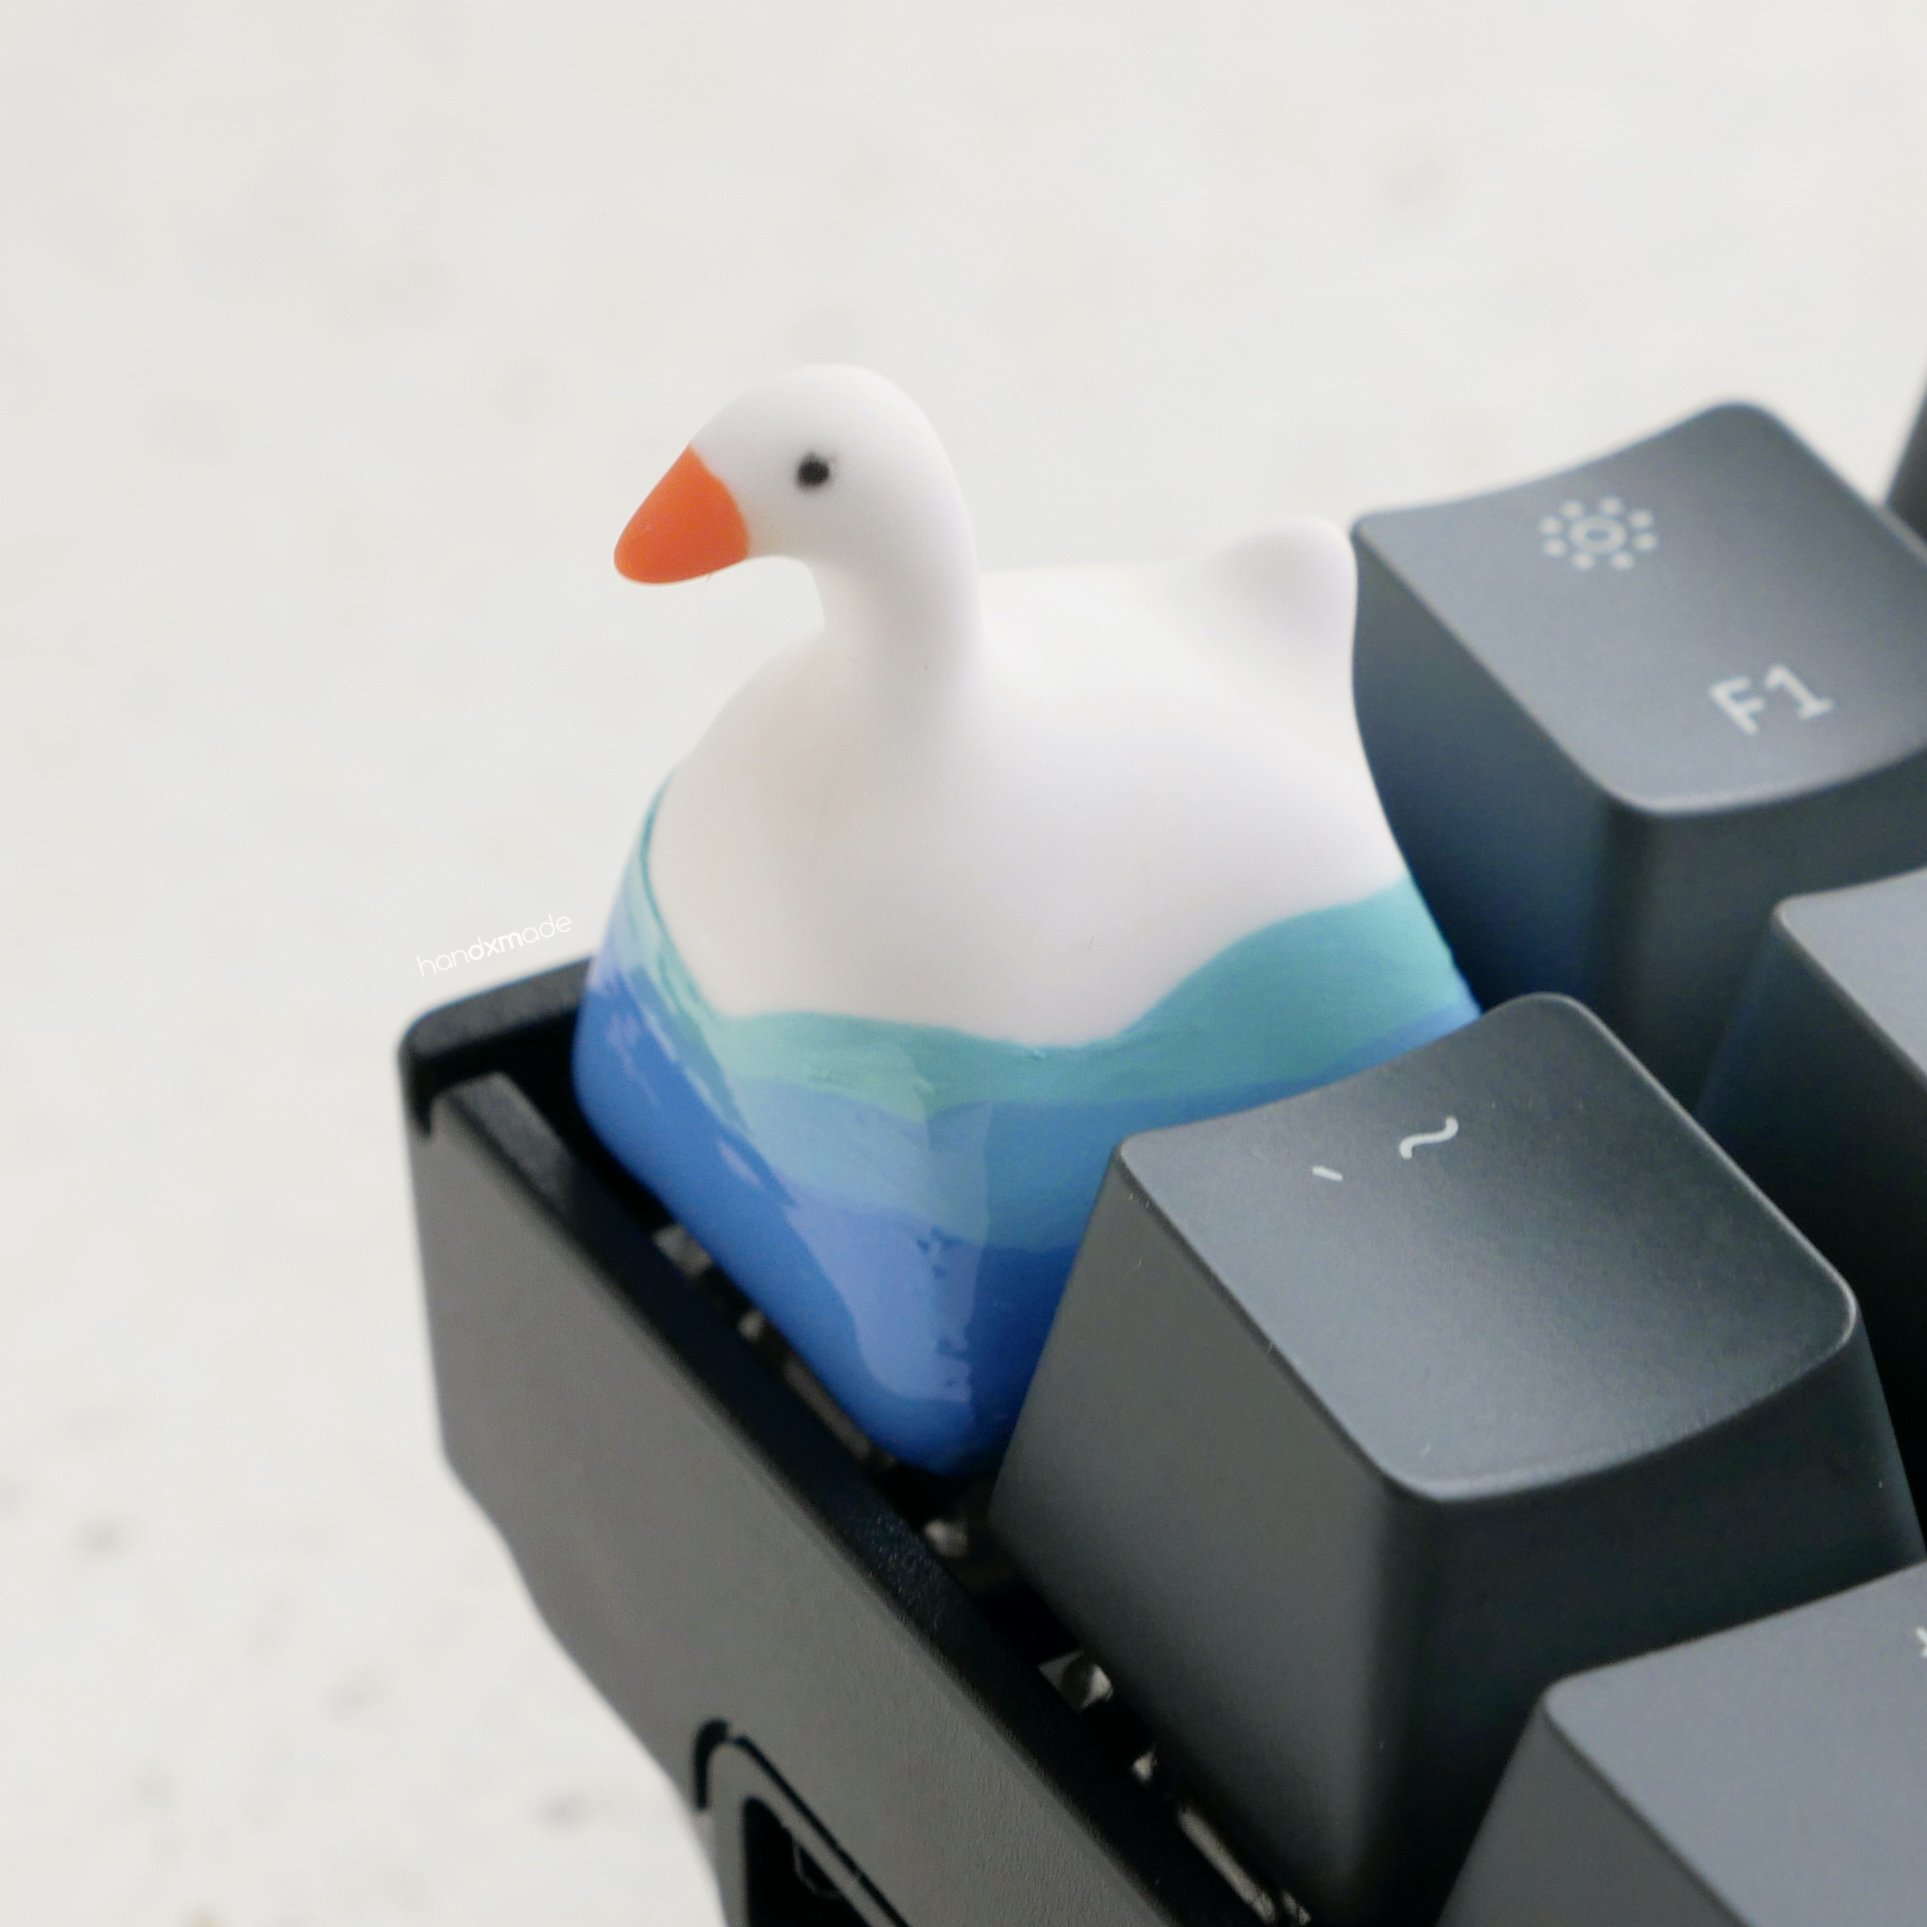
A little preview of how they look like on the keycaps! I used the matte UV gel nail polish on the Anya and Pusheen keycaps, and then the gloss UV gel nail polish on the Goose keycap (the water part only)
I do think the end results made everything look a bit more…cloudy? But I actually really like the soft look 😍
As usual, here’s some of the tests I did for this! They are on baked polymer clay, and then put under the UV light for about 2 minutes.
I realise that a slightly thicker coat yields better results. For the first test, I made it suuuuper thin on the test piece on the left, and you can see a few streaks. It doesn’t look as bad as some other matte varnishes, so it’s quite nice to know that this is the “worse” it can get with this matte UV gel nail polish.
For the second test, you can definitely see how the matte finish looks different from the baked clay’s natural matte finish! There’s really no sheen and it’s a flat matte 🤩
Thickness test for matte UV nail polish gel! ✨
Left: Thinnnnnn strokes
Middle: Thick pool
Right: Uneven - thin at the top, thick at the bottom
I let them even out a little bit before putting them under the UV light for about 2 minutes.
And here’s what they look like after “drying”! 😀
The one in the middle (thick pool) fared much better. It’s much more even. But of course, sometimes you’re not able to slap on such a thick layer of varnish, which is why thankfully the other two didn’t fare so badly as well haha.
One of the things I love about baked polymer clay is the fact that you can clean any dirt on it off with acetone. If it was any normal varnish, acetone would clean it off as well.
So it was a pleasant surprise to find that I could use acetone on the matte uv gel nail polish to clean the surface too! 😱🤩🎉
I used pencil, ballpoint pen, and a permanent marker for this test!
The varnish was still intact, even though I rubbed quite a bit to get the inks off. I wouldn’t recommend doing this a lot though, but it’s nice to know that if there is dirt on your finished clay piece you can clean it off without worrying about touching the paint/clay. Just an occasional clean up — y’know?
Here’s the same test, but with glossy UV nail polish gel! ✨
Really amazed that the gloss still stayed glossy, instead of turning matte? (Friction from the acetone may end up “sanding” the gloss finish)
Something else I realised about this particular UV gel nail polish (NOTE: unsure if it’s the same along all gel nail polish) is that:
The thicker it is, the yellower it becomes after going through the UV light. (Especially for the matte version)
Even if it’s thick, it levels out really well and gets reaaaaally thin after going through the UV light and drying!
The glossy UV gel nail polish top coat doesn’t level out as well as the matte one.
Ahhh this was such a long post, but I hope it answers your questions about varnishes and how to I try to get a perfect matte finish!! ❤